Mackie 402-VLZ4 Owners Manual - Page 16
Stereo Line Ins (Ch. 3-4), 15. Tape Assign to Main, 16. Tape Level, 17. Tape In, 18. Tape Out - review
 |
View all Mackie 402-VLZ4 manuals
Add to My Manuals
Save this manual to your list of manuals |
Page 16 highlights
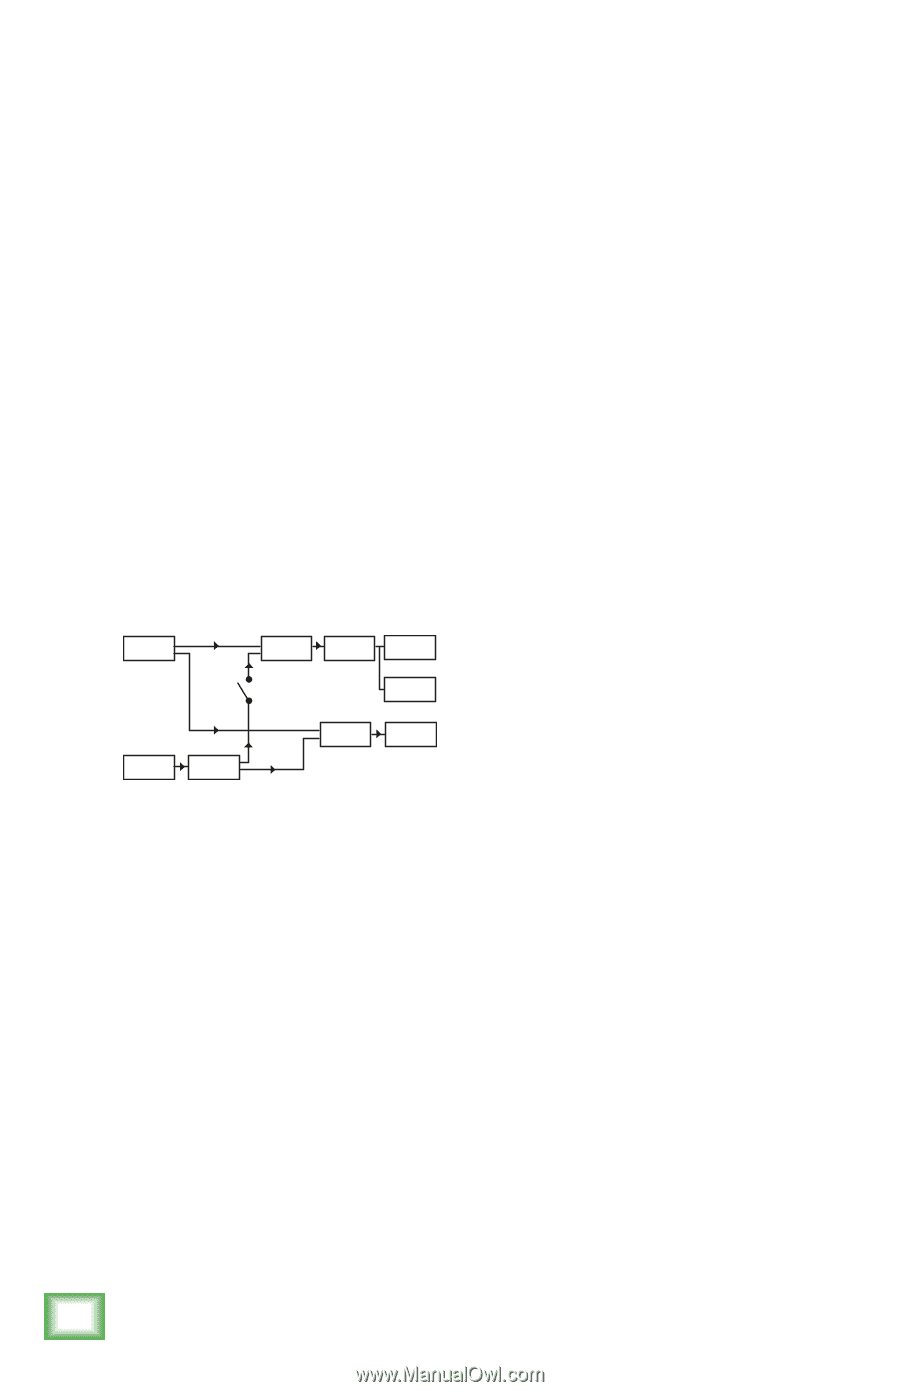
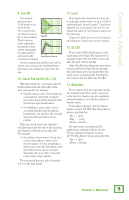
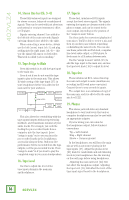
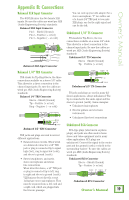
402VLZ4 14. Stereo Line Ins (Ch. 3-4) These fully-balanced inputs are designed for s tereo or mono, balanced or unbalanced signals. They can be used with just about any professional or semi-pro instrument, effect or CD player. Signals entering channel 3 are added to the left side of the main mix only. Signals entering channel 4 are added to the right. When connecting a mono device, always use the left (mono) input (ch. 3) and plug nothing into the right input (ch. 4)- this way the signal will appear on both sides. This trick is called "jack normalling." 15. Tape Assign to Main Press this switch in to add the tape input to the main mix. Press it out if you do not want the tape input to play in the main mix. This allows DJ-style cueing of the tape input [17] in your headphones before it is added to the main mix for your audience. Main Mix Main Mix Level Meters Main out Assign to Main Tape out Tape input Tape Level Phones Level Phones output This also allows for overdubbing with the tape inputs/outputs without experiencing feedback, and it maintains isolation of your audio tracks. For example, you could be feeding the pre-recorded tracks from a computer into the tape inputs. Leave "assign to main" out so you can hear the pre-recorded tracks in the headphones, as you play along to them. Only your live performance will be recorded from the tape outputs, not the pre-recorded tracks. Press "assign to main" in if you want to play the completed songs in your main loudspeakers. 16. Tape Level Use this to adjust the level of the tape input playing in the main mix and headphones. 17. Tape In These dual, unbalanced RCA inputs accept line-level stereo signals. The signals entering the inputs are always routed to the phones output, and can be routed to the main output, depending on the position of the "assign to main" button. Use these jacks for convenient playback of your mixes. You'll be able to review a mix and then try another pass without repatching or disturbing the mixer levels. You can also use these jacks with an iPod dock, computer line-level audio output, or DVD player to feed music to a PA system between sets. Use the "assign to main" switch [15] to add the tape input to the main mix, and use the tape level knob [16] to adjust its level. 18. Tape Out These unbalanced RCA connections tap the main mix output to make simultaneous recording and PA work more convenient. Connect these to your recorder's inputs. The output here is an unbalanced copy of the main mix, and it is affected by the main mix level [22]. 19. Phones This stereo jack will drive any standard headphone to very loud levels. Ear buds or computer headphones may also be used with an appropriate adapter. If you're wiring your own cable for the headphones output, follow standard conventions: Tip = Left channel Ring = Right channel Sleeve = Common ground In the headphones, you will hear the main mix as well as any source playing in the tape inputs [17]. Adjust the phones level [21] knob for comfortable and safe listening levels in your headphones. See the warning on the next page before using headphones. Adjusting the main mix level [22] will not affect the headphone output. Adjusting the tape level [16] will affect the level of the tape input signal heard in the headphones. 16 402VLZ4
-
 1
1 -
2
-
3
-
4
-
5
-
6
-
7
-
8
-
9
-
10
-
 11
11 -
 12
12 -
 13
13 -
 14
14 -
 15
15 -
 16
16 -
 17
17 -
 18
18 -
 19
19 -
 20
20 -
 21
21 -
22
-
23
-
24
 |
 |