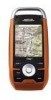
Magellan Triton 1500 Manual - English - Page 22
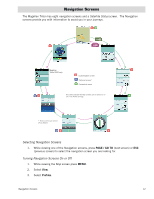
Accessing the Map Screen Contextual Menu, Accessing the Compass or Speedometer Screen Contextual Menu
 |
UPC - 763357117592
View all Magellan Triton 1500 manuals
Add to My Manuals
Save this manual to your list of manuals |
Page 22 highlights
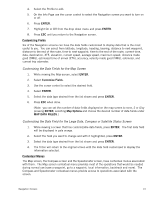
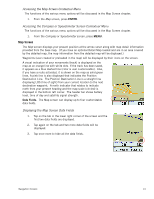
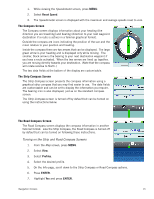
Accessing the Map Screen Contextual Menu The functions of the various menu options will be discussed in the Map Screen chapter. 1. From the Map screen, press ENTER. Accessing the Compass or Speedometer Screen Contextual Menu The functions of the various menu options will be discussed in the Map Screen chapter. 1. From the Compass or Speedometer screen, press MENU. Map Screen The Map screen displays your present position at the arrow cursor along with map detail information provided from the base map. (If you have an optional Detail Map loaded and are in an area covered by the detailed map, the map information from the detailed map will be displayed.) Waypoints (user-created or preloaded in the map) will be displayed by their icons on the screen. A visual indication of your movements (track) is displayed on the map as an orange line with white dots. If the track has been saved, it appears as a blue dashed line (color is user customizable). Also, if you have a route activated, it is shown on the map as solid green lines. A pink line is also displayed that indicates the Position Destination Line. The Position Destination Line is a straight line displaying LOS (line of sight) from your current location to the next destination waypoint. A north indicator that rotates to indicate north from your present heading and the map scale (circled) is displayed in the bottom left corner. The header bar shows battery level, time of day and satellite signal strength. Data Fields. The Map screen can display up to four customizable data fields. Displaying the Map Screen Data Fields 1. Tap on the tab in the lower right corner of the screen and the first two data fields are displayed. 2. Tap again on the tab and two more data fields will be displayed. 3. Tap once more to hide all the data fields. Navigation Screens 14
-
 1
1 -
2
-
3
-
4
-
5
-
6
-
7
-
8
-
9
-
10
-
11
-
12
-
13
-
14
-
15
-
16
-
 17
17 -
 18
18 -
 19
19 -
 20
20 -
 21
21 -
 22
22 -
 23
23 -
 24
24 -
 25
25 -
 26
26 -
 27
27 -
28
-
29
-
30
-
31
-
32
-
33
-
34
-
35
-
36
-
37
-
38
-
39
-
40
-
41
-
42
-
43
-
44
-
45
-
46
-
47
-
48
-
49
-
50
-
51
-
52
-
53
-
54
-
55
-
56
-
57
-
58
-
59
-
60
-
61
-
62
-
63
-
64
-
65
-
66
 |
 |
