Magnavox TB110MW9A Owners Manual - Page 14
Select ON or OFF for Daylight - setup wizard
 |
View all Magnavox TB110MW9A manuals
Add to My Manuals
Save this manual to your list of manuals |
Page 14 highlights
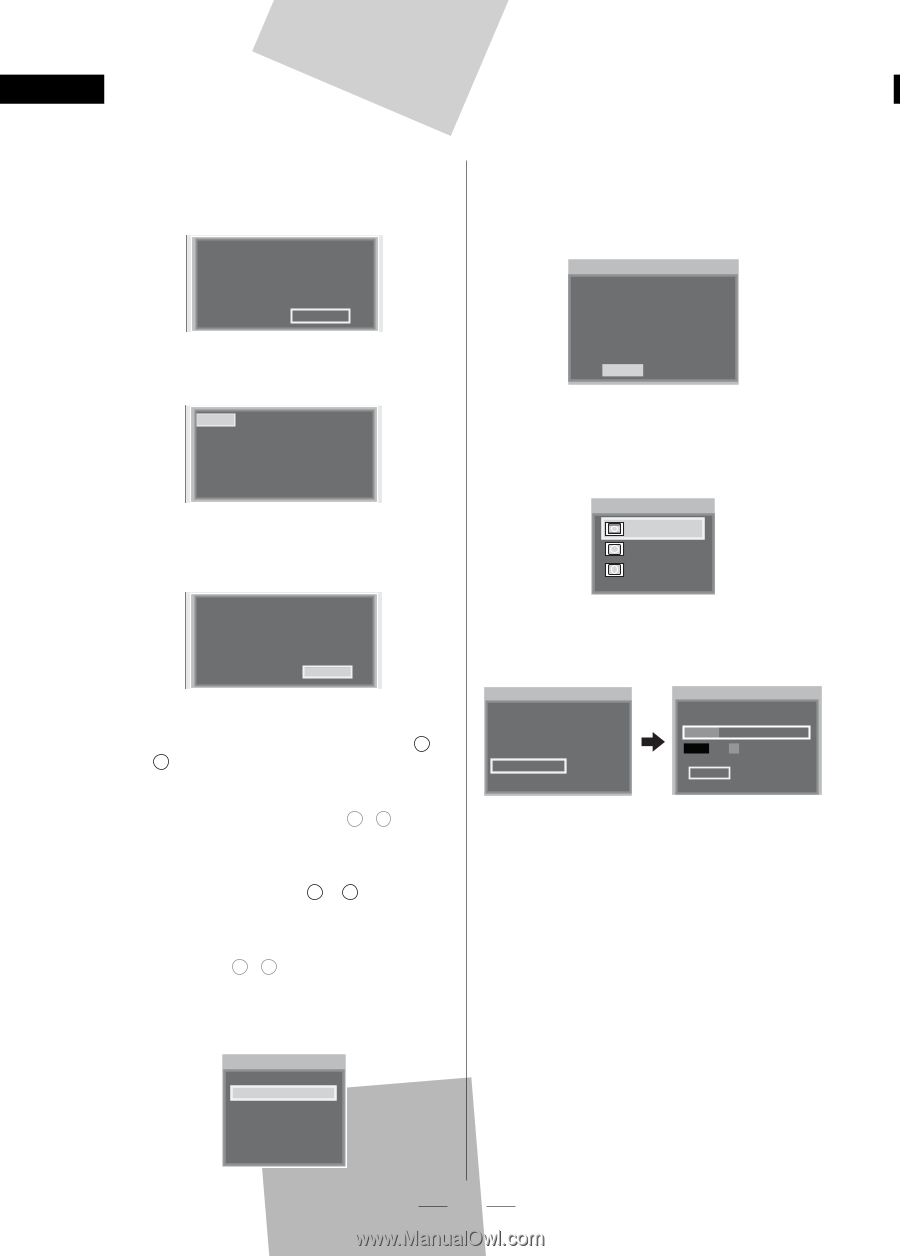
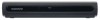
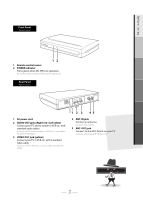
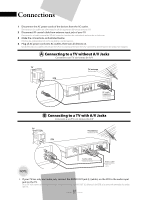
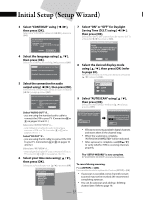
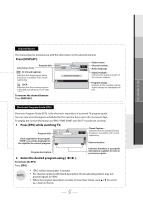
Initial Setup (Setup Wizard) 3 Select "CONTINUE" using [ s / B], then press [OK]. Seleccione "CONTINÚE" utilizando [s / B] y presione [OK]. This SETUP WIZARD will help you with the initial setup on your own. "CONTINUE": To continue setup "CANCEL ": To cancel to leave pre-arranged setup CANCEL CONTINUE 7 Select "ON" or "OFF" for Daylight Saving Time (D.S.T) using [ s / B], then press [OK]. Seleccione "ON" u "OFF" para la hora de verano. (D.S.T) utilizando [s / B] y presione [OK]. Select Daylight Saving Time. NOTE: 2:00AM of the second Sunday in March until 2:00AM of the first Sunday in November. 4 Select the language using [ K / L], then press [OK]. Seleccione el idioma utilizando [K / L] y presione [OK]. ENGLISH Select the language for setup display. ESPAÑOL Elija idioma de preparación. FRANÇAIS Sélectionner langue écran config. 5 Select the connection for audio output using [ s / B], then press [OK]. Seleccione la conexión para salida de audio mediante [s / B] y luego presione [OK]. ON OFF 8 Select the desired display mode using [ K / L], then press [OK] (refer to page 20). Seleccione el modo de indicación deseado utilizando [K / L] y presione [OK]. Select display mode. LETTERBOX ZOOM FULL Select the connection for Audio output. AUDIO OUT : Connecting STB and TV via AUDIO Cable RF OUT : Connecting STB and TV via RF Cable AUDIO OUT RF OUT Select "AUDIO OUT" if... - you are using the standard audio cable to connect the STB to your TV. (Connection B or C on pages 10 and 11.) Seleccione "AUDIO FUERA" si... - está utilizando el cable de audio normal para conectar el STB a su TV. (conexión B o C en las páginas 10 y 11.) Select "RF OUT" if... - you are using the RF cable to connect the STB to your TV. (Connection A or D on pages 10 and 12.) Seleccione "RF FUERA" si... - está utilizando el cable RF para conectar el STB a su TV. (conexión A o D en las páginas 10 y 12.) 6 Select your time zone using [ K / L], then press [OK]. Seleccione su huso horario con [K / L] y presione [OK]. Select Time Zone. ATLANTIC EASTERN CENTRAL MOUNTAIN PACIFIC ALASKA HAWAII 9 Select "AUTOSCAN" using [ K / L], then press [OK]. Seleccione "AUTOEXPLO." mediante [K / L] y luego presione [OK]. The system is now scanning. AUTOSCAN will rescan all channels. This may take a while to complete. EXIT AUTOSCAN 12% EXIT Channel Found • STB starts receiving available digital channels and stores them in the channel map. • When the scanning is complete, "AUTOSCAN COMPLETED" will be indicated. • After autoscan is complete, use [CH K / L ] to verify whether STB is receiving channels properly. The "SETUP WIZARD" is now complete. El "ASISTENTE DE PREP." ahora ha finalizado. To cancel during scanning: Press [SETUP] or [OK]. Para cancelar durante la exploración: Presione [SETUP] o [OK]. • If autoscan is canceled, some channels not yet scanned may not be received. We recommend completing autoscan. • You can do autoscan and adding / deleting channel later. Refer to page 18. 14 EN
-
 1
1 -
2
-
3
-
4
-
5
-
6
-
7
-
8
-
 9
9 -
 10
10 -
 11
11 -
 12
12 -
 13
13 -
 14
14 -
 15
15 -
 16
16 -
 17
17 -
 18
18 -
 19
19 -
20
-
21
-
22
-
23
-
24
-
25
-
26
-
27
-
28
-
29
-
30
-
31
-
32
 |
 |