Makita 3707FC Owners Manual - Page 7
Assembly, Operation
 |
View all Makita 3707FC manuals
Add to My Manuals
Save this manual to your list of manuals |
Page 7 highlights
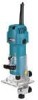
NOTE: • Use a dry cloth to wipe the dirt off the lens of light. Be careful not to scratch the lens of light, or it may lower the illumination. ASSEMBLY CAUTION: • Always be sure that the tool is switched off and unplugged before carrying out any work on the tool. 1 2 3 1. Loosen 2. Tighten 3. Hold 001700 Installing or removing trimmer bit CAUTION: • Do not tighten the collet nut without inserting a bit, or the collet cone will break. • Use only the wrenches provided with the tool. Insert the bit all the way into the collet cone and tighten the collet nut securely with the two wrenches. To remove the bit, follow the installation procedure in reverse. OPERATION Set the tool base on the workpiece to be cut without the bit making any contact. Then turn the tool on and wait until the bit attains full speed. Move the tool forward over the workpiece surface, keeping the tool base flush and advancing smoothly until the cutting is complete. When doing edge cutting, the workpiece surface should be on the left side of the bit in the feed direction. 001701 6 3 1 245 7 8 1. Workpiece 3. Feed direction 5. Correct bit feed direction 7. Feed direction 2. Bit revolving direction 4. View from the top of the tool 6. Bit revolving direction 8. Correct bit feed direction 7
-
 1
1 -
 2
2 -
 3
3 -
 4
4 -
 5
5 -
 6
6 -
 7
7 -
 8
8 -
 9
9 -
 10
10 -
 11
11 -
 12
12 -
13
-
14
-
15
-
16
-
17
-
18
-
19
-
20
 |
 |
