Makita BFR750 Owners Manual - Page 5
Assembly - screws for
 |
View all Makita BFR750 manuals
Add to My Manuals
Save this manual to your list of manuals |
Page 5 highlights
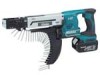
respective screw length. For Models BFR540 Number indicated on the label 25 30 35 40 45 50 55 008239 Screw length 25 mm (1") 30 mm (13/16") 35 mm (1-3/8") 40 mm (1-9/16") 45 mm (1-3/4") 50 mm (2") 55 mm (2-3/16") For Model BFR750 Number indicated on the label 45 50 55 60 65 70 75 008240 Screw length 45 mm (1-3/4") 50 mm (2") 55 mm (2-3/16") 60 mm (2-3/8") 65 mm (2-9/16") 70 mm (2-3/4") 75 mm (2-15/16") Switch action 1. Switch trigger 1 008282 CAUTION: • Before inserting the battery cartridge into the tool, always check to see that the switch trigger actuates properly and returns to the "OFF" position when released. To start the tool, simply pull the switch trigger. Release the switch trigger to stop. Reversing switch action 1 1. Reversing switch lever A B Adjusting the driving depth 5 mm (3/16") 1 2 1. Stopper base 2. Casing 3. Adjusting knob 3 A B 008280 Depress the stopper base as far as it will go. While keeping it in this position, turn the adjusting knob until the bit tip projects approx. 5 mm (3/16") from the stopper base. Drive a trial screw. If the screw head projects above the surface of the workpiece, turn the adjusting knob in the A direction; if the screw head is counter-sunk, turn the adjusting knob in the B direction. 008283 This tool has a reversing switch to change the direction of rotation. Depress the reversing switch lever from the A side for clockwise rotation or from the B side for counterclockwise rotation. When the reversing switch lever is in the neutral position, the switch trigger cannot be pulled. CAUTION: • Always check the direction of rotation before operation. • Use the reversing switch only after the tool comes to a complete stop. Changing the direction of rotation before the tool stops may damage the tool. • When not operating the tool, always set the reversing switch lever to the neutral position. ASSEMBLY CAUTION: • Always be sure that the tool is switched off and the battery cartridge is removed before carrying out any work on the tool. 5
-
 1
1 -
 2
2 -
 3
3 -
 4
4 -
 5
5 -
 6
6 -
 7
7 -
 8
8 -
 9
9 -
 10
10 -
 11
11 -
12
-
13
-
14
-
15
-
16
-
17
-
18
-
19
-
20
-
21
-
22
-
23
-
24
-
25
-
26
-
27
-
28
 |
 |
