Makita BFR750 Owners Manual - Page 6
Installing or removing the bit, Installing screw strip, Removing screw strip, Folding screw guide,
 |
View all Makita BFR750 manuals
Add to My Manuals
Save this manual to your list of manuals |
Page 6 highlights
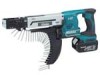
Installing or removing the bit Loosen the thumb screws which secure the casing. Pull out the casing in the direction of the arrow. 1. Casing 2. Thumb screw Removing screw strip To remove the screw strip, just pull it out in the direction of the arrow. If you depress the reverse button, you can pull out the screw strip in the reverse direction of the arrow. 1 2 008285 Press the dust cover toward the plane bearing and pull out the bit. If the dust cover cannot be moved as far as the plane bearing, try it again after turning the bit slightly. To install the bit, insert it into the socket while turning it slightly. After installing, always make sure that the bit is securely held in place by trying to pull it out. 1 1. Plane bearing 2 2. Dust cover 3. Bit 3 008281 1 1. Reverse button 008128 008286 Folding screw guide Installing screw strip Insert the screw strip through the screw guide. Then insert it through the feeder box until the first screw reaches the position next to the driving position. 1 1. Feeder box 2. Screw strip 3. Screw guide 2 008290 3 1. Driving position 1 008289 Screw guide is foldable. Folding the screw guide allows space used for storage to be minimal. Carry hook The carry hook is convenient for temporarily hooking the tool. It can be installed on either side of the tool. When removing the carry hook, widen it by pressing its right ends ON BOTH SIDES in the directions of arrow (1) and raise it in the direction of the arrow (2). 008288 6
-
 1
1 -
 2
2 -
 3
3 -
 4
4 -
 5
5 -
 6
6 -
 7
7 -
 8
8 -
 9
9 -
 10
10 -
 11
11 -
 12
12 -
13
-
14
-
15
-
16
-
17
-
18
-
19
-
20
-
21
-
22
-
23
-
24
-
25
-
26
-
27
-
28
 |
 |
