Makita EK6101 Operation Manual - Page 25
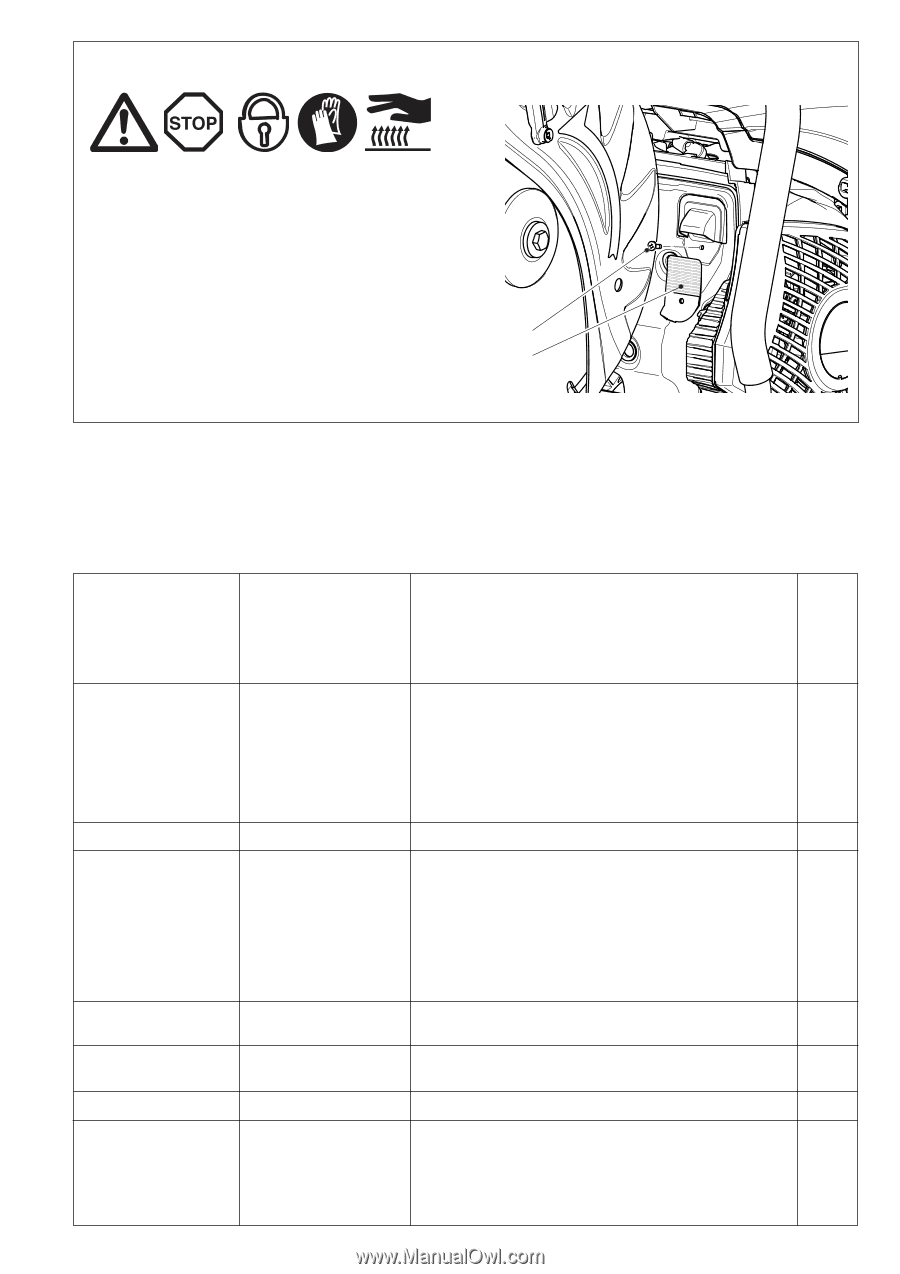
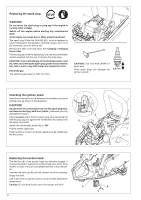
Instructions for periodic maintenance, Replacing/cleaning the spark arrester screen, CAUTION
 |
View all Makita EK6101 manuals
Add to My Manuals
Save this manual to your list of manuals |
Page 25 highlights
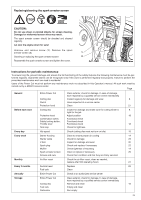
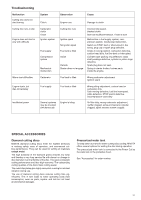
Replacing/cleaning the spark arrester screen CAUTION: Do not use sharp or pointed objects for screen cleaning. Damaged or misformed screen wires may result. The spark arrester screen should be checked and cleaned regularly. Let cool the engine down for sure! Unscrew and remove screw (1). Remove the spark arrester screen (2). 1 Cleaning or replacing the spark arrester screen. 2 Reassembly the spark arrester screen and tighten the screw. Instructions for periodic maintenance To ensure long life, prevent damage and ensure the full functioning of the safety features the following maintenance must be performed regularly. Guarantee claims can be recognized only if this work is performed regularly and properly. Failure to perform the prescribed maintenance work can lead to accidents! Users of the Power Cut must not perform any maintenance work not described in this Operator's manual. All such work must be carried out by a MAKITA service center. Page General Entire Power Cut Cutting disc Clutch Protection hood Before each start Cutting disc Protective hood Combination switch, Safety locking button, Throttle lever Tank cap Every day Idle speed Every week Starter housing Starter cable V‑belt Spark plug Muffler Spark arrester screen Screws and nuts Monthly Air filter insert Every 3 months Suction head Fuel tank Annually Entire Power Cut Storage Entire Power Cut Cutting disc Fuel tank Carburetor Clean exterior, check for damage. In case of damage, have repaired by a qualified service center immediately Inspect regularly for damage and wear. 8 Have inspected at a service center. Clean 21 Inspect for damage and make sure the cutting wheel is right for the job 8 Adjust position 18 Functional check Functional check Functional check 18 Check for tightness Check (cutting disc must not turn on idle) 19 Clean to ensure proper air cooling 14 Check for damage 23 Inspect for damage and wear 20 Check and replace if necessary 22 Check tightness of mounting 14 Clean or replace if necessary 26 Check their condition and that they are firmly secured. Check the air filter insert, clean as needed, replace after 500 operating hours 21 Replace 22 Clean Check at an authorized service center Clean exterior, check for damage. In case of damage, have repaired by a qualified service center immediately Remove and clean 15 Empty and clean Run empty 25
-
 1
1 -
2
-
3
-
4
-
5
-
6
-
7
-
8
-
9
-
10
-
11
-
12
-
13
-
14
-
15
-
16
-
17
-
18
-
19
-
 20
20 -
 21
21 -
 22
22 -
 23
23 -
 24
24 -
 25
25 -
 26
26 -
 27
27 -
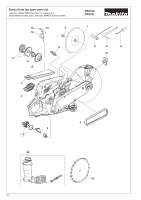 28
28 -
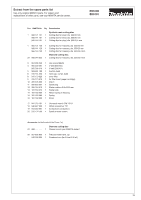 29
29 -
 30
30 -
31
-
32
-
33
-
34
-
35
-
36
-
37
-
38
-
39
-
40
-
41
-
42
-
43
-
44
-
45
-
46
-
47
-
48
-
49
-
50
-
51
-
52
-
53
-
54
-
55
-
56
-
57
-
58
-
59
-
60
 |
 |