Makita PC5001C Owners Manual - Page 7
Assembly
 |
View all Makita PC5001C manuals
Add to My Manuals
Save this manual to your list of manuals |
Page 7 highlights
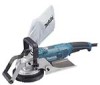
Use a square or ruler to obtain the desired base angle in relation to the diamond wheel. Then secure carefully the hex socket head bolts on either side of the base. Adjust center of base near wheel so that it is on the same level as the wheel. 1 2 1. Same level 2. Square or ruler 3. Hex socket head Max. bolt 6 3 009851 clockwise to raise, counterclockwise to lower. ASSEMBLY CAUTION: • Always be sure that the tool is switched off and unplugged before carrying out any work on the tool. Installing or removing diamond wheel 2 1 1. Lock nut 2. Lock nut wrench 3. Diamond wheel 4. Shaft lock NOTE: • After base adjustment, turn the three hex socket head bolts on the base counterclockwise until the heads are flush with the back side of the base. Turn gently or base adjustment will be thrown off. Base adjustment to compensate for wheel wear (for PC5001C only) With long use, the diamond wheel will wear and thus create a gap with the planing surface so that performance becomes poor. Check the tool after every 4 or 5 hours of use. If the wheel and base surfaces are not aligned, loosen two hex socket head bolts securing the base. Turn three hex socket head bolts on the base clockwise and adjust the base so as to be level with the wheel surface. Retighten firmly the hex socket head bolts securing base and then lightly turn the hex socket head bolts counterclockwise so that the hex socket head bolts do not come loose during operation. Dust cover adjustment 1 2 3 1. Raise 2. Lower 3. Dust cover 4. Screw 3 4 009841 To replace a worn diamond wheel with a new one, press in the shaft lock to hold the shaft steady, then loosen the lock nut counterclockwise with the lock nut wrench provided. Remove the worn diamond wheel. To install a new one, follow the above removal procedure in reverse. When installing a diamond wheel, always make sure to tighten the lock nut firmly. NOTE: • The ordinary diamond wheels on the market have no exhaust holes, so dust evacuation is poor. Also, if the installing hole is not of the exact diameter, tool vibration occurs and accidents can occur. ALWAYS USE A MAKITA OFFSET DIAMOND WHEEL. Replacing dust cover's brush 4 009885 Loosen the screw. and adjust the dust cover's brush level. The dust cover's brush should be either flush with the diamond wheel surface or very slightly above (when tool is inverted) 0.5 mm. Suction/pickup will be poor if they are not approximately on the same level. After adjusting, be sure to tighten the screw firmly. To adjust the dust cover, grip it on the outside; turn 009880 To remove the dust cover's brush from the dust cover, grab an end of the dust cover's brush and take it out slowly outward. 7
-
 1
1 -
 2
2 -
 3
3 -
 4
4 -
 5
5 -
 6
6 -
 7
7 -
 8
8 -
 9
9 -
 10
10 -
 11
11 -
 12
12
 |
 |
