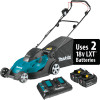
Makita XML02PT XML02 Instruction Manual - Page 6
Indicating the remaining battery, capacity, Switch action, Adjusting the mowing height
 |
View all Makita XML02PT manuals
Add to My Manuals
Save this manual to your list of manuals |
Page 6 highlights
Indicating the remaining battery capacity Only for battery cartridges with "B" at the end of the model number This mower is equipped with the interlock switch and handle switch. If you notice anything unusual with either of these switches, stop operation immediately and have them checked by your nearest Makita Authorized Service Center. 1. Install the battery cartridges. Insert the lock key into the interlock switch and then close the battery cover. 1 1 2 2 1. Indicator lamps 2. Check button Press the check button on the battery cartridge to indicate the remaining battery capacity. The indicator lamps light up for few seconds. Indicator lamps Remaining capacity Lighted Off Blinking 75% to 100% 1. Battery cartridge 2. Lock key 2. Press the switch button and hold it. 3. Grab the upper handle and pull the switch lever. 1 2 50% to 75% 25% to 50% 0% to 25% Charge the battery. The battery may have malfunctioned. NOTE: Depending on the conditions of use and the ambient temperature, the indication may differ slightly from the actual capacity. 1. Switch button 2. Switch lever 4. Release the switch button as soon as the motor starts running. The mower will continue to run until you release the switch lever. 5. Release the switch lever to stop the motor. Adjusting the mowing height Switch action WARNING: Before installing the battery cartridge, always check to see that the switch lever actuates properly and returns to the original position when released. Operating a tool with a switch that does not actuate properly can lead to loss of control and serious personal injury. NOTE: The mower does not start without pressing the switch button even the switch lever is pulled. NOTE: Mower may not start due to the overload when you try to mow long or dense grass at a time. Increase the mowing height in this case. WARNING: Never put your hand or leg under the mower body when adjusting the mowing height. WARNING: Always make sure that the lever fits in the groove properly before operation. The mowing height can be adjusted in the range of between 20 mm (13/16″) - 75 mm (2-15/16″). 1. Remove the lock key. 2. Pull the mowing height adjusting lever to the outward of the mower body and move it to your desired mowing height. 6 ENGLISH
-
 1
1 -
 2
2 -
 3
3 -
 4
4 -
 5
5 -
 6
6 -
 7
7 -
 8
8 -
 9
9 -
 10
10 -
 11
11 -
 12
12 -
13
-
14
-
15
-
16
-
17
-
18
-
19
-
20
-
21
-
22
-
23
-
24
-
25
-
26
-
27
-
28
-
29
-
30
-
31
-
32
-
33
-
34
-
35
-
36
 |
 |
