Marantz VP8600 VP8600 User Manual - Page 9
S-video In, Video In, Component Video In 1, Component Video In 2, Rgb In, Dvi-d In, Rs-232c, Trigger - remote
 |
View all Marantz VP8600 manuals
Add to My Manuals
Save this manual to your list of manuals |
Page 9 highlights
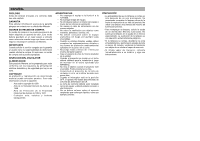
Rear and Terminals View ENGLISH z xc ⁄2 v ⁄1 ⁄0 . ,m n b z S-VIDEO IN Connect an S-video enabled device. x VIDEO IN Connect a composite video enabled device. c COMPONENT VIDEO IN 1 Connect a component video enabled device. v COMPONENT VIDEO IN 2 Connect a component video enabled device. b RGB IN Connect to a computer. n DVI-D IN Connect a DVI (digital) cable from a computer or video source. m RS-232C This is a service port for firmware upgrades. , TRIGGER 1 Connect to the screen. When the unit is turned on, 12V is output. When the unit is turned off, no voltage is output. This allows such as a powered up/down screen,whenever the projector is turned on or off. Note: To connect with external devices, use an ordinal 3.5mm mini-plug (mono) cable. . TRIGGER 2 Connect to the screen to control screen aspect ratio with powered up/down dual aspect ratio screen. If Normal (4:3) aspect ratio is selected by projector, 12V is output. Notes: • Do not use TRIGGER 1 and TRIGGER 2, as the power source. • To connect with external devices, use an ordinal 3.5mm mini-plug (mono) cable. ⁄0 IR receiver Rear receiver for IR signal from remote control. ⁄1 Main power switch Turns the main power to the unit on or off. ⁄2 AC IN socket Connect to an electrical outlet. Note: • If your video equipment has both S- video and RCA jacks (composite video) connect to the S-video connector. S-video provides a better quality signal. 4
-
 1
1 -
2
-
3
-
 4
4 -
 5
5 -
 6
6 -
 7
7 -
 8
8 -
 9
9 -
 10
10 -
 11
11 -
 12
12 -
 13
13 -
 14
14 -
15
-
16
-
17
-
18
-
19
-
20
-
21
-
22
-
23
-
24
-
25
-
26
-
27
-
28
-
29
-
30
-
31
-
32
 |
 |
