Maytag MEDX700XL Installation Instructions - Page 20
Troubleshooting
 |
UPC - 883049199115
View all Maytag MEDX700XL manuals
Add to My Manuals
Save this manual to your list of manuals |
Page 20 highlights
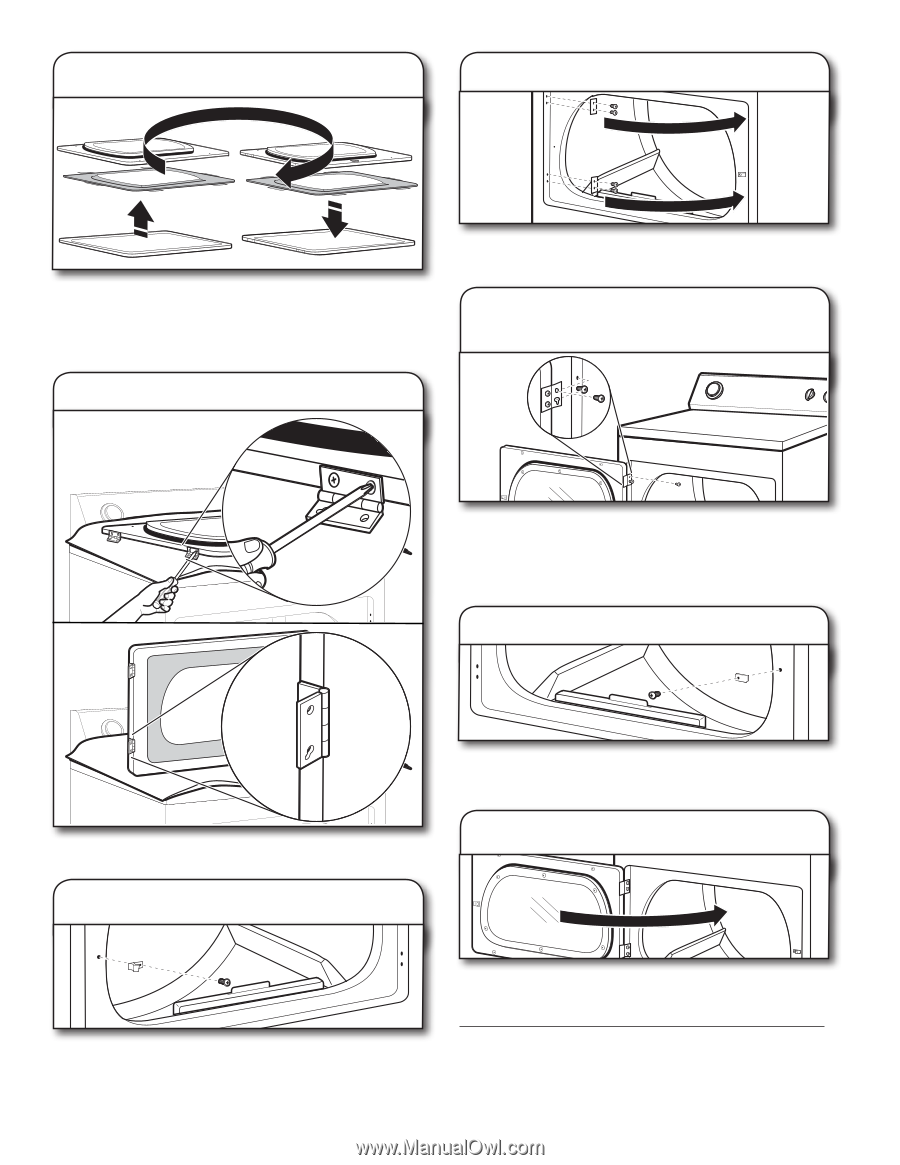
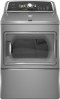
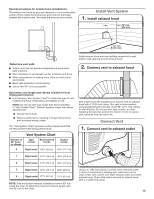
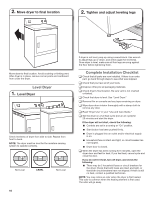
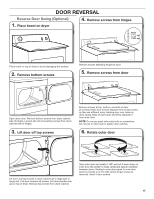
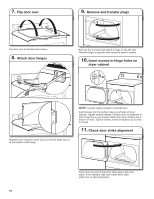
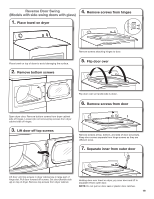
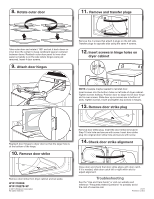
8. Rotate outer door 11. Remove and transfer plugs Take outer door and rotate it 180º and set it back down on inner door. Be certain to keep cardboard spacer centered between doors. Reattach outer door panel to inner door panel so handle is on the side where hinges were just removed. Insert 4 door screws. 9. Attach door hinges Remove the 4 screws that attach 2 plugs on the left side. Transfer plugs to opposite side using the same 4 screws. 12. Insert screws in hinge holes on dryer cabinet NOTE: 2 people maybe needed to reinstall door. Insert screws into the bottom holes on left side of dryer cabinet. Tighten screws halfway. Position door so large end of door hinge slot is over screws. Slide door up so screws are in bottom of slots. Tighten screws. Insert and tighten top screws in hinges. 13. Remove door strike plug Reattach door hinges to dryer door so that the larger hole is at the bottom of the hinge. 10. Remove door strike Remove door strike plug. Insert the door strike removed in Step 10 into hole and secure with screw. Insert door strike plug into original door strike hole and secure with screw. 14. Check door strike alignment Remove door strike from dryer cabinet and set aside. W10115226B W10115227B-SP © 2011 Whirlpool Corporation 2Al0l rights reserved Close door and check that door strike aligns with door catch. If it is needed, slide door catch left or right within slot to adjust alignment. Troubleshooting See the "Use and Care Guide" or visit our website and reference "Frequently Asked Questions" to possibly avoid the cost of a service call. 01/11 Printed in U.S.A.
-
 1
1 -
2
-
3
-
4
-
5
-
6
-
7
-
8
-
9
-
10
-
11
-
12
-
13
-
14
-
 15
15 -
 16
16 -
 17
17 -
 18
18 -
 19
19 -
 20
20
 |
 |