Maytag MGR5775QDB Use and Care Guide - Page 17
Oven Light, Oven Bottom, Oven Racks, Rack Positions, Pilotless Ignition, Oven Vent - bake burner
 |
View all Maytag MGR5775QDB manuals
Add to My Manuals
Save this manual to your list of manuals |
Page 17 highlights
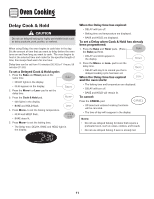
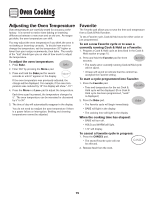
Oven Cooking Pilotless Ignition Your range is equipped with pilotless ignition. With this type of ignition system, the gas automatically shuts off and the oven will not operate during a power failure. A lighted match will not light the oven burner. No attempt should be made to operate the oven during a power failure. Oven Racks CAUTION • Do not attempt to change the rack position when the oven is hot. • Do not use the oven for storing food or cookware. Oven Vent When the oven is in use the area near the vent may become hot enough to cause burns. Never block the vent opening. The oven vent is located below the backguard vent shield on your range. OVEN VENT LOCATION Do not place plastics near the vent opening as heat from the vent could distort or melt the plastic. Oven Light The oven light automatically comes on when the door is opened. When the door is closed, press the Oven Light switch to turn the oven light on and off. Oven Bottom Protect oven bottom against spillovers, especially acidic or sugary spills, as they may discolor the porcelain enamel. Use the correct pan size to avoid spillovers and boilovers. Do not place utensils or aluminum foil directly on the oven bottom. The oven has two racks. All racks are designed with a lockstop edge. To remove: 1. Pull rack straight out until it stops at the lock-stop position. 2. Lift up on the front of the rack and pull out. To replace: 1. Place rack on the rack supports in the oven. 2. Tilt the front end up slightly. Slide rack back until it clears the lock-stop position. 3. Lower front and slide back into the oven. Do not cover an entire rack with aluminum foil or place foil on the oven bottom. Baking results will be affected and damage may occur to the oven bottom. Rack Positions RACK 7 (highest position): For single rack baking on cookie sheets and broiling. RACK 6: Used for single rack baking on cookie sheets and broiling. Used for multiple rack baking. Two Rack Baking 7 6 5 4 3 2 1 Oven Bottom RACK 5: For single rack baking on cookie sheets and broiling. RACK 4: Used for single rack baking on cookie sheets, sheet cakes, casseroles and broiling. Used for multiple rack baking. RACK 3: For single rack baking on cookie sheets, casseroles, layer cakes, loaves of bread and sheet cakes. Used for multiple rack baking. RACK 2: Used for single rack baking on cookie sheets and roasting small cuts of meat. Used for multiple rack baking. RACK 1: Use for roasting large cuts of meat and poultry. cont. 16
-
 1
1 -
2
-
3
-
4
-
5
-
6
-
7
-
8
-
9
-
10
-
11
-
 12
12 -
 13
13 -
 14
14 -
 15
15 -
 16
16 -
 17
17 -
 18
18 -
 19
19 -
 20
20 -
 21
21 -
 22
22 -
23
-
24
-
25
-
26
-
27
-
28
-
29
-
30
-
31
-
32
-
33
-
34
-
35
-
36
-
37
-
38
-
39
-
40
-
41
-
42
-
43
-
44
-
45
-
46
-
47
-
48
-
49
-
50
-
51
-
52
-
53
-
54
-
55
-
56
-
57
-
58
-
59
-
60
-
61
-
62
-
63
-
64
-
65
-
66
-
67
-
68
-
69
-
70
-
71
-
72
-
73
-
74
-
75
-
76
-
77
-
78
-
79
-
80
-
81
-
82
-
83
-
84
 |
 |
