Maytag MGR6775BDW Use and Care Guide - Page 16
Cleenin
 |
UPC - 719881178691
View all Maytag MGR6775BDW manuals
Add to My Manuals
Save this manual to your list of manuals |
Page 16 highlights
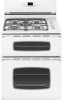
Cleenin Self-Clean Oven The self-clean cycle uses above-normal cooking temperatures to automatically clean the oven interior. The oven should be cleaned regularly by wiping up spillovers to prevent excessive smoke and flare-ups. [:lo not allow a heavy build-up of soil to accumulate in the oven. During the cleaning process, the kitchen should be well ventilated to get rid of normal odors associated with cleaning. Before Self=Cleaning 1. Turn off the oven light before cleaning. Tile light may burn out during the clean cycle. 2. Remove broiler pan, all pans, and oven racks from the oven. The oven racks will discolor and may not slide easily after a self-clean cycle if they are not removed. 3. Clean oven frame, door frame, area outside of gasket, and around the opening in the door gasket with a nonabrasive cleaner such as Bon Ami* or detergent and water. The self-cleaning process does not clean these areas. They should be cleaned to prevent soil from baking on during the clean cycle. (The gasket is the seal around the oven door and window.} 4. To prevent damage, do not clean or rub the gasket around the oven door. The gasket is designed to seal in heat during the clean cycle. 5. Wipe up excess grease or spillovers from the oven bottom. This prevents excessive smoking, flare-ups or flaming during the clean cycle. 6. Wipe up sugary and acidic spillovers such as sweet potatoes, tomato, or milk-based sauces. Porcelain enamel is acid-resistant, not acid-proof. The porcelain finish may discolor if acidic spills are not wiped up before a selfclean cycle. Important: • Oven temperature must be below 400° F to program a clean cycle. • Only one oven can be cleaned at a time. Both oven doors lock when either oven is being cleaned. To set Self=Clean: 1. Close the oven door. 2. Press the Clean pad. Clean • "Clean" and "SEt" flash in the display. If the door is not closed within 25 seconds, the selfcleaning operation will be canceled and the display will return to the time of day. 3. Press the More+ or Less- pad. • "MEd" for medium amount of soil (3 hours} appears in the display. If the door is not closed, "door" will appear in the display. After 45 seconds, three beeps will sound, the self-cleaning operation will be canceled and the display will return to the time of day. 4. Press the More+ twice for heavy soil (4 hours}. ° "HVy" will be displayed. Press Less= pad twice for light soil {2 hours}. • "LITE" will be displayed. Choosing the soil level of the oven automatically programs the self-cleaning time. "Lock" flashes in the display. 5. After four seconds, the oven will start cleaning. • The cleaning time will start counting down in the display. • "Lock" will appear in the display and will flash until the doors are locked. "Lock" will then remain lit. ° "Clean" will remain lit in the display. To Delay a Self=Clean Cycle: 1. Press the Delay pad once for upper oven and twice for lower oven. • "dLY" flashes. • %:00" flashes in the display. Press the More+ or Less- pad to set the amount of time you want to delay the cycle. Delay time can be set from ten minutes (10:00} to 11 hours, 59 minutes (11:59}. Cont. * Brand names for cleaning products are registered trademarks of the respective manufacturers. 15
-
 1
1 -
2
-
3
-
4
-
5
-
6
-
7
-
8
-
9
-
10
-
 11
11 -
 12
12 -
 13
13 -
 14
14 -
 15
15 -
 16
16 -
 17
17 -
 18
18 -
 19
19 -
 20
20 -
 21
21 -
22
-
23
-
24
-
25
-
26
-
27
-
28
-
29
-
30
-
31
-
32
-
33
-
34
-
35
-
36
-
37
-
38
-
39
-
40
-
41
-
42
-
43
-
44
-
45
-
46
-
47
-
48
-
49
-
50
-
51
-
52
-
53
-
54
-
55
-
56
-
57
-
58
-
59
-
60
-
61
-
62
-
63
-
64
-
65
-
66
-
67
-
68
-
69
-
70
-
71
-
72
-
73
-
74
-
75
-
76
 |
 |
