Maytag MGT8775XS Owners Manual - Page 5
Cooktop Use - model
 |
UPC - 883049199559
View all Maytag MGT8775XS manuals
Add to My Manuals
Save this manual to your list of manuals |
Page 5 highlights
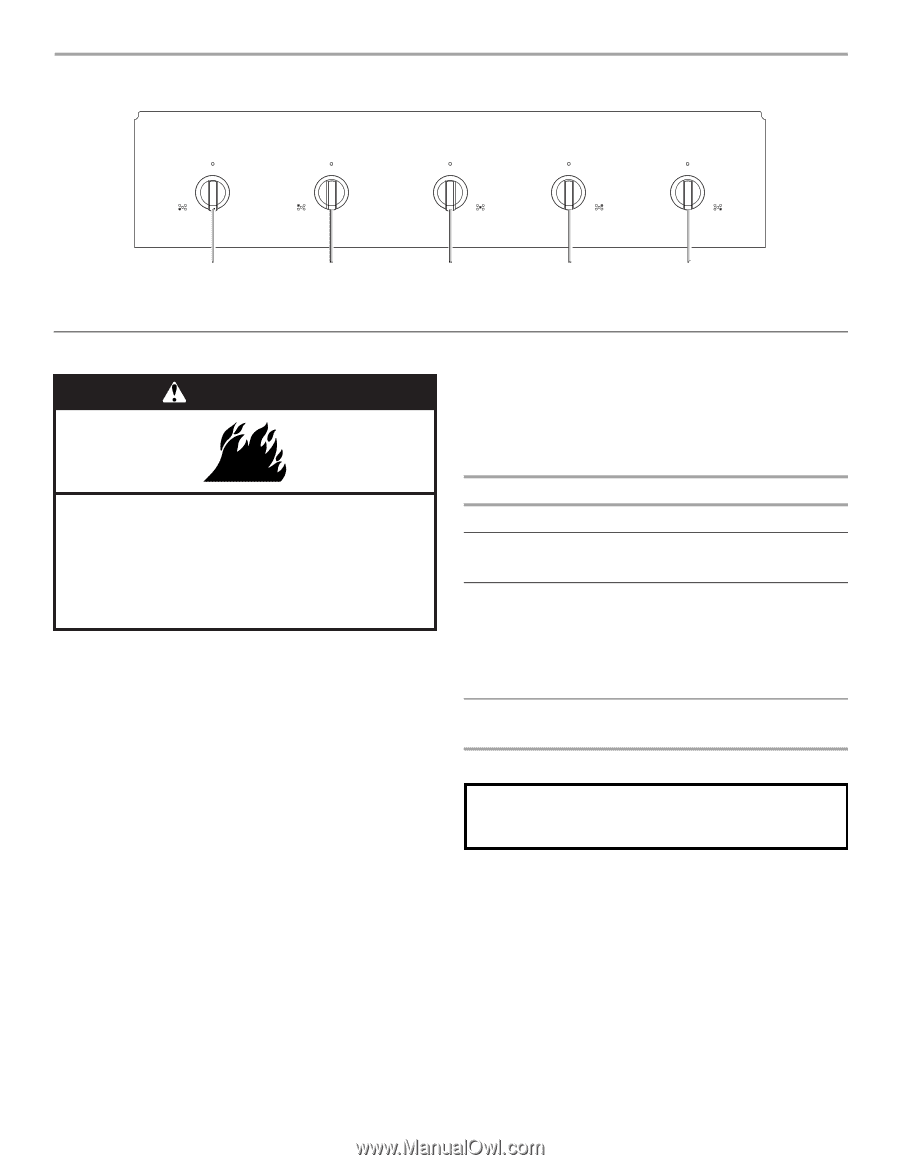
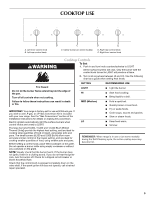
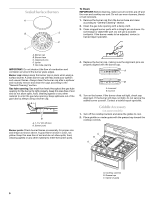
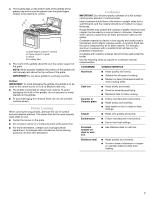
COOKTOP USE A A. Left front control knob B. Left rear control knob B C C. Center burner (on some models) D E D. Right rear control knob E. Right front control knob WARNING Cooktop Controls To Set: 1. Push in and turn knob counterclockwise to LIGHT. All the surface burners will click. Only the burner with the control knob turned to LIGHT will produce a flame. 2. Turn knob anywhere between HI and LO. Use the following chart as a guide when setting heat levels. Fire Hazard Do not let the burner flame extend beyond the edge of the pan. Turn off all controls when not cooking. Failure to follow these instructions can result in death or fire. IMPORTANT: Your range is factory-set for use with Natural gas. If you wish to use LP gas, an LP Gas Conversion Kit is included with your new range. See the "Gas Conversions" section of the Installation Instructions for details on making this conversion. Electric igniters automatically light the surface burners when control knobs are turned to LIGHT. The large burners (16,000, 15,000 and 12,500 Btu/h [British Thermal Units]) provide the highest heat setting, and are ideal for cooking large quantities of food or liquid, using large pots and pans. The small burners (9,200 and 5,000 Btu/h) allow more accurate simmer control at the lowest setting, and are ideal for cooking smaller quantities of food, using smaller pots and pans. Before setting a control knob, place filled cookware on the grate. Do not operate a burner while using empty cookware or without any cookware on the grate. NOTE: Visually check that the burner has lit. If the burner does not ignite, listen for a clicking sound. If you do not hear the igniter click, turn the burner off. Check for a tripped circuit breaker or blown household fuse. Check that the control knob is pressed completely down on the valve shaft. If the spark igniter still does not operate, call a trained repair specialist. SETTING LIGHT HI MED (Medium) LO RECOMMENDED USE ■ Light the burner. ■ Start food cooking. ■ Bring liquid to a boil. ■ Hold a rapid boil. ■ Quickly brown or sear food. ■ Fry or sauté foods. ■ Cook soups, sauces and gravies. ■ Stew or steam foods. ■ Keep food warm. ■ Simmer. REMEMBER: When range is in use or (on some models) during the Self-Cleaning cycle, the entire cooktop area may become hot. 5
-
 1
1 -
 2
2 -
 3
3 -
 4
4 -
 5
5 -
 6
6 -
 7
7 -
 8
8 -
 9
9 -
 10
10 -
 11
11 -
12
-
13
-
14
-
15
-
16
-
17
-
18
-
19
-
20
-
21
-
22
-
23
-
24
-
25
-
26
-
27
-
28
-
29
-
30
-
31
-
32
-
33
-
34
-
35
-
36
-
37
-
38
-
39
-
40
-
41
-
42
-
43
-
44
-
45
-
46
-
47
-
48
 |
 |