Maytag MHWZ600TW Use and Care Guide - Page 13
Complete Installation - front load washer
 |
UPC - 883049064352
View all Maytag MHWZ600TW manuals
Add to My Manuals
Save this manual to your list of manuals |
Page 13 highlights
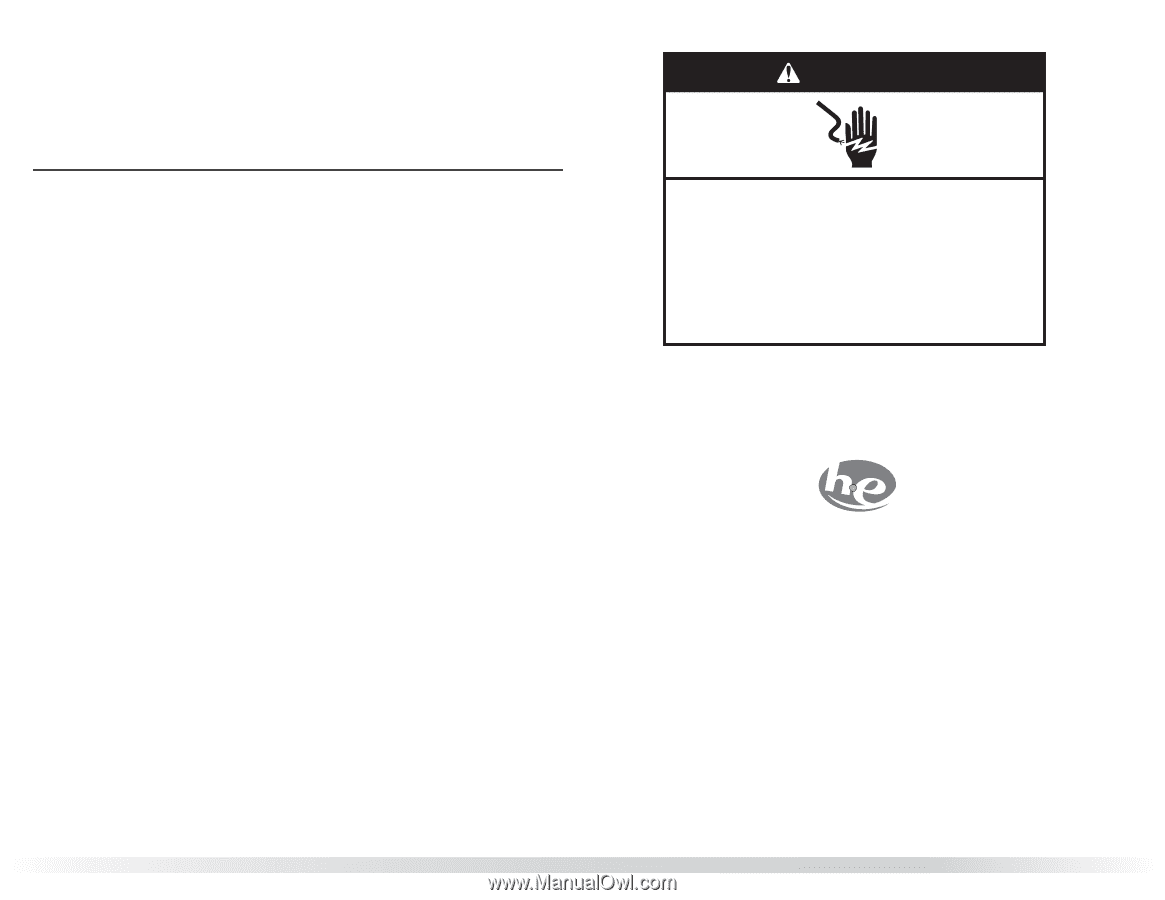
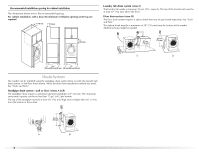
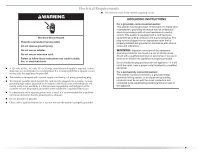
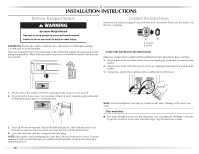
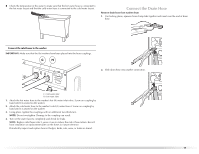
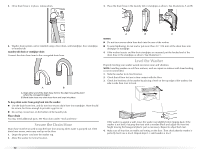
5. After the washer is level, and all four feet are in firm contact with the floor, use a 9/16" (14 mm) open-end wrench to turn the locknuts on the feet, tightly against the washer cabinet. IMPORTANT: All four feet must be tightened. If the locknuts are not tight against the washer cabinet, the washer may vibrate. 6. The washer should not move front to back, side to side, or diagonally when pushed on its top edges. 7. Confirm the levelness of the washer. Complete Installation 1. Check the electrical requirements. Be sure that you have the correct electrical supply and the recommended grounding method. See "Electrical Requirements." 2. Check that all parts are now installed. If there is an extra part, go back through the steps to see which step was skipped. 3. Check that you have all of your tools. 4. Dispose of/recycle all packaging materials. 5. Check that the water faucets are on. 6. Check for leaks around faucets and inlet hoses. WARNING Electrical Shock Hazard Plug into a grounded 3 prong outlet. Do not remove ground prong. Do not use an adapter. Do not use an extension cord. Failure to follow these instructions can result in death, fire, or electrical shock. 7. Plug into a grounded 3 prong outlet. 8. Read "Washer Use." 9. To test and to clean your washer, measure ½ the detergent manufacturer's recommended amount of HE High Efficiency detergent for a medium-size load. Pour the detergent into the detergent dispenser. Select NORMAL, and then select START. Allow the washer to complete one whole cycle. Use only HE High Efficiency detergent. 13
-
 1
1 -
2
-
3
-
4
-
5
-
6
-
7
-
 8
8 -
 9
9 -
 10
10 -
 11
11 -
 12
12 -
 13
13 -
 14
14 -
 15
15 -
 16
16 -
 17
17 -
 18
18 -
19
-
20
-
21
-
22
-
23
-
24
-
25
-
26
-
27
-
28
-
29
-
30
-
31
-
32
-
33
-
34
-
35
-
36
-
37
-
38
-
39
-
40
-
41
-
42
-
43
-
44
-
45
-
46
-
47
-
48
-
49
-
50
-
51
-
52
-
53
-
54
-
55
-
56
-
57
-
58
-
59
-
60
-
61
-
62
-
63
-
64
 |
 |