Metabo BFE 9-90 Operating Instructions 2 - Page 10
Overview, Scope of delivery, Initial Operation - set
 |
View all Metabo BFE 9-90 manuals
Add to My Manuals
Save this manual to your list of manuals |
Page 10 highlights
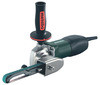
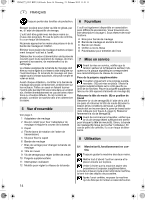
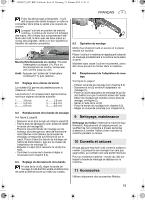
17026977_0212 BFE 9-90.book Seite 10 Dienstag, 21. Februar 2012 11:51 11 ENG ENGLISH Pull the plug out of the plug socket before any adjustments, conversions or servicing are performed. The rated speed of the sanding belt must be at least equal to the belt speed in idling marked on the power tool. A sanding belt running faster than its rated speed can break and fly apart. Check prior to each use that the sanding belt is correctly attached and is completely on the rollers. Carry out a trial run: Allow the machine to run at idling speed for 30 seconds in a safe location. Stop immediately if significant vibrations occur or if other defects are noted. If such a situation occurs, check the machine to determine the cause. 5 Overview See page 2. 1 Sanding attachment 2 Rotary knob for securing the sanding attachment and adjusting the belt run 3 Cover 4 Arrow (direction of rotation of drive shaft) 5 Screw for securing the cover 6 Sanding belt 7 Tensioner arm for replacing the sanding belt 8 Sanding head 9 Locking screw for adjusting sanding head 10 Additional handle 11 Sliding switch 12 Adjusting wheel for setting belt speed 6 Scope of delivery The machine is also available with different accessory parts. An overview can be found on page 4. Subject to change. A Sanding belt arm B Sanding belt, zirconia alumina C Nylon web band D Microfibre cloth E Stainless steel cleaning spray Attaching the additional handle Always work with the additional handle attached (10)! Attach the additional handle on the left or right of the machine and secure. Attach the additional handle to the side facing away from the sanding belt (6). Turning the sanding head (8) to operating position Loosen the locking screw (9) using the hexagon spanner and, if necessary and depending on the task at hand, turn the sanding head (8). The sanding head must be positioned in the permitted working area as shown (see illustration A, page 2). Firmly tighten the locking screw (9). Each time before you start work, verify that the locking screw (9) is sufficiently tightened to ensure that the sanding head (8) does not move. Otherwise, the sanding belt (6) may come in contact with the user. Loss of control can cause personal injury. 8 Use 8.1 On/Off switch, continuous activation Always guide the machine with both hands. Switch the machine on first before mounting it on the workpiece. The machine must not be allowed to draw in additional dust and shavings. When switching the machine on and off, keep it away from dust deposits. After switching off the machine, only place it down when the motor has come to a standstill. Avoid inadvertent starts: always switch the tool off when the plug is removed from the mains socket or if there has been a power cut. In continuous operation, the machine continues running if it is forced out of your hands. Therefore, always hold the machine using the handles provided, stand in a safe position and concentrate. 11 0 7 Initial Operation Before plugging in, check that the rated mains voltage and mains frequency, as stated on the rating label, match with your power supply. I Switching on/Continuous activation: Push slide switch (11) forward. For continuous activation, now tilt downwards until it engages. Switching off: Press the rear end of the slide switch (11) and release. 10
-
 1
1 -
2
-
3
-
4
-
 5
5 -
 6
6 -
 7
7 -
 8
8 -
 9
9 -
 10
10 -
 11
11 -
 12
12 -
 13
13 -
 14
14 -
 15
15 -
16
-
17
-
18
-
19
-
20
-
21
-
22
-
23
-
24
-
25
-
26
-
27
-
28
-
29
-
30
-
31
-
32
-
33
-
34
-
35
-
36
-
37
-
38
-
39
-
40
-
41
-
42
-
43
-
44
-
45
-
46
-
47
-
48
-
49
-
50
-
51
-
52
-
53
-
54
-
55
-
56
-
57
-
58
-
59
-
60
-
61
-
62
-
63
-
64
-
65
-
66
-
67
-
68
 |
 |
