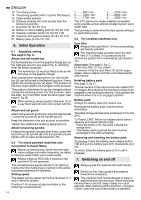
Metabo SE 17-200 RT Operating Instructions - Page 14
Initial Operation, Switching on and off - set
 |
View all Metabo SE 17-200 RT manuals
Add to My Manuals
Save this manual to your list of manuals |
Page 14 highlights
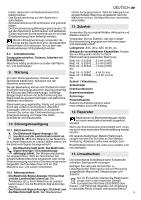
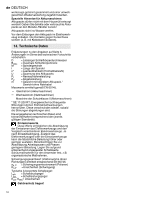
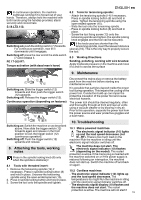
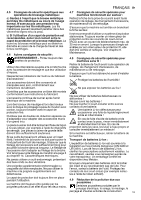
en ENGLISH 13 Tool fixing screw 14 Tensioning spindle (with 2 captive fitted keys) 15 Open-ended spanner 16 Distance sleeves (for tools shorter than the tensioning spindle) 17 Dust filter (S 18 LTX 115) 18 Button to unlock battery pack (S 18 LTX 115) 19 Capacity indicator button (S 18 LTX 115) 20 Capacity and signal indicator (S 18 LTX 115) 21 Battery pack (S 18 LTX 115) 6. Initial Operation 6.1 Assembly, setting See page 2, fig. A. Attach and set handle bar Put the handle bar (3) on the gearbox flange (put on the right way around, see page 2 fig. A: clamping lever (4) shows forwards). The handle bar (3) must be fitted as far as the limit stop on the gearbox flange. After releasing the clamping lever (4), the handle bar (3) can be turned to the desired position. Firmly tighten the clamping lever (4) again. The position of the lever might need to be changed for this purpose. The position of the lever (4) can be changed without turning the clamping screw. For this purpose, raise the lever, turn it and then lower the lever again (see page 2, fig. B). When working, always position the lever (4) in a way that it cannot come into contact with the tool. Attach and set guard Attach the guard (2) as shown using the side handle (1) and the screws (5) at the handle bar (3). Keep the distance to the tool as short as possible. Tighten the additional handle by applying force. Attach tensioning spindle Holding the spindle locking button down, screw the tensioning (14) spindle (8) onto the spindle (9) and tighten with an open-ended spanner (15). 6.2 For mains powered machines only Connection to Power Mains Before commissioning, check that the rated mains voltage and mains frequency, as stated on the type plate match your power supply. Always install an RCD with a maximum trip current of 30 mA upstream. The red electronics signal indicator (10) lights up briefly when the mains plug is inserted in the socket, indicating readiness for operation. Setting speed The speed can be preset via the thumb-wheel (11) and is infinitely variable. Positions 1-6 correspond approximately to the following no-load speeds: 14 1 ........ 800 / min 2 ........ 1250 / min 3 ........ 1700 / min 4........2150 / min 5........2600 / min 6........3000 / min The VTC electronics make material-compatible work possible and an almost constant speed, even under load. The best way to determine the ideal speed setting is by performing a test. 6.3 For cordless machines only Dust filter Always fit the dust filter (17) if the surroundings are heavily polluted. The machine heats up faster when the dust filter (17) is fitted. It is protected by the electronics system from overheating (see Section 10.). Attachment: See page 2, fig. C. Fit the dust filter (17) as shown. To remove: Hold the dust filter (17) by the upper edges, raise it slightly and then pull it downwards and remove. Rotating battery pack See page 2, fig. D. The rear section of the machine can be rotated 270° in 3 stages, thus allowing the machine's shape to be adapted to the working conditions. Only operate the machine when it is in an engaged position. Battery pack Charge the battery pack (21) before use. Recharge the battery pack if performance diminishes. The ideal storage temperature is between 10°C and 30°C. "Li-Power, LiHD" lithium ion battery packs have a capacity and signal indicator (20): - Press the button (19), the LEDs indicate the charge level. - The battery pack is almost flat and must be recharged if one LED is flashing. Removing and inserting the battery pack To remove: Press the battery pack release button (18) and pull the battery pack (21) downwards and out. To insert: Slide the battery pack (21) in until it engages. 7. Switching on and off Always guide the machine with both hands. Switch on first, then guide the accessory towards the workpiece. The machine must not be allowed to draw in additional dust and shavings. When switching the machine on and off, keep it away from dust deposits. After switching off the machine, only place it down when the motor has come to a standstill.
-
 1
1 -
2
-
3
-
4
-
5
-
6
-
7
-
8
-
 9
9 -
 10
10 -
 11
11 -
 12
12 -
 13
13 -
 14
14 -
 15
15 -
 16
16 -
 17
17 -
 18
18 -
 19
19 -
20
-
21
-
22
-
23
-
24
-
25
-
26
-
27
-
28
-
29
-
30
-
31
-
32
-
33
-
34
-
35
-
36
-
37
-
38
-
39
-
40
-
41
-
42
-
43
-
44
-
45
-
46
-
47
-
48
-
49
-
50
-
51
-
52
-
53
-
54
-
55
-
56
-
57
-
58
-
59
-
60
-
61
-
62
-
63
-
64
-
65
-
66
-
67
-
68
-
69
-
70
-
71
-
72
-
73
-
74
-
75
-
76
-
77
-
78
-
79
-
80
-
81
-
82
-
83
-
84
-
85
-
86
-
87
-
88
-
89
-
90
-
91
-
92
-
93
-
94
-
95
-
96
-
97
-
98
-
99
-
100
-
101
-
102
-
103
-
104
-
105
-
106
-
107
-
108
 |
 |