Miele Dynamic U1 Jazz - SHCE0 Operating instructions - Page 14
en-US
 |
View all Miele Dynamic U1 Jazz - SHCE0 manuals
Add to My Manuals
Save this manual to your list of manuals |
Page 14 highlights
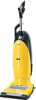
en-US References to illustrations The illustrations referred to in the text are shown on the fold-out pages at the end of these Operating Instructions. Preparing for use Assembly (Fig. 01) Raise the vacuum cleaner into the vertical position. Insert the handle into the vacuum cleaner until it clicks into position. Activating the exhaust filter change indicator Depending on the model, your vacuum cleaner will come standard with one of the following exhaust filters (Fig. 02): a AirClean b Active AirClean 30 (black) c HEPA AirClean 30 (white) If your vacuum cleaner is equipped with filter type b or c, you will need to activate the exhaust filter change indicator. Open the lid of the exhaust filter compartment and pull the exhaust filter slightly out of the holder (Fig. 03). Remove the indicator strip, then reinsert the exhaust filter (Fig. 04). Press the exhaust filter change indicator (Fig. 05). After approx. 10 - 15 seconds, a thin red stripe will appear on the left-hand side of the display (Fig. 06). Close the exhaust filter compartment lid. Function of the exhaust filter change indicator The exhaust filter change indicator shows the remaining functional life of the exhaust filter. After approx. 50 operating hours, or approx. one year of average use, the display will be completely filled with red (Fig. 07). Use Unwinding the power cord (Fig. 08) The lower cord hook can be pivoted. Turn it upwards so that the cord can be removed easily. Winding up the power cord (Fig. 09) When the vacuum cleaner is not in use, the power cord can be wound around the two cord hooks. Secure the power cord by clipping the plug to the cord (see detailed image). Plugging in the vacuum cleaner (Fig. 10) When vacuuming, loop the power cord through the guide notch on the side of the upper cord hook. This will keep the power cord from getting in the way during vacuuming. It also protects the cable from becoming kinked at the handle. Releasing the vacuum cleaner (Fig. 11) Press the foot release briefly and tilt the vacuum cleaner to a comfortable position for vacuuming. 14
-
 1
1 -
2
-
3
-
4
-
5
-
6
-
7
-
8
-
 9
9 -
 10
10 -
 11
11 -
 12
12 -
 13
13 -
 14
14 -
 15
15 -
 16
16 -
 17
17 -
 18
18 -
 19
19 -
20
-
21
-
22
-
23
-
24
-
25
-
26
-
27
-
28
-
29
-
30
-
31
-
32
-
33
-
34
-
35
-
36
-
37
-
38
-
39
-
40
-
41
-
42
-
43
-
44
-
45
-
46
-
47
-
48
-
49
-
50
-
51
-
52
-
53
-
54
-
55
-
56
-
57
-
58
-
59
-
60
-
61
-
62
-
63
-
64
 |
 |
