Miele RX1 Robot Vacuum Product Manual - Page 12
Connect the base station dia. 5 - 9, Charge the rechargeable battery, dia. 10, Rechargeable battery
 |
View all Miele RX1 Robot Vacuum manuals
Add to My Manuals
Save this manual to your list of manuals |
Page 12 highlights
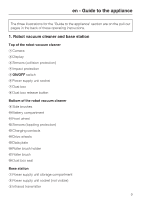
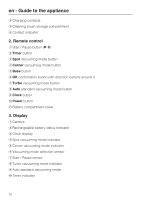
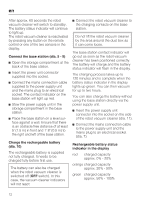
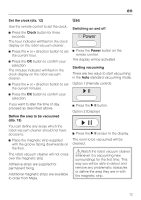
en After approx. 60 seconds the robot vacuum cleaner will switch to standby. The battery status indicator will continue to light up. The robot vacuum cleaner is reactivated by pressing any button on the remote control or one of the two sensors in the display. Connect the base station (dia. 5 - 9) ^ Open the storage compartment at the back of the base station. ^ Insert the power unit connector supplied into the socket. ^ Connect the mains connection cable supplied to the power supply unit and the mains plug to an electrical socket. The contact indicator on the base station will light up red. ^ Stow the power supply unit in the storage compartment in the base station. ^ Place the base station on a level surface against a wall. Ensure that there is an obstacle free distance of at least 5' (1.5 m) in front and 1' 8" (0.5 m) to the right and left of the base station. ^ Connect the robot vacuum cleaner to the charging contacts on the base station. Do not lift the robot vacuum cleaner by the area around the dust box as it can come loose. The base station contact indicator will go out as soon as the robot vacuum cleaner has been positioned correctly. The battery will charge and the battery status indicator will flash in the display. The charging process takes up to 120 minutes and is complete when the battery status indicator in the display lights up green. You can then vacuum for up to two hours. You can also charge the battery without using the base station directly via the power supply unit. ^ Insert the power supply unit connector into the socket on the side of the robot vacuum cleaner (dia. 11). ^ Connect the mains connection cable to the power supply unit and the mains plug to an electrical socket (dia. 7). Charge the rechargeable battery (dia. 10) The rechargeable battery is supplied not fully charged. It needs to be charged fully before first use. The battery can also be charged when the robot vacuum cleaner is switched off (OFF switch). In this case, the vacuum cleaner indicators will not react. Rechargeable battery status indicator in the display red charged capacity approx. 0% - 20% orange charged capacity approx. 20% - 50% green charged capacity approx. 50% - 100% 12
-
 1
1 -
2
-
3
-
4
-
5
-
6
-
 7
7 -
 8
8 -
 9
9 -
 10
10 -
 11
11 -
 12
12 -
 13
13 -
 14
14 -
 15
15 -
 16
16 -
 17
17 -
18
-
19
-
20
-
21
-
22
-
23
-
24
-
25
-
26
-
27
-
28
-
29
-
30
-
31
-
32
-
33
-
34
-
35
-
36
-
37
-
38
-
39
-
40
-
41
-
42
-
43
-
44
-
45
-
46
-
47
-
48
-
49
-
50
-
51
-
52
-
53
-
54
-
55
-
56
-
57
-
58
-
59
-
60
-
61
-
62
-
63
-
64
-
65
-
66
-
67
-
68
 |
 |