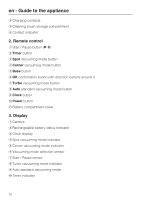
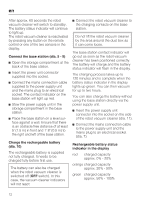
Miele RX1 Robot Vacuum Product Manual - Page 13
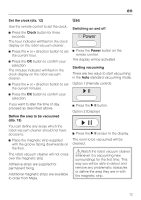
Set the clock dia. 12, Clock, Define the area to be vacuumed, dia. 13, Switching on and off, Power,
 |
View all Miele RX1 Robot Vacuum manuals
Add to My Manuals
Save this manual to your list of manuals |
Page 13 highlights
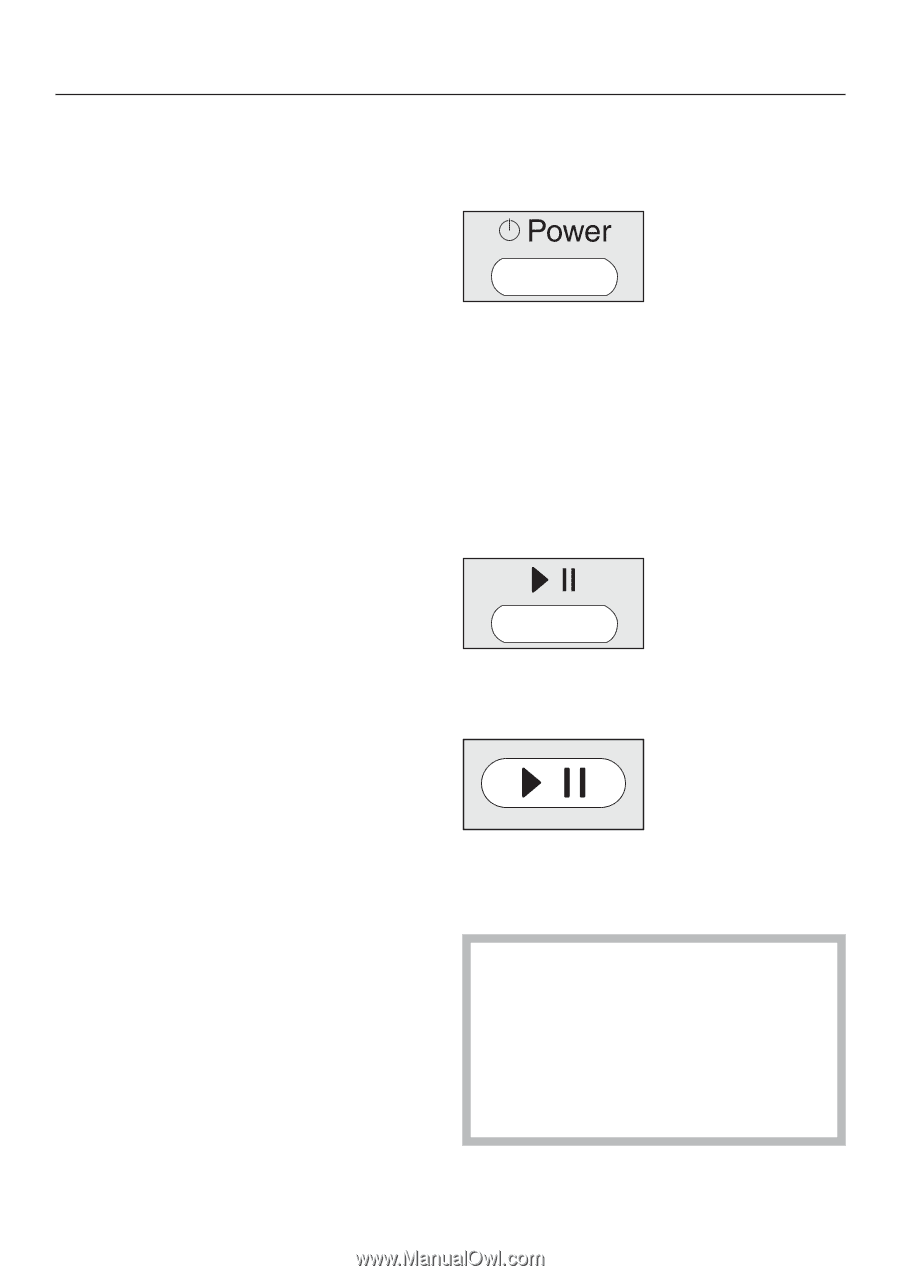
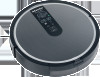
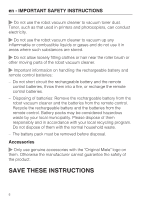
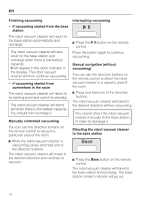
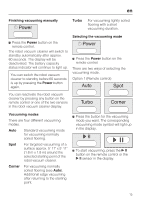
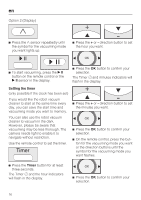
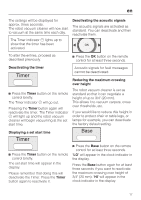
en Set the clock (dia. 12) Use Use the remote control to set the clock. ^ Press the Clock button for three seconds. The hour indicator will flash in the clock display on the robot vacuum cleaner. ^ Press the + or - direction button to set the current hour. ^ Press the OK button to confirm your selection. The minutes indicator will flash in the clock display on the robot vacuum cleaner. ^ Press the + or - direction button to set the current minutes. Switching on and off ^ Press the Power button on the remote control. The display will be activated. Starting vacuuming There are two ways to start vacuuming in the Auto standard vacuuming mode. Option 1 (Remote control) ^ Press the OK button to confirm your selection. If you want to alter the time of day, proceed as described above. Define the area to be vacuumed (dia. 13) ^ Press the ~ II button. Option 2 (Display) You can define any areas which the robot vacuum cleaner should not have access to. ^ Place the magnetic strip supplied with the groove facing downwards on the floor. The robot vacuum cleaner will not cross over the magnetic strip. Adhesive strips are supplied for permanent fixing. Additional magnetic strips are available to order from Miele. ^ Press the ~ II sensor in the display. The room to be vacuumed will be cleaned. ,Watch the robot vacuum cleaner whenever it is vacuuming new surroundings for the first time. This way you will be able to detect and remove any problematic obstacles or define the area they are in with the magnetic strip. 13
-
 1
1 -
2
-
3
-
4
-
5
-
6
-
7
-
 8
8 -
 9
9 -
 10
10 -
 11
11 -
 12
12 -
 13
13 -
 14
14 -
 15
15 -
 16
16 -
 17
17 -
 18
18 -
19
-
20
-
21
-
22
-
23
-
24
-
25
-
26
-
27
-
28
-
29
-
30
-
31
-
32
-
33
-
34
-
35
-
36
-
37
-
38
-
39
-
40
-
41
-
42
-
43
-
44
-
45
-
46
-
47
-
48
-
49
-
50
-
51
-
52
-
53
-
54
-
55
-
56
-
57
-
58
-
59
-
60
-
61
-
62
-
63
-
64
-
65
-
66
-
67
-
68
 |
 |