Motorola HMVC3020 Quick Start Guide - Page 5
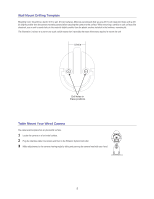
Wall Mount Drilling Template, Table Mount Your Wired Camera
 |
UPC - 612572123317
View all Motorola HMVC3020 manuals
Add to My Manuals
Save this manual to your list of manuals |
Page 5 highlights
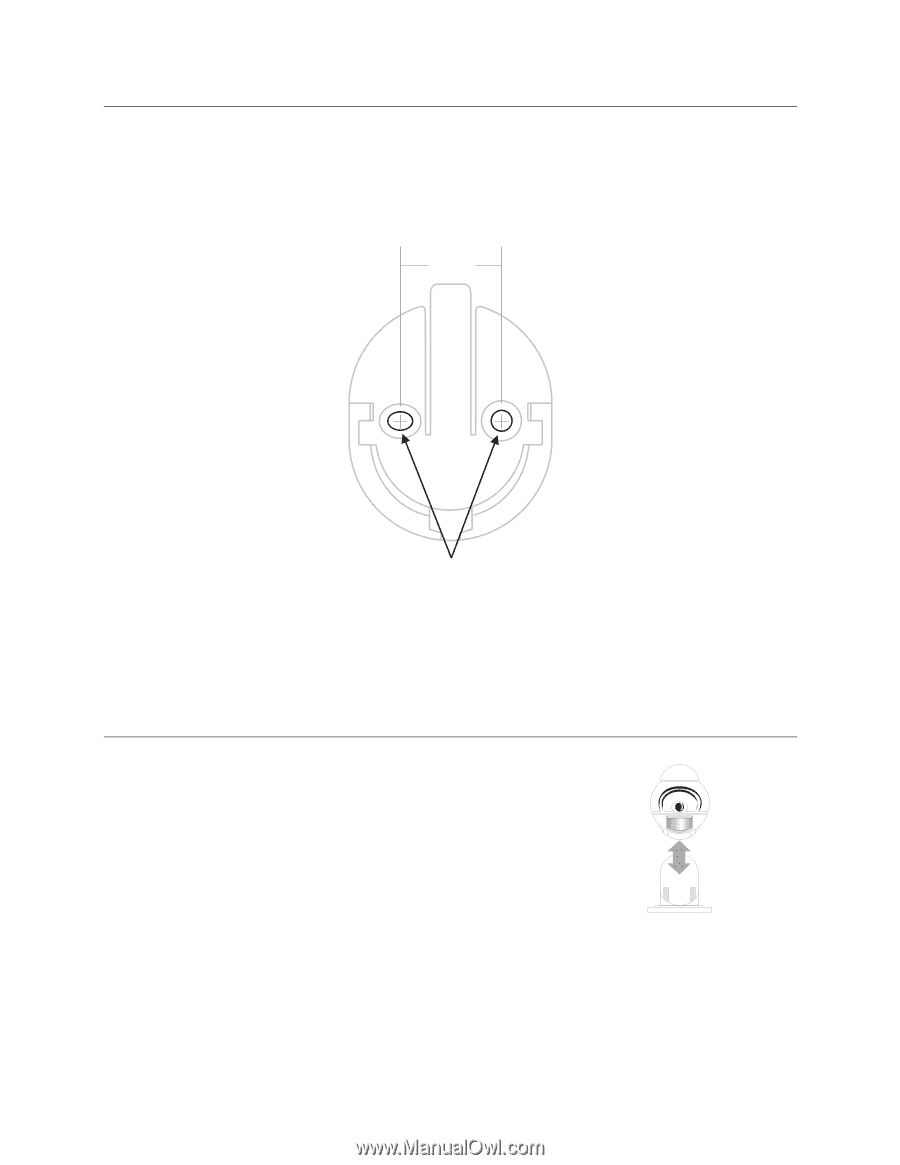
Wall Mount Drilling Template Mounting tools: Screwdriver, electric drill or awl. On hard surfaces, Motorola recommends that you pre-drill ½-inch deep pilot holes with a drill bit slightly smaller than the camera mounting screws before securing the camera to the surface. When mounting a camera on soft surfaces like sheetrock, use an awl to punch holes in the material slightly smaller than the plastic anchors included in the hardware mounting kit. The illustration is drawn to a one-to-one scale, which means that it provides the exact dimensions required to mount the unit. 0.94 in Drill holes in these positions Table Mount Your Wired Camera The camera can be placed on any horizontal surface. 1 Locate the camera on a horizontal surface. 2 Plug the interface cable into camera and then to the Wireless System Controller. 3 Make adjustments to the camera viewing angle by tilting and panning the camera head with your hand. 5
-
 1
1 -
 2
2 -
 3
3 -
 4
4 -
 5
5 -
 6
6 -
 7
7 -
 8
8 -
 9
9 -
 10
10
 |
 |