Motorola MD71 User Guide - Page 36
Setting the Date and Time, MM/DD or DD/MM.
 |
UPC - 612572110980
View all Motorola MD71 manuals
Add to My Manuals
Save this manual to your list of manuals |
Page 36 highlights
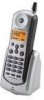
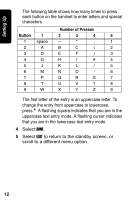
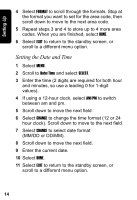
Setting Up 4 Select FORMAT to scroll through the formats. Stop at the format you want to set for the area code, then scroll down to move to the next area code. 5 Repeat steps 3 and 4 to store up to 4 more area codes. When you are finished, select DONE. 6 Select EXIT to return to the standby screen, or scroll to a different menu option. Setting the Date and Time 1 Select MENU. 2 Scroll to Date/Time and select SELECT. 3 Enter the time (2 digits are required for both hour and minutes, so use a leading 0 for 1-digit values). 4 If using a 12-hour clock, select AM/PM to switch between am and pm. 5 Scroll down to move the next field. 6 Select CHANGE to change the time format (12 or 24 hour clock). Scroll down to move to the next field. 7 Select CHANGE to select date format (MM/DD or DD/MM). 8 Scroll down to move the next field. 9 Enter the current date. 10 Select DONE. 11 Select EXIT to return to the standby screen, or scroll to a different menu option. 14
-
 1
1 -
2
-
3
-
4
-
5
-
6
-
7
-
8
-
9
-
10
-
11
-
12
-
13
-
14
-
15
-
16
-
17
-
18
-
19
-
20
-
21
-
22
-
23
-
24
-
25
-
26
-
27
-
28
-
29
-
30
-
 31
31 -
 32
32 -
 33
33 -
 34
34 -
 35
35 -
 36
36 -
 37
37 -
 38
38 -
 39
39 -
 40
40 -
 41
41 -
42
-
43
-
44
-
45
-
46
-
47
-
48
-
49
-
50
-
51
-
52
-
53
-
54
-
55
-
56
-
57
-
58
-
59
-
60
-
61
-
62
-
63
-
64
-
65
-
66
-
67
-
68
-
69
-
70
-
71
-
72
-
73
-
74
-
75
-
76
-
77
-
78
-
79
-
80
-
81
-
82
 |
 |