Mr. Coffee BVMC-VMX38-DS User Manual - Page 7
B. Water Filtration System Not included in all models, C. Adding Water and Ground Coffee
 |
View all Mr. Coffee BVMC-VMX38-DS manuals
Add to My Manuals
Save this manual to your list of manuals |
Page 7 highlights
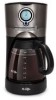
B. Water Filtration System (Not included in all models) Congratulations! You are the owner of a MR. COFFEE® water filtration system. Using the Mr. Coffee® carbon-based water filter in the Mr. Coffee® coffeemaker during the brewing process helps remove up to 97% of the Red chlorine from the water and improves the Indicator taste of your coffee. First, look for the MR. COFFEE Filter Friendly symbol on the bottom of your filter basket. If you do not see this symbol, please call 1-800-672-6333. To use the water filtration system in your MR. COFFEE® Coffeemaker, please follow these steps: 1. Align the red indicator on the frame to the letter that corresponds with the month that you are using the disk for the first time. This serves to remind you to change the disk every month (approx. 30 brewing cycles). To change the disk, remove the used disk, insert new disk into the frame. NOTE: For optimum results, use the water filtration system with a permanent filter. 2. Rinse the water filter in fresh water before first use. 3. Follow Adding Water and Coffee instructions. 4. When you are done brewing your coffee, rinse the water filter with fresh water. Do not put your water filter in the dishwasher. Frame To replace the water filter disks: slide the used disk from your water filtration Filter Disk system. To insert the new disk, slide disk into the frame. 12 BVMC-VM Series_17ESM1.indd 13-14 C. Adding Water and Ground Coffee 1. Open the brew basket lid. For your convenience, you can lift out the removable filter basket. 2. Place a MR. COFFEE® brand 10-12 cup paper basket-style filter or a MR. COFFEE® permanent filter into the removable filter basket (Figure 5). NOTE: If using paper filters, it is important that the sides of the filter fit flush against the side of the filter basket. If filter Figure 5 collapse occurs, dampen the filter before placing in the filter basket and adding ground coffee and water. 3. Add the desired amount of coffee and gently shake to level the coffee. See the Suggested Coffee Measurement Chart. 4. After following instructions in the Water Filtration System, place the MR. COFFEE® water filter in the basket, making sure that the side marked "this side up" faces you and that the water filter is level. 5. Be sure the removable filter basket is properly centered and all the way down in the brew basket and close the lid. 6. Fill the decanter with cold, fresh water to the desired capacity (1 cup equals 5 ounces) For easy and accurate filling, the water markings on the glass decanter and on the coffeemaker's water window, should show the amount of water needed to make the corresponding desired number of cups. Do not fill past the "12 cup MAX line" or water will flow out of the overfill hole in the back of the coffeemaker. The amount of coffee brewed will always be slightly less than the amount of water poured in the water reservoir. This is due to the minimum absorption of water by the coffee grounds. 7. Lift the pour through. 13 6/28/17 10:40
-
 1
1 -
 2
2 -
 3
3 -
 4
4 -
 5
5 -
 6
6 -
 7
7 -
 8
8 -
 9
9 -
 10
10 -
 11
11 -
 12
12 -
13
-
14
-
15
-
16
-
17
-
18
-
19
-
20
-
21
-
22
-
23
-
24
-
25
-
26
-
27
-
28
-
29
 |
 |
