NEC EA232WMi MultiSync EA232WMi-BK : user manual - Page 9
C.2, English - monitor
 |
View all NEC EA232WMi manuals
Add to My Manuals
Save this manual to your list of manuals |
Page 9 highlights
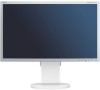
English 5. To keep the cables neatly organized, place them into the cable management system that is built into the stand. Place the Power cord and DVI cables into the specific hooks, as indicated in Figure C.2/Figure C.3. Place the D-Sub and the USB cables into the specific hooks, as indicated in Figure C.2/Figure C.3. 6. Make sure all cables are resting flat against the stand (Figure C.2/Figure C.3). Please check Tilt, Rise and Lower monitor screen and screen rotation when you manage cables. DVI Cable Power Cord DisplayPort Cable D-SUB Cable USB Cable Audio Cable Flat USB Cable Audio Cable D-SUB Cable DVI Cable DisplayPort Cable Power Cord Flat Figure C.2 Figure C.3 7. Hold all cables firmly and place the cable cover onto the stand (Figure D.1). To remove the cable cover, lift the cover off as shown in Figure D.2. Insert Top First Figure D.1 Figure D.2 English-7
-
 1
1 -
2
-
3
-
 4
4 -
 5
5 -
 6
6 -
 7
7 -
 8
8 -
 9
9 -
 10
10 -
 11
11 -
 12
12 -
 13
13 -
 14
14 -
15
-
16
-
17
-
18
-
19
-
20
-
21
-
22
 |
 |
