NEC MT1035 User Manual
NEC MT1035 - MultiSync XGA LCD Projector Manual
 |
View all NEC MT1035 manuals
Add to My Manuals
Save this manual to your list of manuals |
NEC MT1035 manual content summary:
- NEC MT1035 | User Manual - Page 1
NEC Multimedia Theatre MultiSync® MT1035™ LCD Projector User's Manual NEC Technologies NEC Multimedia Theatre NEC Technologies, Inc. 1250 N. Arlington Heights Road,Suite 500 Itasca, Illinois 60143-1248 Part No. 78409631 Printed in Japan - NEC MT1035 | User Manual - Page 2
manual carefully before using your NEC MultiSync MT1035 LCD Projector and keep the manual -SERVICEABLE PARTS INSIDE. REFER SERVICING TO QUALIFIED NEC SERVICE PERSONNEL should be read carefully to avoid problems. WARNING TO PREVENT FIRE OR SHOCK in accordance with the instructions, may cause harmful - NEC MT1035 | User Manual - Page 3
: a. The ceiling must be strong enough to support the LCD projector and the installation must be in accordance with any local building codes. b. The LCD projector must be installed by qualified NEC service personnel. Power Supply 1. The LCD projector is designed to operate on a power supply of - NEC MT1035 | User Manual - Page 4
pour but de prévenir l'utilisateur de la présence d'importantes instructions concernant l'entretien et le fonctionnement de cet appareil. Par conséquent, de sécurité importantes destinées à garantir une longue durée de service du projecteur à écran à cristaux liquides (LCD) et afin d'éviter - NEC MT1035 | User Manual - Page 5
respecter les instructions suivantes. a. Le plafond doit être suffisamment solide pour supporter le poids du projecteur à écran à cristaux liquides (LCD) et il doit être installé selon les codes blesser. Dans ce cas, contactez votre revendeur NEC afin de procéder au remplacement de la - NEC MT1035 | User Manual - Page 6
RRA NT Y 9 NEC MultiSync® LCD Projector Products NEC Technologies, Inc. ( nature, unauthorized product modification, or failure to follow instructions supplied with the product. b. Repair or attempted the problem to your dealer. 3. For the name of the nearest NECTECH authorized service center, - NEC MT1035 | User Manual - Page 7
An External Monitor 54 Projector Control Icons 67 Settings Menu(Maintenance Icons 69 Using the Viewer function 71 4. Maintenance Replacing The Lamp ...79 Cleaning Or Replacing The Filter 81 Remote Control Battery Installation 82 5. Troubleshooting Status Light Messages ...87 Common Problems - NEC MT1035 | User Manual - Page 8
PC or Mac. But best of all, the MultiSync MT1035 is an NEC LCD projector. That means you can depend on years of reliable performance and crystal- guaranteed for 2000 hours of service or six months, whichever comes first. • A wireless remote control that operates the projector from any angle. • A - NEC MT1035 | User Manual - Page 9
. • NEC MultiSync MT1035 LCD Projector • Remote Control With Built-In Laser Pointer And Cables • Mouse Adapter for IBM PS/2 and Mac • Serial Cable • Signal Cable (15-Pin Mini D-Sub To 15-Pin Mini D-Sub Connector) • Pin Adapter for Macintosh • Power Cable • Two AA Batteries • Quick Connect Guide - NEC MT1035 | User Manual - Page 10
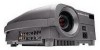
17 Getting To Know Your MultiSync MT1035 LCD Projector Front Features AC Input Plug the female end Remote Sensor Connector Cap Carrying Handle 10 INTRODUCTION S-VIDEO INPUT AUDIO L/MONO R RGB MONITOR OUTPUT AUDIO PC CONTROL MOUSE OUTPUT REMOTE CONTROL INPUT L/MONO R VIDEO INPUT AUDIO - NEC MT1035 | User Manual - Page 11
the power on and off when the Main Power Switch is on and the LCD projector is in standby. 2 Menu Button Displays the on- screen menu. 3 Select warning you that the projection lamp has exceed STATUS ++ 2000 hours of service. After this light appears, it is advisable to replace the projection - NEC MT1035 | User Manual - Page 12
Mini Jack This is where you connect RGB audio output from a computer or another RGB source. 21 1 3 S-VIDEO INPUT AUDIO L/MONO R RGB MONITOR OUTPUT AUDIO PC CONTROL MOUSE OUTPUT REMOTE CONTROL INPUT L/MONO R VIDEO INPUT AUDIO RGB INPUT 1 AUDIO RGB INPUT 2 AUDIO 2 4 12 INTRODUCTION - NEC MT1035 | User Manual - Page 13
. 7 Mouse Output Port Use this port to operate your computer's mouse functions from the NEC MultiSync MT1035 remote control. When your computer is connected here, the remote sensors on the LCD projector cabinet will receive your mouse commands. 8 Remote Control Jack Connect your remote control cable - NEC MT1035 | User Manual - Page 14
9 3 Infrared Transmitter Direct the remote control toward the remote sensor on the projector cabinet. 4 LED Flashes when any button is pressed. 5 Power On And turned on, you can use this button to turn your MultiSync MT1035 LCD Projector on and off. 6 Video Button Press to select an NTSC, PAL, - NEC MT1035 | User Manual - Page 15
11 Laser Button Press and hold this button to activate the laser pointer. When lit, you can use the laser to draw your audience's attention to a red dot that you can place on any object within 30 feet (10 m). 12 Menu Button Use this button to call up the On-Screen Menu so you can adjust and set - NEC MT1035 | User Manual - Page 16
19 Slide Button Press (+) to advance the next file or slide and (-) to return to the previous file or slide. (the optional MT Viewer board required) 20 Magnify Button Use the (+) or (-) button to adjust the image size up to 400%. When the Pointer is displayed, the magnified image is displayed at the - NEC MT1035 | User Manual - Page 17
can project your image. Attaching the lens cap to the lens hood with the supplied string and rivet. Lens cap Carrying The LCD Projector Always carry your LCD projector by the handle. Ensure that the power cord and any other cables connecting to video sources are disconnected before moving the - NEC MT1035 | User Manual - Page 18
is approximately 10.5˚ of up and down adjustment for the front of the projector. ) (A) Top view (B) Side view 6. If a trapezoidal distortion appears so that the lens surface is parallel to the screen. If you use the projector with the screen tilted, the picture will be distorted. Each of the rear - NEC MT1035 | User Manual - Page 19
center C : Horizontal throw distance between the screen surface and the lens D : Vertical distance between the projector bottom and the bottom of image E : Vertical distance between the projector bottom and the screen center 35 Formulas (mm) "H=Horizontal Screen Width M=1.25H/ 33.02 (Projection - NEC MT1035 | User Manual - Page 20
37 Standard Zoom Lens (Wide) α β (sin= α) γ (cos= α) Degree 9.40 9.24 9.20 9.17 9.14 9.12 9.10 9.07 9.05 9.04 9.02 9.01 9.01 0.02622 0.1665 0.1657 0.1651 0.1647 0.1643 0.1638 0.1633 0.1629 0.1628 0.1625 0.1623 0.1622 0.98658 0.98701 0.9871 0.9872 0.98729 0.9873 0.9874 0.98751 0.98756 0.98759 0. - NEC MT1035 | User Manual - Page 21
on the ceiling must be done by a qualified technician. Contact your NEC dealer for more information. Do not attempt to install the projector yourself. NOTE : Distances may vary ± 5%. Formulas (mm) "H=Horizontal Screen Width M=1.25H/ 33.02 (Projection magnification) A= C/ cosα F Β= 84.3+7.69M - NEC MT1035 | User Manual - Page 22
41 Standard Zoom Lens (Wide) α β (sin= α) γ (cos= α) Degree 9.26 9.11 0.166 0.166 0.987 0.987 9.07 0.166 0.988 9.04 0.165 0.988 9.01 0.165 0.988 8.99 0.164 0.988 8.96 0.164 0.988 8.93 8.92 0.163 0.163 0.988 0.988 8.91 0.163 0.988 8.89 0.162 0.988 8.88 0.162 0.988 8.88 0.162 0.988 - NEC MT1035 | User Manual - Page 23
mirror to reflect your LCD projector's image enables you to enjoy a much larger image. Contact your NEC dealer if you need a projector cabinet or (v) (w) buttons on your remote control to correct the orientation. (See page 70.) Screen AUDIO R S-VIDEO IN PU T L/M ONO AUDIO OUTPUT MONITOR - NEC MT1035 | User Manual - Page 24
R VIDEO INPUT AUDIO RGB INPUT 1 AUDIO RGB INPUT 2 AUDIO 45 To video, S-video, and audio inputs on the LCD Projector. VCR, DVD Player or LaserDisc Player Monitor Remote cable Mouse adapter (For Macintosh) Macintosh or Compatibles (Desk top type) Document Camera Mouse adapter (For IBM PS - NEC MT1035 | User Manual - Page 25
manual that comes with your new graphics board for installation instructions. 47 3. Use the signal cable that's supplied to connect your PC or Macintosh computer to the projector Monitor Mode Number of DIP switch S1 S2 S3 S4 S5 S6 S7 S8 Monitor other than display modes supported by your Macintosh - NEC MT1035 | User Manual - Page 26
/SVGA mode ON 12345678 NOTE: Refer to your computer's owner's manual for more information about your computer's video output requirements and any special identification or configuring your projector's image and monitor may require. Settings for Macintosh Adapter Macintosh models applied Setting - NEC MT1035 | User Manual - Page 27
and click "OK." If you have an NEC monitor connected to your Macintosh, you may have NEC projectors are designed to project industry standardized video such as VESA (Video Electronics supported by SXGA (1280ן1024) and when an SVGA image (800ן600) is displaying with a note book computer supported - NEC MT1035 | User Manual - Page 28
: Refer to your VCR or laser disc player owner's manual for more information about your equipment's video output requirements. Connecting An External Monitor You can connect a separate, external monitor to your LCD projector to simultaneously view on a monitor the image you're projecting. To do so - NEC MT1035 | User Manual - Page 29
operate your computer's mouse functions from the NEC MultiSync MT1035 remote control. It is port's serial cable, and connect the LCD Projector to your mouse port. 3. When the built (supplied) S-VIDEO INPUT AUDIO L/MONO R RGB MONITOR OUTPUT AUDIO REMOTE CONTROL INPUT L/MONO R VIDEO INPUT - NEC MT1035 | User Manual - Page 30
. General Controls Before you turn on your MultiSync MT1035 LCD Projector, ensure that the computer or video source is turned on and that your lens on the front panel. The power light will go out. IMPORTANT: • The LCD projector should be unplugged if it will not to be used for an extended period. • To - NEC MT1035 | User Manual - Page 31
cabinet or (v) (w) buttons on your remote control to highlight the menu for the item you want to adjust. 3. Press the "Enter" button on the projector cabinet or the "Left Click" button on the remote control to select a submenu or item. 4. Adjust the level or turn the selected item on or - NEC MT1035 | User Manual - Page 32
a VCR, DVD player, laser disc player, computer or document camera depending on what is connected to your inputs. Press the "Select" button on the projector cabinet or (v) (w) buttons on your remote control to highlight the menu for the item you want to adjust Video Selects what is connected to your - NEC MT1035 | User Manual - Page 33
Image Adjustment Menu 63 Provides access to controls for your image and sound. Use the "Select" button on the projector cabinet or (v) (w) buttons on your remote control to highlight the menu for the item you want to adjust. The volume, image mode, keystone, brightness, contrast, - NEC MT1035 | User Manual - Page 34
"Vertical Position", "Picture Adjustment", "Fine Picture" and "Resolution" manually. Horizontal Position૽૽૽(when Auto Mode is off) Use the Mouse pad the LCD projector automatically determines the best resolution for the current RGB input signal to project an image using NEC's AccuBlend Intelligent - NEC MT1035 | User Manual - Page 35
On" button on the remote control for ten seconds to reset the lamp clock back to zero. NOTE: The projector will turn off and go into stand by mode after 2100 hours of service. If this happens, press the "Power Off" button on the remote control for ten seconds to reset the - NEC MT1035 | User Manual - Page 36
is selected, press "Enter" on the projector cabinet or Left Click button on the remote feature enables you to select composite video standards M_NTSC manually. Normally select "Auto". Use the Mouse pad choose one of six languages for on-screen instructions. Press "ENTER" on the cabinet or the - NEC MT1035 | User Manual - Page 37
, you must first install the optional MT Viewer board (VK-MT) in the LCD projector and set up the exclusive software included with the VK-MT kit. See the user's manual included with the VK-MT for installing and uninstalling the software. Mounting the Optional MT Viewer Board To install the Viewer - NEC MT1035 | User Manual - Page 38
or ruin the flash memory card slot. See the flash memory card manual for information about the orientation of the flash memory card. 73 To be displayed. * If there is no flash memory card in the card slot, the LCD projector displays a blue back or black back image. 3. Select a file. Use the SLIDE + - NEC MT1035 | User Manual - Page 39
Selecting a File from a List of Files * The Viewer feature allows you to store one or more presentation materials in a single flash memory card. Each material is referred to as a "file" or "slide". To select a file from a list of files 1. Press the Menu button on the remote control or cabinet to - NEC MT1035 | User Manual - Page 40
+ advances to the next slide. NOTE: Editing tasks such as deleting the data inside the flash memory card cannot be accomplished with the LCD projector. Use the exclusive software on your PC for this purpose. If you accidentally delete data required for playback, playing back the data is not possible - NEC MT1035 | User Manual - Page 41
: Do not use a lamp other than the NEC replacement lamp. Order this from your NEC dealer using your projector's model number. 5. Reattach the lamp cover and . NOTE: If resetting the lamp clock back to zero after 2100 hours of service, press the "Power Off" (not "Power On") button on the remote - NEC MT1035 | User Manual - Page 42
with soap and water. Soap and water will damage the filter membrane. Before replacing the filter cover, remove dust and dirt from the projector cabinet. Keep out dust and dirt during filter replacement. Remote Control Battery Installation 1. Press firmly and slide the battery cover off. 2. Remove - NEC MT1035 | User Manual - Page 43
nouvel assemblage de compartiment lampe et fixez-le avec les deux vis. PRECAUTION: N'utilisez pas d'autres lampes qu'une lampe de rechange NEC. Commandez-la auprès de votre vendeur NEC en donnant le numéro de modèle du projecteur. 5. Fixez de nouveau le couvercle de lampe et serrer la vis unique - NEC MT1035 | User Manual - Page 44
85 Nettoyage ou remplacement du filtre Le coussin éponge du filtre à air maintient l'intérieur du projecteur à affichage à cristaux liquides MultiSync MT1035 à l'abri de la poussière ou de la saleté et doit être nettoyé toutes les 100 heures d'utilisation (plus souvent dans les endroits poussiéreux - NEC MT1035 | User Manual - Page 45
or if the room where you're presenting is particularly warm, move the projector to a cooler location. • Check the filter and clean it if necessary. • If the problem persists, contact your NEC dealer for service. Blinking slowly (On and off in a cycle of 8 sec.) Ⅵ The cooling fan has stopped - NEC MT1035 | User Manual - Page 46
the recalled Custom Memory supports the current input signal. • Install new batteries. (See page 82 or 86.) • Make sure there are no obstacles between you and the projector. • Stand within 23 feet (7m) of the projector. See the Status Light message chart on pages 87 and 88. Problem Cross color in - NEC MT1035 | User Manual - Page 47
vertical 100 - 120 / 220 - 240 VAC, 50 / 60 Hz 3.5 A 13.2" (W)ן5.8" (H)ן16.2" (D) 33.5 cm (W)ן14.8 cm (H)ן41.2 cm (D) 16.8 lbs / 7.6 kg LCD projector: 32° - 104°F(0° to 40°C), 20 - 80% humidity Remote control: 32° - 140°F (0° to 60°C) Remote mouse receiver: 32° - 140°F (0° to 60°C) UL - NEC MT1035 | User Manual - Page 48
.4" (290) ZOOM FOCUS ++ -- STATUS POWER ON/OFF ENTER + - SELECT MENU 14.9" (378.0) 16.24" (412.0) S-VIDEO INPUT AUDIO L/MONO R RGB MONITOR OUTPUT AUDIO PC CONTROL MOUSE OUTPUT L/MONO R VIDEO INPUT AUDIO RGB INPUT 1 AUDIO RGB INPUT 2 UTPUT REMOTE CONTROL INPUT 2 AUDIO 7" (178 - NEC MT1035 | User Manual - Page 49
95 D-Sub Pin Assignments PC 15-Pin mini D-Sub Pin No. Signal to be connected 1 Red 2 Green 3 Blue 4 GND 5 GND 6 Red GND 7 Green GND 8 Blue GND 9 No Connection 10 Digital GND 11 GND 12 No Connection 13 Horizontal Sync 14 Vertical Sync 15 No Connection PC 15-Pin mini - NEC MT1035 | User Manual - Page 50
Timing Chart Y/N Signal Y NTSC Y PAL Y SECAM Y VESA Y IBM Y VESA Y MAC Y VESA Y IBM Y MAC Y MAC Y MAC Y VESA Y VESA Y IBM Y VESA Y IBM Y IBM Y VESA Y IBM Y Y Y Y Y Y Y N Y Y Y Y Y Y Y 50 IBM VESA VESA VESA VESA VESA MAC VESA VESA VESA IBM MAC VESA VESA SGI MAC SUN SGI SGI VESA MAC HP VESA SUN - NEC MT1035 | User Manual - Page 51
Off 08 Picture Mute 09 Onscreen Mute 10 Power Zoom W 11 Power Zoom T 12 Power Focus + 13 Power Focus - 14 Reset 15 Freeze 16 Slide + Code 03H 04H 05H C6H 27H 08H 14H 47H 11H 09H 0AH 0BH 0CH 43H 4CH 4BH Data No No No No No No No No - NEC MT1035 | User Manual - Page 52
to 63 0 to 63 0 to 63 -32 to +31(E0 to 1F) 0 to 3 0 to 63 768 to 1279 (2 byte code) 0 to 31 -64 to +63 (C0 to 3F) -32 to +31 (E0 to 1F) 00:English, 01:German, 02:French data) CSUM CSUM = Checksum is a low-order digit of the sum from the Code to the immediately preceding data. 52 SPECIFICATIONS 102 - NEC MT1035 | User Manual - Page 53
on/off: Communications procedure: None Full duplex If the CPU of the LCD projector has received the data correctly, it returns an ACK(C5H). If the received Receiving failure: CA Err Err 01: Command Error (command not supported) Err 02: Checksum Error Err 03: Busy (command not acceptable
-
 1
1 -
 2
2 -
 3
3 -
 4
4 -
 5
5 -
 6
6 -
 7
7 -
8
-
9
-
10
-
11
-
12
-
13
-
14
-
15
-
16
-
17
-
18
-
19
-
20
-
21
-
22
-
23
-
24
-
25
-
26
-
27
-
28
-
29
-
30
-
31
-
32
-
33
-
34
-
35
-
36
-
37
-
38
-
39
-
40
-
41
-
42
-
43
-
44
-
45
-
46
-
47
-
48
-
49
-
50
-
51
-
52
-
53
 |
 |

Part No.
78409631
Printed in Japan
NEC Multimedia Theatre
NEC Multimedia Theatre
LCD Projector
User’s Manual
NEC Technologies, Inc.
1250 N. Arlington Heights Road,
°
Suite 500
°
Itasca, Illinois 60143-1248
MultiSync
®
MT
1035
™
NEC Technologies