NEC PN-HY501 PN-HS and PN-HY Series Operation Manual - Page 26
Menu Items, Schedule, Monitor Buttons Lock
 |
View all NEC PN-HY501 manuals
Add to My Manuals
Save this manual to your list of manuals |
Page 26 highlights
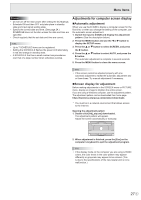
Menu Items MONITOR BUTTONS LOCK You can disable the monitor buttons. To disable MONITOR BUTTONS LOCK, press the FUNCTION button and then press the , , and buttons in this sequence. REMOTE CONTROL LOCK You can disable the remote control unit buttons. UNLOCKED Enable the remote control unit buttons. LOCK ALL Disable remote control unit buttons. LOCK EXCEPT VOLUME....... Disable remote control unit buttons except volume adjustment buttons. LOCK EXCEPT POWER......... Disable remote control unit buttons except POWER button. To disable REMOTE CONTROL LOCK, press the FUNCTION button and then press the , , and sequence before REMOTE CONTROL LOCK disappears. buttons in this THERMAL SENSOR SETTING Select the installation direction of the monitor. LANDSCAPE Landscape orientation PORTRAIT Portrait orientation FACE UP Screen faces up FACE DOWN Screen faces down LED Specifies whether to light the power LED. INFORMATION Displays monitor information. ROTATE 180° If video is upside down when the monitor is installed in portrait orientation, you can rotate the video 180 degrees. Interlaced signals may not be displayed properly. ALL RESET Resets the settings to the factory default settings. TIPS • When WHITE BALANCE is set to THRU, BLACK LEVEL, CONTRAST, TINT, COLORS, GAMMA, PRESET, USER and ACTIVE CONTRAST cannot be set. • If COLOR MODE is set to sRGB, the following items cannot be set. WHITE BALANCE, PRESET, USER, ACTIVE CONTRAST, and GAMMA • When the COLOR MODE is set to VIVID or HIGH ILLUMINANCE, GAMMA cannot be adjusted. nSCHEDULE You can set the time to switch the monitor on and off. An auto play file in a USB flash drive (see page 21) can also be played at a specified time. Set this function with SCHEDULE in the SETUP menu. (See page 24.) 1. Insert the USB flash drive to be played into USB port on the monitor when playing files. (See page 10.) 2. Press the or button to select the SCHEDULE number, and press the ENTER button. 3. Set the SCHEDULE. (See below) Move through the items with the or each item. 4. Press the MENU button. SCHEDULE becomes effective. button, and set (1) ON/OFF Enable/disable the SCHEDULE. (2) ON TIME Specify the time the power turns on. Set the time with the , , or button and press the RETURN button. (3) OFF TIME Specify the time the power turns off. Set the time with the , , or button and press the RETURN button. (4) REPEAT MODES Select the day of the week the schedule will be executed. Press the ENTER button to change the setting, and press the RETURN button. • ONLY ONCE The SCHEDULE will be executed once only regardless of the day of the week. When the schedule is set to ONLY ONCE, the setting is cleared after the schedule is executed. • EVERY SUN - EVERY SAT Executes the SCHEDULE on the specified day every week. Multiple days of the week can be specified. (5) INPUT Specify the input mode at power on. E 26
-
 1
1 -
2
-
3
-
4
-
5
-
6
-
7
-
8
-
9
-
10
-
11
-
12
-
13
-
14
-
15
-
16
-
17
-
18
-
19
-
20
-
 21
21 -
 22
22 -
 23
23 -
 24
24 -
 25
25 -
 26
26 -
 27
27 -
 28
28 -
 29
29 -
 30
30 -
 31
31 -
32
-
33
-
34
-
35
-
36
-
37
-
38
 |
 |
