Nady U-41 Manual - Page 9
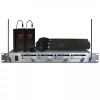
Ub-4 Bodypack Transmitter
 |
View all Nady U-41 manuals
Add to My Manuals
Save this manual to your list of manuals |
Page 9 highlights
UB-4 BODYPACK TRANSMITTER The UB-4 is equipped with two INPUT SELECTOR SWITCHES (27) located under the cover on the circuit board for selecting the type of audio input you will be supplying to the transmitter. Select from the choice of three positions: INSTRUMENT (for guitar, bass, etc.)/ HEADWORN MIC/ LAVALIER MIC. (G/H/L). There are two switches, one with selectable position G, H, L and the other with G, HL. To select inputs: (see chart on page 10) A. Instrument - both switches to "G" B. Headworn Mic - set one switch to "HL" and the other to "H" C. Lavalier Mic - set one switch to "HL" and the other to "L" Transmitter Operation To turn transmitter on, slide the OFF/STANDBY/ON switch (28) to the STANDBY position first (transmitter on, audio muted) or the ON position (transmitter and audio both on). The LOW BAT LED (29) will give a single flash, indicating usable battery strength. In case of dead or low battery, the LED will either not go on at all or will stay on continuously. During use, if the low battery/ LED stays on continuously, it is indicating that the battery should be replaced with a fresh one. To preserve battery life, turn the transmitter off when not in use. Receiver Volume Controls Adjust The volume controls adjust only the 1⁄4" sum output. Turn Volume controls (5) on the U-41 receiver clockwise to near full gain. Adjust Volume up or down so that no audio distortion is present when amplifier or mixer is set at their usual levels. At full gain, the system gain for LT or HM is approximately +20dB (+4dB for GT) higher than a direct line-to-amp connection. If the fixed level XLR outputs (10) are used, the volume level of each receiver should be adjusted by the mixer to which the U-41 receiver is connected. Level Trim Adjust For optimum performance, an input level control (30) for LT/HM is provided. Adjust the microphone gain by inserting a small slot-headed screwdriver to the adjustment knob, located on the topside of the transmitter unit, next to the mic input jack. Factory setting is 1⁄2 full. This is a setting to be used in most typical close microphone applications. Depending on the average distance between vocalist's mouth and microphone, you can adjust the level for your application. Set for maximum possible gain and headroom without noticeable distortion of the high level peaks. It is recommended that the level be set at about 1⁄2 maximum. Experiment and set for maximum possible gain without audible distortion on the high level peaks. (Note: Turning down the gain too much can compromise the signal-to-noise and it is not recommended.) The transmitter is now ready to use. The TX LED indicator on corresponding receiver should now be on, indicating a received signal from the transmitter. When ready to speak, slide the switch to the ON position. Adjust the volume of the receiver as per in the receiver operating instruction section. Notes: • The transmitter has an external flexible wire antenna. For proper operation, it should not be covered or touched during operation. • Observe care in selecting P.A. volume, transmitter location and speaker placement so that acoustic feedback (howling or screeching) will be avoided. 9
-
 1
1 -
2
-
3
-
 4
4 -
 5
5 -
 6
6 -
 7
7 -
 8
8 -
 9
9 -
 10
10 -
 11
11 -
 12
12 -
 13
13 -
 14
14 -
15
-
16
 |
 |
