Nady U-800 Manual - Page 11
Programming the U-800 to the Selected Group/Channel frequency - ht
 |
View all Nady U-800 manuals
Add to My Manuals
Save this manual to your list of manuals |
Page 11 highlights
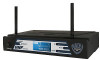
Programming the U-800 to the Selected Group/Channel (frequency) The Receiver must be programmed for a Group/Channel (frequency) first then automatic synchronization using the IR ASC™ Sync function to the transmitter. For system set up procedures, see next section "6. Selecting Group/Channel, IR Programming and Simultaneous Multichannel Operation" UH-800 HANDHELD MICROPHONE TRANSMITTER (HT) Setting up the UH-800 Transmitter The UH-800 requires two AA alkaline or NiMH batteries to operate (do not mix types). Installing batteries by unscrewing counterclockwise the BATTERY COVER (29) and slide down, exposing the BATTERY COMPACTMENT (32). Insert two fresh AA BATTERIES (31), observing the correct polarity as marked, and screw the cover back on to the microphone. Make sure the cover is screwed clockwise completely. Fresh alkaline batteries can last up to 10 hours in use, but in order to ensure optimum performance, it is recommended that you replace the batteries after every 6-8 hours of use. Powering the UH-800 Transmitter On/Off Turn on the UH-800 by sliding the AUDIO SWITCH (36) to the OFF position first. Then slide the POWER SWITCH (35) to the ON position. The POWER ON LED (33) will stay on, indicating that the transmitter is now on. The BATTERY LED (34) will stay off, indicating usable battery strength. In the case of a dead or low battery, the low battery LED will light red continuously, indicating that the batteries should be replaced with fresh ones. To preserve battery life, turn the transmitter off when not in use. To turn the transmitter off, slide the RF POWER (35) switch to the OFF position. The POWER ON LED (33) is not lit up, indicating the unit is off. The MUTE ICON (6) on the receiver should be on, muting the audio out. At power off the transmitter will store the last settings entered and re-display them at the next power on. The default factory setting is Group 11, Channel 01. For optimum performance, an AUDIO INPUT LEVEL (30) is provided. Adjust the gain by turning the control with a small screwdriver. It is recommended that the level be set at about 1/2 maximum. Experiment and set for maximum possible gain without audible distortion on the high level peaks. (Note: Turning down the gain too much can compromise the signal-to-noise and it is not recommended.) The microphone is now ready to use. The diversity A/B INDICATORS (9) on the U-800 receiver should now be on, indicating a received signal from the transmitter. When ready to speak, slide the AUDIO MUTE (36) to the ON position. The MUTE ICON (6) on receiver should be off. Adjust the volume of the receiver as per the Audio Output Microphone Connection section of the above U-800 receiver instructions. 11
-
 1
1 -
2
-
3
-
4
-
5
-
 6
6 -
 7
7 -
 8
8 -
 9
9 -
 10
10 -
 11
11 -
 12
12 -
 13
13 -
 14
14 -
 15
15 -
 16
16 -
17
-
18
-
19
-
20
-
21
-
22
-
23
-
24
 |
 |
