Nady U-800 Manual - Page 14
Selecting Group/channel, Ir Programming, And Simultaneous Multichannel Operation
 |
View all Nady U-800 manuals
Add to My Manuals
Save this manual to your list of manuals |
Page 14 highlights
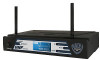
Connecting Input Audio Source Lapel/Head Mic Uses (UB-800 LT/HM) The mini 3.5mm locking INPUT JACK (39) is for connecting the audio input from a lavaliere/lapel Mic (LT), a Head Mic™ (HM), or an instrument (GT) cable, depending on which transmitter version is being used. Secure the connection to the cable by tightening the cable mini plug's outer ring counterclockwise. When ready to play, slide the AUDIO MUTE ON/OFF SWITCH (40) to the ON position to un-mute the audio. Adjust the INPUT VOLUME LEVEL (43) on the transmitter for suitable level. Instrument Use (UB-800 GT) Secure the connection of the GT (instrument) cable by tightening the mini plug outer ring counterclockwise onto the 3.5mm locking INPUT JACK (39). When ready to play, slide the AUDIO MUTE ON/OFF SWITCH (40) to the ON position to un-mute the audio. Adjust the volume on the receiver for one-to-one unity gain with a hardwired cord or select up to an added 4-5dB boost by adjusting the receiver volume to maximum for normal use with guitars and bass guitars. Note: The audio level should be adjusted on the instrument as when using a hardwired cord. Programming the UB-800 to the Selected Group/Channel (frequency) The transmitter must be programmed to the same frequency as selected for the receiver via automatic synchronization using the IR ASC™ Sync function. It cannot be programmed on the transmitter itself. See next section "6. Selecting Group/Channel, IR Programming and Simultaneous Multichannel Operation". 6. SELECTING GROUP/CHANNEL, IR PROGRAMMING AND SIMULTANEOUS MULTICHANNEL OPERATION Note: Note: The transmitter should be turned ON and ready for the IR communications with the receiver IR receptor for the following process. Note: If no button is pressed within the five seconds period during a selection, the program is terminated and the process needs to be repeated. Note: For normal operation, the transmitter should have the same channel as displayed on the receiver. Choosing Group/Channel for the System The receiver offers a choice of 15 groups: 10 that are Factory PRESET (Group 11 to 1A) and 5 that are User SELECTABLE (Group 1B to 1F). If the Factory PRESET Group mode is chosen, only a limited numbers of channels are available in these groups. For most convenient setup, each of these groups offers from 3 to 14 channels (depending on group selected) to choose from that are factory preset for simultaneous multichannel operation compatibility and are retained in memory after the receiver is powered off. For the User SELECTABLE Group 1B-1F mode, a letter "U" will lit up on the LCD DISPLAY (5) instead of the CHANNEL (12) number as in the Factory PRESET Groups. Each User SELECTABLE Group has 800 channels to choose from either by manually selecting a channel or using the Auto-Scan in 1MHz segment increments at a time within the frequency band and they are retained in memory 14
-
 1
1 -
2
-
3
-
4
-
5
-
6
-
7
-
8
-
 9
9 -
 10
10 -
 11
11 -
 12
12 -
 13
13 -
 14
14 -
 15
15 -
 16
16 -
 17
17 -
 18
18 -
 19
19 -
20
-
21
-
22
-
23
-
24
 |
 |
