Nady W-1KU Manual - Page 13
Group, Channel, Volume - lt
 |
View all Nady W-1KU manuals
Add to My Manuals
Save this manual to your list of manuals |
Page 13 highlights
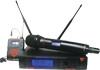
more at three seconds, indicating that the IR transmission is over. Upon successful data transfer (usually in less than two seconds) the transmitter's backlight will light up and the transmitter will transmit a radio signal on the same channel as the receiver. The Signal Strength and Diversity Indicators on the receiver's LCD display will then light up, indicating that the IR link is completed. If no action is taken during the three seconds of active data transfer, the receiver and the transmitter units do not link and transmitter's previous program channel remains unchanged. input level only, press the Set button three times to select the volume input level setting. Use the or to change in four steps from 0dB to -30dB (for loudest input). The level is preset at 0dB for GT and -10dB for LT/HM. These settings are optimal for most applications. For normal operation, the transmitter should have the same Group/Channel as displayed on the receiver. After programming is finished, close the battery compartment door, ensuring that it latches. The BT-1KU is now ready for use. Note: The IR link is infrared light and thus works best when this data transfer is accomplished in a light-shielded or darker environment. It may not be successful in a brightly lit area. If the transfer fails, repeat the procedure in a darker location or somehow shield the link from outside light to success-fully program the transmitter with the pre-programmed group and channel info from the receiver. BT-1KU Transmitter Switches At Power Off the transmitter will store the last settings entered and re-display them at the next power on where it can be reprogrammed to any new Group/Channel. The default factory setting is Group 08, Channel 00. Manual Programming (GRP/CH and Volume): The transmitter's frequency is set using the Set Button (44) and then the (UP) or (DOWN) Buttons (43). To start, press the Set button once. The backlight on the LCD (36) will light up and the Group Icon (37) will flash. Use the or buttons to change the group. When a group selection is finished, press the Set button again for the channel selection. The Channel Icon (38) will now flash. Again, use the or buttons to change the channel as desired. When the group/channel selection is done, press the Set button to enter volume level input setting and then press or to change in four steps from 0dB to -30dB (for loudest input) or press the Set button a second time to exit to the main menu. To change volume The RF Power Level Switch (42) is used to select Hi/Low power transmission (see Operating the BT-1KU Handheld Transmitter). When the Set Button (44) is pressed, the LCD main menu will cycle in this order: MAIN MENU > GROUP > CHANNEL > VOLUME > repeat The selected function will flash for 20 seconds before returning to the main menu. The (UP) or (DOWN) Buttons (43) work in the set mode only. They can be used to change any Group/Channel as selected (if not using IR Sync from receiver). They can also be used to select the desired Input audio level VOL setting. 13
-
 1
1 -
2
-
3
-
4
-
5
-
6
-
7
-
 8
8 -
 9
9 -
 10
10 -
 11
11 -
 12
12 -
 13
13 -
 14
14 -
 15
15 -
 16
16 -
 17
17 -
 18
18 -
19
-
20
 |
 |
