Naxa NTD-7561A NTD-7561 English Manual - Page 7
Control, Reference, Guide
 |
View all Naxa NTD-7561A manuals
Add to My Manuals
Save this manual to your list of manuals |
Page 7 highlights
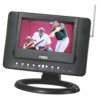
CONTROL REFERENCE GUIDE Main unit 16 17 18 19 24 20 e rt • * lel. e * 910111213 14 15 1SD/MMC/MS card slot 2 USB slot 3 Built-in Speaker. 4 TFT Display Window- Displays all information about DVD/TV work scene. 5 SWITCH button- Press this button to switch the unit between TV and DVD mode. 6 PLAY/PAUSE button- Press this button to start or pause playing a disc. 7 DOWN/CH- button-Press this button to down, and in DVD mode, if you keep pressing it for more than 2 seconds, the player will skip to the next chapter or title(DVD) or track (for CD),In TV mode.press this button to play the previous channel. 8 UP/CH+ button- Press this button to up, and in DVD mode, if you keep pressing it for more than 2 seconds, the player will skip to the previous chapter or title(for DVD)or track (for CD),In TV mode, press this button to play the next channel. 9 LEFT/ FR button- Press LEFT button to left. and if you keep pressing it for more than 2 seconds, the playerwill play the disc backward at speed:x2,x4,x8,x16,x32. 10 OK/MEN U/TV SETUP button-Press it to confirm a selection. Press and hold it for more than 2 seconds to return to root menu in DVD mode; to turn on/off the PBC (for VCD); to enter TV PAGE menu in TV mode. 11 RIGHT/F F button- Press RIGHT button to right, and if you keep pressing it for more than 2 seconds, the player will play the disc forward at speed:x2,x4,x8,x16,x32. 12 VOL - button- Press this button to decrease the volume. 13 VOL+ button- Press this button to increase the volume. 14 CHARGE INDICATOR, Power ON / Standby Indicator 6 21 22 23 15 Remote control sensor 16 External Antenna Jack- When the signal is too weak, connect a external antenna to this jack fora better reception. 17 AV OUT Jack -Connect TV or other external AV equipment to this jack to use the unit as a signal source. 18 Phone- Connect headphone to this jack for private listening. 19 Power Switch- Switch this knob to turn on the unit or set it in standby mode. 20 DC In Jack- Power input jack. 21 TELESCOPING ANTENNA 22 STAND HOLDER 23 BATTERY COVER 24 OPEN-To open the disc cover.
-
 1
1 -
 2
2 -
 3
3 -
 4
4 -
 5
5 -
 6
6 -
 7
7 -
 8
8 -
 9
9 -
 10
10 -
 11
11 -
 12
12 -
13
-
14
-
15
-
16
-
17
-
18
-
19
-
20
-
21
-
22
-
23
-
24
-
25
-
26
-
27
-
28
-
29
-
30
-
31
-
32
-
33
-
34
 |
 |
