Netgear MA111v1 MA111v1 User Manual - Page 4
Install the MA111 Wireless USB Adapter, Verify the Driver Installation - driver windows 7
 |
View all Netgear MA111v1 manuals
Add to My Manuals
Save this manual to your list of manuals |
Page 4 highlights
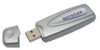
Install the MA111 Wireless USB Adapter 1. Insert the MA111 802.11b Wireless USB Adapter into the USB port on your computer as shown here. Desktop PC Notebook PC with MA111 802.11b Wireless USB Adapter MA111 802.11 Wireless USB Adapter 2. Windows will automatically detect the MA111 802.11b Wireless USB Adapter and the Found New Hardware Wizard dialog box will appear. 3. Follow the on-screen instructions to install the driver for the MA111 802.11b Wireless USB Adapter. • For Windows 98/ME users, once the [Please insert the disk labeled "Windows 98/ME CD-ROM," and then click OK] window appears, enter the path corresponding to the appropriate drives and click OK. Usually these files can be found at C:\Windows or C:\Windows\System. • For Windows 2000 users, a Digital Signature Not Found message may appear. Click Yes to proceed. • For Windows XP users, a Windows Logo Testing Not Found dialog box may appear. Click Continue Anyway to proceed. 4. Click Finish to complete the installation. Verify the Driver Installation It is a good idea to confirm that the MA111 802.11b Wireless USB Adapter has been properly installed. Follow the instructions that apply to your computer system: 1. From the Windows desktop, right-click My Computer. 5 2. Click Properties. 3. Open Device Manager: • Windows 98/ME users - Select the Device Manager folder tab. • Windows 2000/XP users - Select the Hardware folder tab, and click on the Device Manager button. 4. Double-click Network Adapters. There should be no yellow exclamation mark or red cross icon on the NETGEAR MA111 802.11b Wireless USB Adapter selection, as shown here. 5. Double-click NETGEAR MA111 802.11b Wireless USB Adapter. On the General folder tab, the Device Status window should indicate that the device is working properly, as shown here: The installation of the MA111 Wireless USB Adapter driver is complete. 6
-
 1
1 -
 2
2 -
 3
3 -
 4
4 -
 5
5 -
 6
6 -
 7
7 -
 8
8 -
 9
9 -
 10
10 -
11
-
12
-
13
-
14
-
15
 |
 |
