Netgear PS101v1 PS101v2 Installation Guide - Page 5
Connect the Print Server
 |
View all Netgear PS101v1 manuals
Add to My Manuals
Save this manual to your list of manuals |
Page 5 highlights
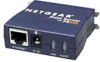
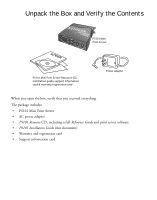
2 Connect the Print Server The PS101 Mini Print Server connects directly to the Centronics parallel port on your printer. After connecting it to your printer, you then connect the print server to a network device (like a hub, router, or switch). Centronics parallel port on the printer Before you share the printer with the NETGEAR PS101 Mini Print Server, you should have at least one computer connected to an Ethernet network and have one unused port on an Ethernet hub, switch, or router. Not Compatible with Mini Centronics-C Printers Note: For printers with a MiniCentronics C port, you will need to use one of the other NETGEAR Print Servers such as the PS111W, PS110 or PS113 along with the correct cable. Note: The procedures described in this guide are for a ETHERNET 9V DC LINK ALERT TCP/IP-based network environment. For NetBEUI Printer with PS101 protocol printing, please see the Reference Manual. attached 1. With the printer turned off, connect the print server to the Centronics connector on the printer. 2. Insert one end of an Ethernet patch (or straight-through) cable into an open Ethernet port in the network device (hub, switch, or router) and insert the other end into the Ethernet port on the print server. Note: You may use a Category 3 (or higher) Ethernet cable. ETHERNET 9V DC LINK ALERT Printer with PS101 attached Netgear Router DSL modem 3. Turn the printer on. 4. Connect the power adapter's cord into the back of the print server and then plug the adapter into a power source (such as a wall socket or power strip). When power has been applied to the print server: The LINK light (green) should light up and may blink to show network activity. The ALERT light (yellow) should be off. Note: If any light does not operate as indicated, go to the Troubleshooting section on page 9. 3
-
 1
1 -
 2
2 -
 3
3 -
 4
4 -
 5
5 -
 6
6 -
 7
7 -
 8
8 -
 9
9 -
 10
10 -
 11
11 -
12
-
13
-
14
-
15
-
16
 |
 |
