Netgear PS113 PS113 Reference Manual - Page 29
Verifying Power, On the Model PS104 Print Server and the Model PS105 Print Server - driver
 |
View all Netgear PS113 manuals
Add to My Manuals
Save this manual to your list of manuals |
Page 29 highlights
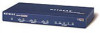
Installation and Reference for the Model PS104/PS105/PS110/PS113 Print Server Verifying Power To complete the installation, connect the power adapter first to the power adapter receptacle on the print server rear panel and then to the power outlet on the wall. When power has been applied to the print server: • The green PWR (power) LED on the front panel is on. • On the Model PS104 Print Server and the Model PS105 Print Server, the green Link/Rx LED on each connected network port is on. • On the Model PS110 and the Model PS113 Print Sever, the green Link LED on each connected printer port is on. • The green Link/Act LED on the connected PRINTER, PRINTER 1, PRINTER 2, or PRINTER 3 port is on. Make sure the network interface cards installed in the workstations are in working condition and the software driver has been installed on the cards. If required, verify the integrity of the print server by resetting it. Turn power to the print server off and then back on. If the problem continues and you have completed all the preceding diagnoses, contact NETGEAR Customer Support. For the telephone number of the representative in your area, refer to "Customer Support" on page iii. Installation 2-3
-
 1
1 -
2
-
3
-
4
-
5
-
6
-
7
-
8
-
9
-
10
-
11
-
12
-
13
-
14
-
15
-
16
-
17
-
18
-
19
-
20
-
21
-
22
-
23
-
 24
24 -
 25
25 -
 26
26 -
 27
27 -
 28
28 -
 29
29 -
 30
30 -
 31
31 -
 32
32 -
 33
33 -
 34
34 -
35
-
36
-
37
-
38
-
39
-
40
-
41
-
42
-
43
-
44
-
45
-
46
-
47
-
48
-
49
-
50
-
51
-
52
-
53
-
54
-
55
-
56
-
57
-
58
-
59
-
60
-
61
-
62
-
63
-
64
-
65
-
66
-
67
-
68
-
69
-
70
-
71
-
72
-
73
-
74
-
75
-
76
-
77
-
78
-
79
-
80
-
81
-
82
-
83
-
84
-
85
-
86
-
87
-
88
-
89
-
90
-
91
-
92
-
93
-
94
-
95
-
96
-
97
-
98
-
99
-
100
-
101
-
102
-
103
-
104
-
105
-
106
-
107
-
108
-
109
-
110
-
111
-
112
-
113
-
114
-
115
-
116
-
117
-
118
-
119
-
120
-
121
-
122
-
123
-
124
-
125
-
126
-
127
-
128
-
129
-
130
-
131
-
132
-
133
-
134
-
135
-
136
-
137
-
138
-
139
-
140
-
141
-
142
-
143
-
144
-
145
-
146
-
147
-
148
-
149
-
150
-
151
-
152
-
153
-
154
-
155
-
156
-
157
-
158
-
159
-
160
-
161
-
162
-
163
-
164
-
165
-
166
-
167
-
168
-
169
-
170
-
171
 |
 |
