Netgear RN31211D Software Manual - Page 95
Default LUN Settings, Manage LUNs, Create a LUN
 |
View all Netgear RN31211D manuals
Add to My Manuals
Save this manual to your list of manuals |
Page 95 highlights
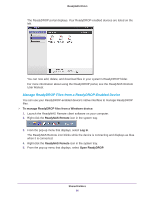
ReadyNAS OS 6.1 • Thick. All storage space that you specify when you create a thick LUN is allocated up front and the storage space is reserved on the volume. Snapshots, other LUNs, and shared folders on the volume cannot consume storage space that is reserved. The size of the LUN is reported as the total storage space that you specify when you create the LUN. You cannot assign more storage space than the available nonreserved storage space on the volume. Default LUN Settings The following table explains the default settings of a LUN. You can change these settings when you create or change the LUN. Table 7. LUN default settings Item Compression Continuous Protection Interval Provision Access Default State Disabled Enabled Daily Thick Denied until you set permissions Manage LUNs From the local admin page, you can create, modify, or delete a LUN. Create a LUN After you create a volume (see Create and Encrypt a Volume on page 29), you can create LUNs on that volume. The following procedure describes how to create a LUN from the Shares screen. You can also create a LUN from the iSCSI screen. Note: On ReadyNAS 102, 104, and 2120 systems, individual LUNs cannot exceed 8 TB. To create a LUN: 1. Select Shares > Shares. A list of shared folders and LUNs on each volume displays. LUNs 95
-
 1
1 -
2
-
3
-
4
-
5
-
6
-
7
-
8
-
9
-
10
-
11
-
12
-
13
-
14
-
15
-
16
-
17
-
18
-
19
-
20
-
21
-
22
-
23
-
24
-
25
-
26
-
27
-
28
-
29
-
30
-
31
-
32
-
33
-
34
-
35
-
36
-
37
-
38
-
39
-
40
-
41
-
42
-
43
-
44
-
45
-
46
-
47
-
48
-
49
-
50
-
51
-
52
-
53
-
54
-
55
-
56
-
57
-
58
-
59
-
60
-
61
-
62
-
63
-
64
-
65
-
66
-
67
-
68
-
69
-
70
-
71
-
72
-
73
-
74
-
75
-
76
-
77
-
78
-
79
-
80
-
81
-
82
-
83
-
84
-
85
-
86
-
87
-
88
-
89
-
 90
90 -
 91
91 -
 92
92 -
 93
93 -
 94
94 -
 95
95 -
 96
96 -
 97
97 -
 98
98 -
 99
99 -
 100
100 -
101
-
102
-
103
-
104
-
105
-
106
-
107
-
108
-
109
-
110
-
111
-
112
-
113
-
114
-
115
-
116
-
117
-
118
-
119
-
120
-
121
-
122
-
123
-
124
-
125
-
126
-
127
-
128
-
129
-
130
-
131
-
132
-
133
-
134
-
135
-
136
-
137
-
138
-
139
-
140
-
141
-
142
-
143
-
144
-
145
-
146
-
147
-
148
-
149
-
150
-
151
-
152
-
153
-
154
-
155
-
156
-
157
-
158
-
159
-
160
-
161
-
162
-
163
-
164
-
165
-
166
-
167
-
168
-
169
-
170
-
171
-
172
-
173
-
174
-
175
-
176
-
177
-
178
-
179
-
180
-
181
-
182
-
183
-
184
-
185
-
186
-
187
-
188
-
189
-
190
-
191
-
192
-
193
-
194
-
195
-
196
-
197
-
198
-
199
-
200
-
201
-
202
-
203
-
204
-
205
-
206
-
207
-
208
-
209
-
210
-
211
-
212
-
213
-
214
-
215
-
216
-
217
-
218
-
219
-
220
-
221
-
222
-
223
-
224
-
225
-
226
-
227
-
228
-
229
-
230
-
231
-
232
-
233
-
234
-
235
-
236
-
237
-
238
-
239
-
240
-
241
-
242
-
243
-
244
-
245
-
246
-
247
-
248
-
249
-
250
-
251
-
252
-
253
-
254
-
255
-
256
-
257
-
258
-
259
-
260
-
261
-
262
-
263
-
264
-
265
-
266
-
267
-
268
-
269
-
270
-
271
-
272
-
273
-
274
-
275
-
276
 |
 |
