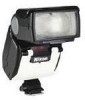
Nikon 50DX Instruction Manual - Page 8
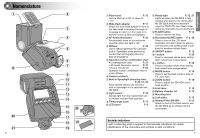
Attaching the SB-50DX to the Camera
 |
UPC - 018208047161
View all Nikon 50DX manuals
Add to My Manuals
Save this manual to your list of manuals |
Page 8 highlights
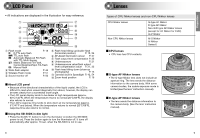
Basic Operation 2 Attaching the SB-50DX to the Camera Turn off the SB-50DX and camera body, and attach the SB-50DX to the camera body. 1. Turn off the SB-50DX and camera body. 2. Attach the SB-50DX to the camera body, then turn the lock lever in the direction as illustrated to lock the unit. • When detaching the SB-50DX, turn the lock lever in the opposite direction to unlock the unit. 3. Adjust the flash head to the horizontal position. • Set the tilting angle scale of the flash head to "0". 4. Turn on the SB-50DX and camera body. • Lock lever • With the SB-50DX attached to the camera body, turning the lever in the direction as illustrated presses the lock plate on the camera body's accessory shoe. This prevents the SB-50DX from accidentally slipping off the camera. • Flash head • For normal flash shooting, keep the flash head in the horizontal position. Tilt up the flash head for bounce-flash operation (p. 40) or tilt it down for close-up flash shooting (p. 43). (Click stops are provided at 90°, 75°, 50°, horizontal and -18° positions). • When the flash head is tilted up, is displayed in the LCD panel. When the flash head is tilted down, is displayed. (When the flash head is tilted down and the wide-flash adapter is not attached, [wide-flash adapter recommend] blinks. p. 44.) • For details, see "Tilting the flash head" on p. 40. • When ready-light warning is blinking inside the camera's viewfinder: • The SB-50DX is not properly attached to the camera body (except for FE 10). • The ISO film speed (sensitivity) set on the camera is outside the range for the TTL auto flash (with camera in Group V or VI except for F3-series with AS-17 and FM3A, p. 29). Usable film speed (sensitivity) range The usable film speed (sensitivity) range for TTL/D-TTL auto flash is ISO 25 to ISO 1600. However, this range also depends on the type of camera body. (For details, see your camera's instruction manual). 14 15
-
 1
1 -
2
-
 3
3 -
 4
4 -
 5
5 -
 6
6 -
 7
7 -
 8
8 -
 9
9 -
 10
10 -
 11
11 -
 12
12 -
 13
13 -
14
-
15
-
16
-
17
-
18
-
19
-
20
-
21
-
22
-
23
-
24
-
25
-
26
-
27
-
28
-
29
-
30
-
31
-
32
-
33
-
34
-
35
-
36
-
37
-
38
-
39
 |
 |
