Nokia IP2255 Installation Guide - Page 53
Using Nokia Network Voyager
 |
View all Nokia IP2255 manuals
Add to My Manuals
Save this manual to your list of manuals |
Page 53 highlights
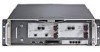
Using Nokia Network Voyager „ To connect 10 Gigabit Ethernet devices to the fiber-optic 10 Gigabit Ethernet NIC, use a multi-mode fiber-optic cable with an LC connector for each NIC interface. The destination end of the cable can be either LC or SC, depending on the type of connector required for the destination Gigabit Ethernet device. You can also use a half-duplex LC-to-LC cable to loopback the transmit port of an interface to the receive port. For details, see "Fiber-Optic Gigabit Ethernet NIC Connectors and Cables" on page 68 „ To connect 10/100 Ethernet devices to the 8-port Ethernet NIC or 10/100/ 1000 Ethernet devices to the management ports, use a straight-through cable with an RJ-45 connector. For details, see "10/100 Ethernet NIC Connectors and Cables" on page 61. Using Nokia Network Voyager Use Nokia Network Voyager to configure and monitor your appliance. For additional information about how to use Network Voyager, see "Viewing Nokia IPSO Documentation by Using Nokia Network Voyager" later in this section. To open Nokia Network Voyager 1. Open a Web browser on the host you plan to use to configure or monitor your appliance. 2. In the Location or Address field, enter the IP address of the initial interface you configured for the appliance. You are prompted to enter the admin username and the password you entered when you performed the initial configuration. Nokia IP2255 Security Platform Installation Guide 53
-
 1
1 -
2
-
3
-
4
-
5
-
6
-
7
-
8
-
9
-
10
-
11
-
12
-
13
-
14
-
15
-
16
-
17
-
18
-
19
-
20
-
21
-
22
-
23
-
24
-
25
-
26
-
27
-
28
-
29
-
30
-
31
-
32
-
33
-
34
-
35
-
36
-
37
-
38
-
39
-
40
-
41
-
42
-
43
-
44
-
45
-
46
-
47
-
 48
48 -
 49
49 -
 50
50 -
 51
51 -
 52
52 -
 53
53 -
 54
54 -
 55
55 -
 56
56 -
 57
57 -
 58
58 -
59
-
60
-
61
-
62
-
63
-
64
-
65
-
66
-
67
-
68
-
69
-
70
-
71
-
72
-
73
-
74
-
75
-
76
-
77
-
78
-
79
-
80
-
81
-
82
-
83
-
84
-
85
-
86
-
87
-
88
-
89
-
90
-
91
-
92
-
93
-
94
-
95
-
96
-
97
-
98
-
99
-
100
-
101
-
102
-
103
-
104
-
105
-
106
-
107
-
108
-
109
-
110
-
111
-
112
-
113
-
114
-
115
-
116
-
117
-
118
-
119
-
120
-
121
-
122
-
123
-
124
 |
 |
