Nokia IP2255 Installation Guide - Page 93
To replace DIMMs, power supply at the back of the appliance to turn off power to
 |
View all Nokia IP2255 manuals
Add to My Manuals
Save this manual to your list of manuals |
Page 93 highlights
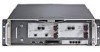
Replacing the Memory „ Nokia memory kit and accompanying documentation You must install DIMMs in pairs starting from the slot closest to the back of the chassis. To replace DIMMs 1. Use Network Voyager or the CLI halt command to perform an orderly shutdown of the appliance. For information about how to access Network Voyager and the related reference materials, see "Using Nokia Network Voyager" on page 53. 2. After the system shuts down, press the power switch, located on each power supply at the back of the appliance to turn off power to the appliance. Note Make sure you turn off both power supplies. 3. Loosen the four chassis tray assembly retaining screws on the front panel of the security platform. SLOT 1 10Base-SR X2 A L 10Base-SR X2 A L SLOT 2 RESET CONSOLE AUX PCMCIA SLOT 3 10/100 BaseT 1 3 10/100 BaseT 2 4 1 3 2 4 SLOT 4 10/100/1000BaseT 5 7 6 8 5 7 6 8 SLOT 5 1 3 57 L A L A 2 4 68 1 3 57 L A L A 2 4 68 1 2 3 4 IP2255 00010 Chassis tray assembly retaining screws 4. Slide the chassis tray assembly forward to expose the DIMM sockets on the IP2255 motherboard. Nokia IP2255 Security Platform Installation Guide 93
-
 1
1 -
2
-
3
-
4
-
5
-
6
-
7
-
8
-
9
-
10
-
11
-
12
-
13
-
14
-
15
-
16
-
17
-
18
-
19
-
20
-
21
-
22
-
23
-
24
-
25
-
26
-
27
-
28
-
29
-
30
-
31
-
32
-
33
-
34
-
35
-
36
-
37
-
38
-
39
-
40
-
41
-
42
-
43
-
44
-
45
-
46
-
47
-
48
-
49
-
50
-
51
-
52
-
53
-
54
-
55
-
56
-
57
-
58
-
59
-
60
-
61
-
62
-
63
-
64
-
65
-
66
-
67
-
68
-
69
-
70
-
71
-
72
-
73
-
74
-
75
-
76
-
77
-
78
-
79
-
80
-
81
-
82
-
83
-
84
-
85
-
86
-
87
-
 88
88 -
 89
89 -
 90
90 -
 91
91 -
 92
92 -
 93
93 -
 94
94 -
 95
95 -
 96
96 -
 97
97 -
 98
98 -
99
-
100
-
101
-
102
-
103
-
104
-
105
-
106
-
107
-
108
-
109
-
110
-
111
-
112
-
113
-
114
-
115
-
116
-
117
-
118
-
119
-
120
-
121
-
122
-
123
-
124
 |
 |
