NordicTrack 1750 Treadmill English Manual - Page 7
Identify the Right Upright Sleeve 90 and - assembly
 |
View all NordicTrack 1750 Treadmill manuals
Add to My Manuals
Save this manual to your list of manuals |
Page 7 highlights
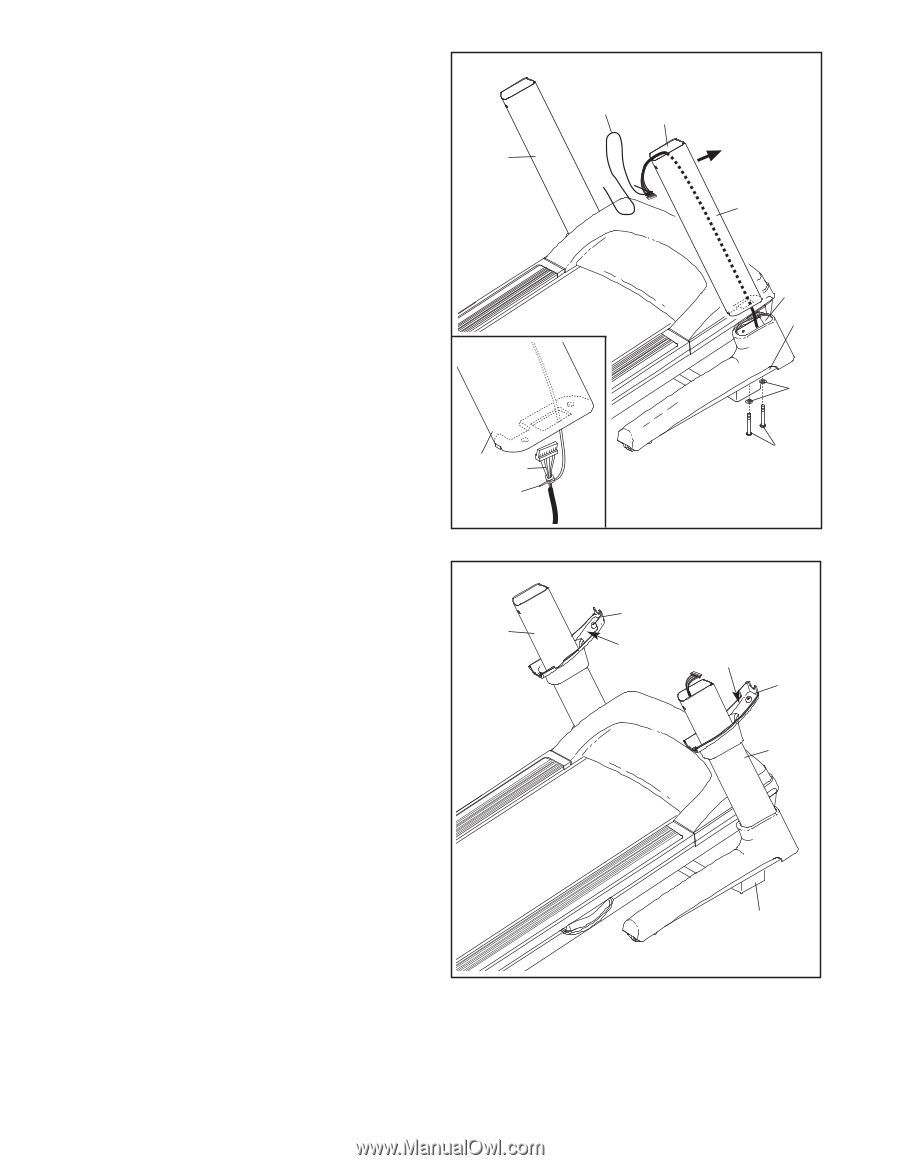
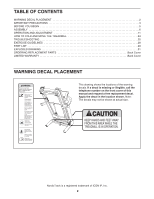
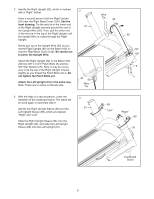
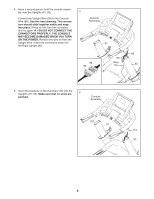
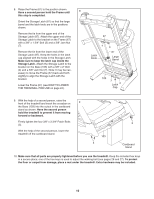
2. Identify the Right Upright (92), which is marked with a "Right" sticker. Have a second person hold the Right Upright (92) near the Right Base Cover (102). See the inset drawing. Tie the wire tie in the lower end of the Right Upright securely around the end of the Upright Wire (93). Then, pull the other end of the wire tie in the top of the Right Upright until the Upright Wire is routed through the Right Upright. Gently pull up on the Upright Wire (93) as you set the Right Upright (92) on the Base (103) inside the Right Base Cover (102). Be careful not to pinch the Upright Wire. Attach the Right Upright (92) to the Base (103) with two 3/8" x 3 3/4" Patch Bolts (5) and two 3/8" Star Washers (6). Note: It may be necessary to tip the top of the Right Upright forward slightly as you thread the Patch Bolts into it. Do not tighten the Patch Bolts yet. Attach the Left Upright (91) in the same way. Note: There are no wires on the left side. 2 91 92 93 Wire Tie 3. With the help of a second person, lower the treadmill off the cardboard stand. The stand will be used again in assembly step 9. Identify the Right Upright Sleeve (90) and the Left Upright Sleeve (89), which are labeled "Right" and "Left." Slide the Right Upright Sleeve (90) onto the Right Upright (92), and slide the Left Upright Sleeve (89) onto the Left Upright (91). 3 91 Wire Tie 93 92 102 103 6 5 89 "Left" "Right" 90 92 Cardboard Stand 7
-
 1
1 -
 2
2 -
 3
3 -
 4
4 -
 5
5 -
 6
6 -
 7
7 -
 8
8 -
 9
9 -
 10
10 -
 11
11 -
 12
12 -
13
-
14
-
15
-
16
-
17
-
18
-
19
-
20
-
21
-
22
-
23
-
24
-
25
-
26
-
27
-
28
-
29
-
30
-
31
-
32
-
33
-
34
-
35
-
36
 |
 |