NordicTrack E 7.1 Elliptical English Manual - Page 6
Attach the Rear Stabilizer 4 to the Folding
 |
View all NordicTrack E 7.1 Elliptical manuals
Add to My Manuals
Save this manual to your list of manuals |
Page 6 highlights
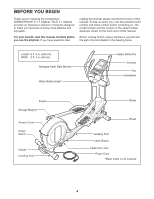
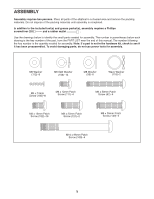
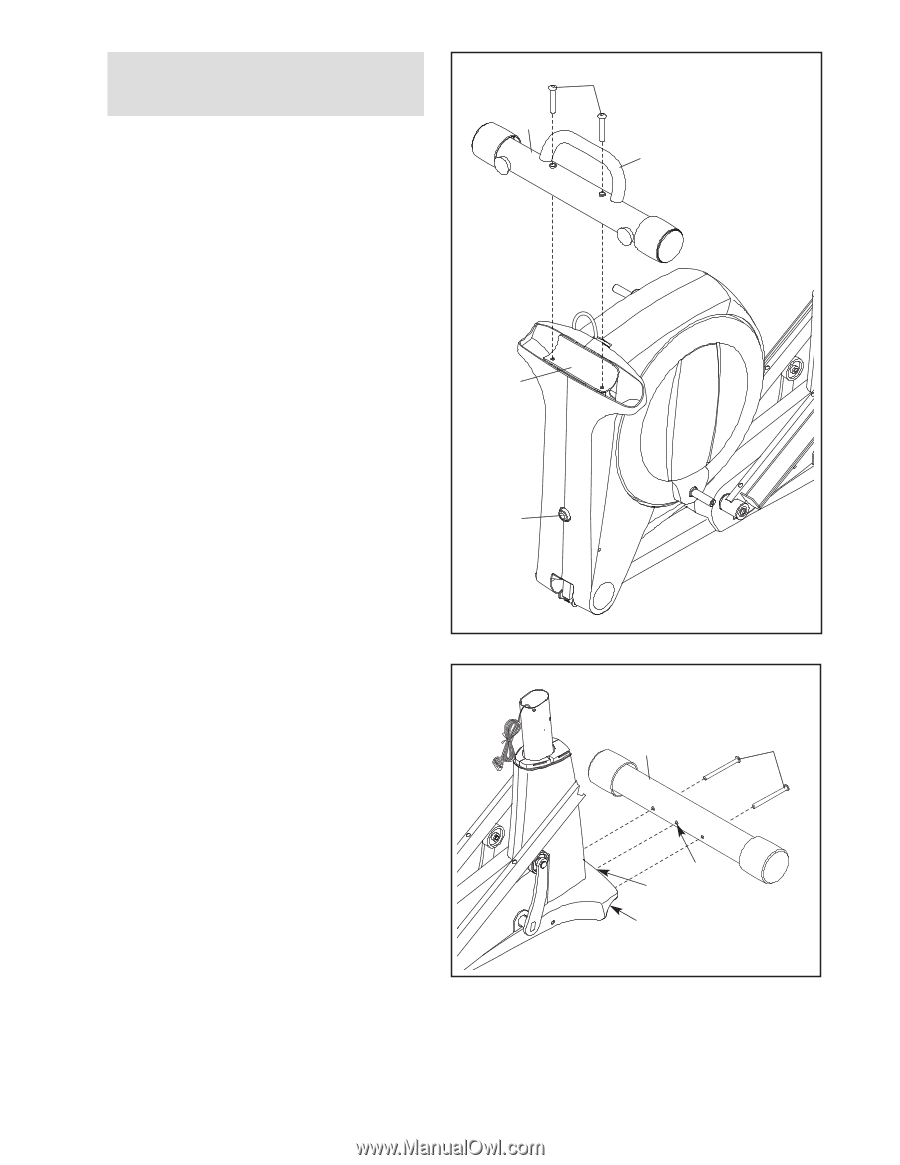
1. To make assembly easier, read the information on page 5 before you begin. Orient the Rear Stabilizer (4) as shown. 1 4 Attach the Rear Stabilizer (4) to the Folding Frame (2) with two M10 x 95mm Patch Screws (100). Next, hold the handle on the Rear Stabilizer (4), press the Latch Button (67), and lower the Rear Stabilizer and the Folding Frame (2) to the floor. 100 Handle 2 67 2. Orient the Front Stabilizer (3) so that the indicated hole is facing the pin on the Main Frame 2 (1). While a second person lifts the front of the Main Frame (1), attach the Front Stabilizer (3) with two M10 x 95mm Patch Screws (100). 3 100 Hole Pin 1 6
-
 1
1 -
 2
2 -
 3
3 -
 4
4 -
 5
5 -
 6
6 -
 7
7 -
 8
8 -
 9
9 -
 10
10 -
 11
11 -
 12
12 -
13
-
14
-
15
-
16
-
17
-
18
-
19
-
20
-
21
-
22
-
23
-
24
-
25
-
26
-
27
-
28
-
29
-
30
-
31
-
32
 |
 |
6
1.
Orient the Rear Stabilizer (4) as shown.
Attach the Rear Stabilizer (4) to the Folding
Frame (2) with two M10 x 95mm Patch Screws
(100).
Next, hold the handle on the Rear Stabilizer (4),
press the Latch Button (67), and lower the Rear
Stabilizer and the Folding Frame (2) to the floor.
4
1
To make assembly easier, read the
information on page 5 before you begin.
100
Handle
2
67
2.
Orient the Front Stabilizer (3) so that the indi-
cated hole is facing the pin on the Main Frame
(1).
While a second person lifts the front of the Main
Frame (1), attach the Front Stabilizer (3) with
two M10 x 95mm Patch Screws (100).
2
3
1
100
Hole
Pin