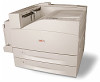
Oki B930dn B930 Setup Guide (English Fran栩s Espa?ol Portugu( - Page 13
Service and Support
 |
View all Oki B930dn manuals
Add to My Manuals
Save this manual to your list of manuals |
Page 13 highlights
1. Select Optional Utilities or Internet Downloads from the CD installer menu bar. 2. Click on the utilities and downloads you want to install and follow the instructions. Windows USB Install the Printer Driver Note: Install the driver before connecting the USB cable to the printer. 1. Turn the printer OFF. 2. Insert the CD, in the CD-ROM drive. The CD will autorun. If it doesn't, click Start → Run → Browse. Browse to your CDROM drive, double-click Setup. Click OK. 3. Select your language. Accept the license agreement. 4. Click Install Driver. 5. Select local printer. Follow the on-screen instructions. 6. When prompted, select printer emulation (PS or PCL). 7. When prompted, connect the USB cable and switch the printer ON. Test the Driver Install To make sure the printer driver is correctly installed, print a page from any program. Reinstall the driver if the installation failed. Install the Utilities and Downloads Note: You must be connected to the internet to download utilities. 1. Select Optional Utilities or Internet Downloads from the CD installer menu bar. 2. Click the utilities and downloads you want to install and follow the instructions. Windows: Activate the Optional Accessories You Have Installed Note: If your printer has a Duplex Unit, Trays or other accessories installed, they must be activated in the printer driver. 1. Click Start → Settings → Printers (and Faxes) on the Windows taskbar. 2. Right click the printer name, then click Properties. 3. Click the Device Options tab. 4. Click Get Information From Printer to activate all the installed options. 5. Click Apply. Click OK. Macintosh Install the Printer Driver 1. Turn on the printer, then turn on the computer. 2. Place the CD supplied with the printer in the CD-ROM drive. 3. Double-click the CD icon that appears on the desktop. 4. Open the MAC folder. 5. Double-click the Mac B930n Installer icon. The Installer displays with the driver pre-selected. 6. Select any utilities you want to install. Click Install. Add the Printer 1. Run the Print Center or Print Setup Utility. Click Add. 2. Click More Printers. 3. Select OKI USB, OKI TCP/IP, or Rendezvous/ Bonjour from the drop-down menu. Note: If you are using USB, select OKI USB and disregard step 4. 4. Enter the printer's IP address. 5. Select the printer model. Click Add. 6. Quit the Print Center. Use the Web Page to Configure the Printer If you are working in a TCP/IP-enabled environment, you can use a web browser to display the printer or job printing status and to change the settings. Among the printer settings that are made on the control panel, settings for the system and network ports can be configured under [Printer], [Network] and [Maintenance] on the web page. Note: The web page facility is only available when the printer is connected to the network. Note: Refer to the Network section in the User's Guide if the web page does not appear after carrying out steps 1 and 2: 1. Boot your computer, and start the web browser. 2. Enter the printer's IP address or URL in the address input column on the web browser and press the key. Service and Support • Visit our multilingual web site: www.okiprintingsolutions.com • Call 1-800-654-3282 13
-
 1
1 -
2
-
3
-
4
-
5
-
6
-
7
-
 8
8 -
 9
9 -
 10
10 -
 11
11 -
 12
12 -
 13
13 -
 14
14 -
 15
15 -
 16
16 -
 17
17 -
 18
18 -
19
-
20
-
21
-
22
-
23
-
24
-
25
-
26
-
27
-
28
-
29
-
30
-
31
-
32
-
33
-
34
-
35
-
36
-
37
-
38
-
39
-
40
-
41
-
42
-
43
-
44
-
45
-
46
-
47
-
48
-
49
-
50
-
51
-
52
 |
 |
