Oki B930dn B930 Setup Guide (English Fran栩s Espa?ol Portugu( - Page 8
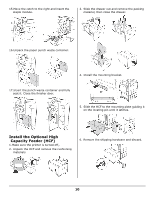
Install the Optional Finisher
 |
View all Oki B930dn manuals
Add to My Manuals
Save this manual to your list of manuals |
Page 8 highlights
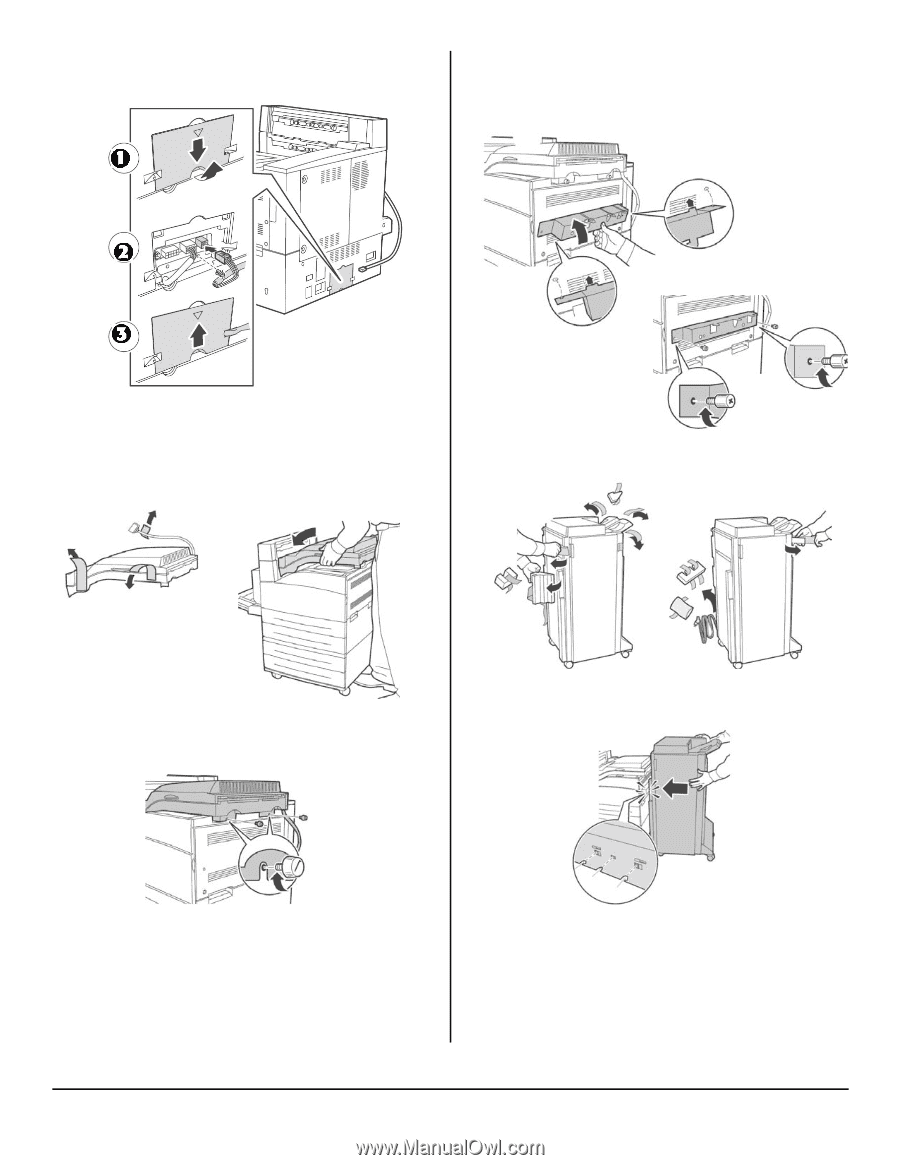
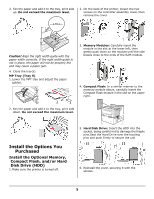
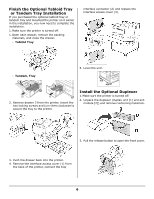
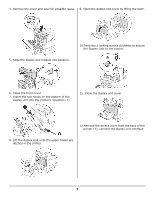
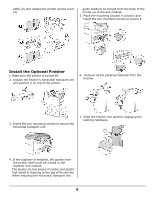
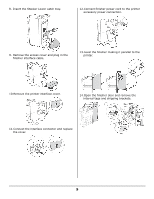
cable (2) and replace the printer access cover (3). guide needs to be moved from the body of the printer up to the exit module. 5. Place the mounting bracket in position and insert the two mounting screws to secure it. Install the Optional Finisher 1. Make sure the printer is turned off. 2. Unpack the finisher's horizontal transport unit and position it on top of the printer. 6. .Remove all the packing materials from the finisher. 3. Insert the two mounting screws to secure the horizontal transport unit. 7. Slide the finisher into position engaging the latching hardware. 4. If the duplexer is installed, the guides from the printer itself must be moved to the duplexer exit module. The guides are two pieces of rubber and plastic that assist in stacking to the top of the printer. When installing the horizontal transport this 8
-
 1
1 -
2
-
 3
3 -
 4
4 -
 5
5 -
 6
6 -
 7
7 -
 8
8 -
 9
9 -
 10
10 -
 11
11 -
 12
12 -
 13
13 -
14
-
15
-
16
-
17
-
18
-
19
-
20
-
21
-
22
-
23
-
24
-
25
-
26
-
27
-
28
-
29
-
30
-
31
-
32
-
33
-
34
-
35
-
36
-
37
-
38
-
39
-
40
-
41
-
42
-
43
-
44
-
45
-
46
-
47
-
48
-
49
-
50
-
51
-
52
 |
 |