Oki CX2731MFP CX2731 MFP Setup Guide (English, Fran栩s, Espa?ol, Por - Page 47
Specifying Current Time and Sender Information, Summer Time] or [Now Summer Time] - advanced user s guide
 |
View all Oki CX2731MFP manuals
Add to My Manuals
Save this manual to your list of manuals |
Page 47 highlights
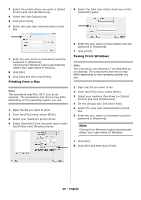
Specifying Current Time and Sender Information Note You can set up the date and time automatically using the Webpage. For details, refer to the Advanced User's Guide at www.my.okidata.com. Note When using the arrow keys, press the key repetitively to go to the selection. 9 Use the up and down arrow keys to set the current time (Hour, Minute, Seconds), pressing the right arrow key to move to each successive block. When done press . "Date/Time Setting was completed" appears on the display, then the Setup Menu screen appears. Specifying Sender Information Specify the fax number and sender name for your machine. The sender ID is printed on the top edge of the fax when it is printed by the recipient. 10 Press the down arrow key to select [Fax Setting], then press the right arrow key. 1 Press on the control panel. 2 Use the down arrow key to select [Easy Setup], then press . 3 If prompted, entire the Admin Password, then use the arrow keys to highlight [Enter] and press . 4 With [Date/Time Setting] highlighted, press the right arrow key. 11 Press to select [FAX number]. 12 Use the keypad to enter the fax number of your machine. 13 With [Enter] highlighted, press . 14 Press the right arrow to select [Sender ID]. 15 Use the screen keypad to enter your ID, up to 22 digits. When the ID is entered, use the arrow keys to highlight [Enter], then press . "Fax Setting was completed" appears on the display, then the Setup Menu screen appears. 16 Press to complete the setup, then use the left arrow key to back out to the main screen. 5 Use the down arrow key to select the appropriate time zone and then press the right arrow key. You can select the time zone between [-12:00] and [+13:00] in 15 minute increments. 6 Use the down arrow key to select [Not Summer Time] or [Now Summer Time] for daylight saving, then press the right arrow key. 7 Use the down arrow key to select [Manual], then press the right arrow key. 8 Use the up and down arrow keys to set the Year, Month and Day, pressing the right arrow key to move to each successive block. When done press . 47 - English
-
 1
1 -
2
-
3
-
4
-
5
-
6
-
7
-
8
-
9
-
10
-
11
-
12
-
13
-
14
-
15
-
16
-
17
-
18
-
19
-
20
-
21
-
22
-
23
-
24
-
25
-
26
-
27
-
28
-
29
-
30
-
31
-
32
-
33
-
34
-
35
-
36
-
37
-
38
-
39
-
40
-
41
-
 42
42 -
 43
43 -
 44
44 -
 45
45 -
 46
46 -
 47
47 -
 48
48 -
 49
49 -
 50
50 -
 51
51 -
 52
52 -
53
-
54
-
55
-
56
-
57
-
58
-
59
-
60
-
61
-
62
-
63
-
64
-
65
-
66
-
67
-
68
-
69
-
70
-
71
-
72
-
73
-
74
-
75
-
76
-
77
-
78
-
79
-
80
-
81
-
82
-
83
-
84
-
85
-
86
-
87
-
88
-
89
-
90
-
91
-
92
-
93
-
94
-
95
-
96
-
97
-
98
-
99
-
100
-
101
-
102
-
103
-
104
-
105
-
106
-
107
-
108
-
109
-
110
-
111
-
112
-
113
-
114
-
115
-
116
-
117
-
118
-
119
-
120
-
121
-
122
-
123
-
124
-
125
-
126
-
127
-
128
-
129
-
130
-
131
-
132
-
133
-
134
-
135
-
136
-
137
-
138
-
139
-
140
-
141
-
142
-
143
-
144
-
145
-
146
-
147
-
148
-
149
-
150
-
151
-
152
-
153
-
154
-
155
-
156
-
157
-
158
-
159
-
160
-
161
-
162
-
163
-
164
-
165
-
166
-
167
-
168
-
169
-
170
-
171
-
172
-
173
-
174
-
175
-
176
-
177
-
178
-
179
-
180
-
181
-
182
-
183
-
184
-
185
-
186
-
187
-
188
-
189
-
190
-
191
-
192
-
193
-
194
-
195
-
196
-
197
-
198
-
199
-
200
-
201
-
202
-
203
-
204
-
205
-
206
-
207
-
208
-
209
-
210
-
211
-
212
 |
 |
