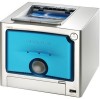
Olympus P-10 P-10 Instruction Manual - Page 30
If the Ink ribbon cartridge is removed during, printing - printer ink
 |
UPC - 050332145085
View all Olympus P-10 manuals
Add to My Manuals
Save this manual to your list of manuals |
Page 30 highlights
ENGLISH Introduction Preparation Troubleshooting 5 Set the printer on its rear so that the front of the printer is facing up. Insert your finger in the paper dispenser slot located on the bottom and slide the jammed paper towards the paper tray door. If you cannot move the paper with your finger, use tweezers or the like. 6 After the paper has moved partway, you will then be able to remove it through the paper tray door. 7 Turn the printer on. 8 Reinsert the paper tray in the paper tray door. If operation is normal, the paper jam has been successfully cleared and you can continue printing. Caution After removing the jammed paper, do not attempt to use it again in the printer. Doing so may damage your printer. If the Ink ribbon cartridge is removed during printing 1 Turn the printer off. 2 Insert the ink ribbon cartridge all the way into the compartment, and close the cartridge door firmly. 3 Turn the printer on. 30 Printing For Your Information
-
 1
1 -
2
-
3
-
4
-
5
-
6
-
7
-
8
-
9
-
10
-
11
-
12
-
13
-
14
-
15
-
16
-
17
-
18
-
19
-
20
-
21
-
22
-
23
-
24
-
 25
25 -
 26
26 -
 27
27 -
 28
28 -
 29
29 -
 30
30 -
 31
31 -
 32
32 -
 33
33 -
 34
34 -
 35
35 -
36
-
37
-
38
-
39
-
40
-
41
-
42
-
43
-
44
-
45
-
46
-
47
-
48
-
49
-
50
-
51
-
52
-
53
-
54
-
55
-
56
-
57
-
58
-
59
-
60
-
61
-
62
-
63
-
64
-
65
-
66
-
67
-
68
-
69
-
70
-
71
-
72
-
73
-
74
-
75
-
76
-
77
-
78
-
79
-
80
-
81
-
82
-
83
-
84
-
85
-
86
-
87
-
88
-
89
-
90
-
91
-
92
-
93
-
94
-
95
-
96
-
97
-
98
-
99
-
100
-
101
-
102
-
103
-
104
-
105
-
106
-
107
-
108
-
109
-
110
-
111
-
112
-
113
-
114
-
115
-
116
-
117
-
118
-
119
-
120
-
121
-
122
-
123
-
124
-
125
-
126
-
127
-
128
-
129
-
130
-
131
-
132
-
133
-
134
-
135
-
136
-
137
-
138
-
139
-
140
-
141
-
142
-
143
-
144
-
145
-
146
-
147
-
148
 |
 |
