Olympus SP-590 UZ SP-590UZ Instruction Manual (English) - Page 37
Recording sound when shooting still pictures, Adjusting the white balance
 |
UPC - 050332168497
View all Olympus SP-590 UZ manuals
Add to My Manuals
Save this manual to your list of manuals |
Page 37 highlights
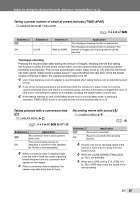
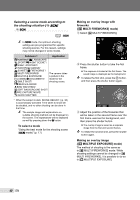
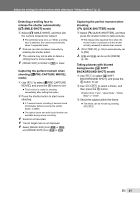
Adjust the settings for the functions while referring to "Using the Menu" (p. 3). Recording sound when shooting still pictures [R] K CAMERA MENU R Selecting the color tone of the image [PICTURE MODE] K CAMERA MENU PICTURE MODE : P A S M r : P A S M r Submenu 2 Application OFF No sound is recorded. The camera automatically starts recording for approx. 4 seconds after ON taking the picture. This is useful for recording notes or comments about the picture. When recording, aim the microphone (p. 48) at the source of the sound you want to record. Adjusting the white balance [>] K CAMERA MENU > : P A S M r I A 1 Use 78 to adjust the white balance and press the o button to set. Submenu 2 VIVID NATURAL Application This gives the image a vivid color tone. This gives the image a natural color tone. Adjusting the sharpness of contours [SHARPNESS] K CAMERA MENU SHARPNESS : P A S M r I A Submenu 2 −5 to +5 Application This adjusts the sharpness of contours. Adjust in the + direction to make the image appear sharper, and adjust in the - direction to make the image appear softer. The white balance can be adjusted in 7 steps in both the [BLUE] and [RED] directions. > BACK MENU BLUE RED SET OK If you adjust the sharpness too far in the + direction, noise may appear in the image. [WB] (p. 30) EN 37
-
 1
1 -
2
-
3
-
4
-
5
-
6
-
7
-
8
-
9
-
10
-
11
-
12
-
13
-
14
-
15
-
16
-
17
-
18
-
19
-
20
-
21
-
22
-
23
-
24
-
25
-
26
-
27
-
28
-
29
-
30
-
31
-
 32
32 -
 33
33 -
 34
34 -
 35
35 -
 36
36 -
 37
37 -
 38
38 -
 39
39 -
 40
40 -
 41
41 -
 42
42 -
43
-
44
-
45
-
46
-
47
-
48
-
49
-
50
-
51
-
52
-
53
-
54
-
55
-
56
-
57
-
58
-
59
-
60
-
61
-
62
-
63
-
64
-
65
-
66
-
67
-
68
-
69
-
70
-
71
-
72
-
73
-
74
-
75
-
76
-
77
-
78
-
79
-
80
-
81
-
82
-
83
-
84
-
85
-
86
 |
 |
