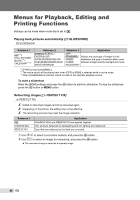
Olympus SP-590 UZ SP-590UZ Instruction Manual (English) - Page 45
Retouching the skin and eyes, Changing the image size, Cropping images, When [CLEAR SKIN] is selected
 |
UPC - 050332168497
View all Olympus SP-590 UZ manuals
Add to My Manuals
Save this manual to your list of manuals |
Page 45 highlights
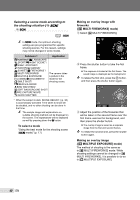
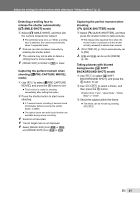
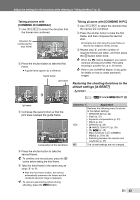
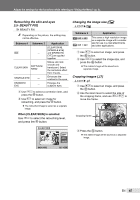
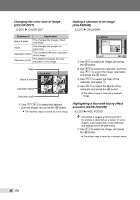
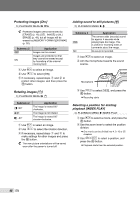
Adjust the settings for the functions while referring to "Using the Menu" (p. 3). Retouching the skin and eyes [F BEAUTY FIX] F BEAUTY FIX Depending on the picture, the editing may not be effective. Submenu 1 Submenu 2 ALL ― CLEAR SKIN SOFT/AVG/ HARD SPARKLE EYE ― DRAMATIC EYE ― Application [CLEAR SKIN], [SPARKLE EYE] and [DRAMATIC EYE] are applied together. Makes skin look smooth and translucent. Select the correction effect from 3 levels. Enhances the contrast in the eyes. Enlarges the subject's eyes. 1 Use 78 to select a correction item, and press the o button. 2 Use 9: to select an image for retouching, and press the o button. ● The retouched image is saved as a separate image. When [CLEAR SKIN] is selected Use 78 to select the retouching level, and press the o button. CLEAR SKIN SOFT AVG HARD Changing the image size [Q] I EDIT Q Submenu 2 C 640 × 480 E 320 × 240 Application This saves a high-resolution image as a separate image with a smaller size for use in e-mail attachments and other applications. 1 Use 9: to select an image, and press the o button. 2 Use 78 to select the image size, and press the o button. ● The resized image will be saved as a separate image. Cropping images [P] I EDIT P 1 Use 9: to select an image, and press the o button. 2 Use the zoom lever to select the size of the cropping frame, and use 789: to move the frame. Cropping frame WT SET OK 3 Press the o button. ● The edited image will be saved as a separate image. BACK MENU SET OK EN 45
-
 1
1 -
2
-
3
-
4
-
5
-
6
-
7
-
8
-
9
-
10
-
11
-
12
-
13
-
14
-
15
-
16
-
17
-
18
-
19
-
20
-
21
-
22
-
23
-
24
-
25
-
26
-
27
-
28
-
29
-
30
-
31
-
32
-
33
-
34
-
35
-
36
-
37
-
38
-
39
-
 40
40 -
 41
41 -
 42
42 -
 43
43 -
 44
44 -
 45
45 -
 46
46 -
 47
47 -
 48
48 -
 49
49 -
 50
50 -
51
-
52
-
53
-
54
-
55
-
56
-
57
-
58
-
59
-
60
-
61
-
62
-
63
-
64
-
65
-
66
-
67
-
68
-
69
-
70
-
71
-
72
-
73
-
74
-
75
-
76
-
77
-
78
-
79
-
80
-
81
-
82
-
83
-
84
-
85
-
86
 |
 |
