Olympus SP-600UZ SP-600UZ Instruction Manual (English) - Page 11
the computer., Follow the instructions on - user manual
 |
UPC - 050332173569
View all Olympus SP-600UZ manuals
Add to My Manuals
Save this manual to your list of manuals |
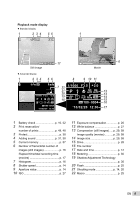
Page 11 highlights
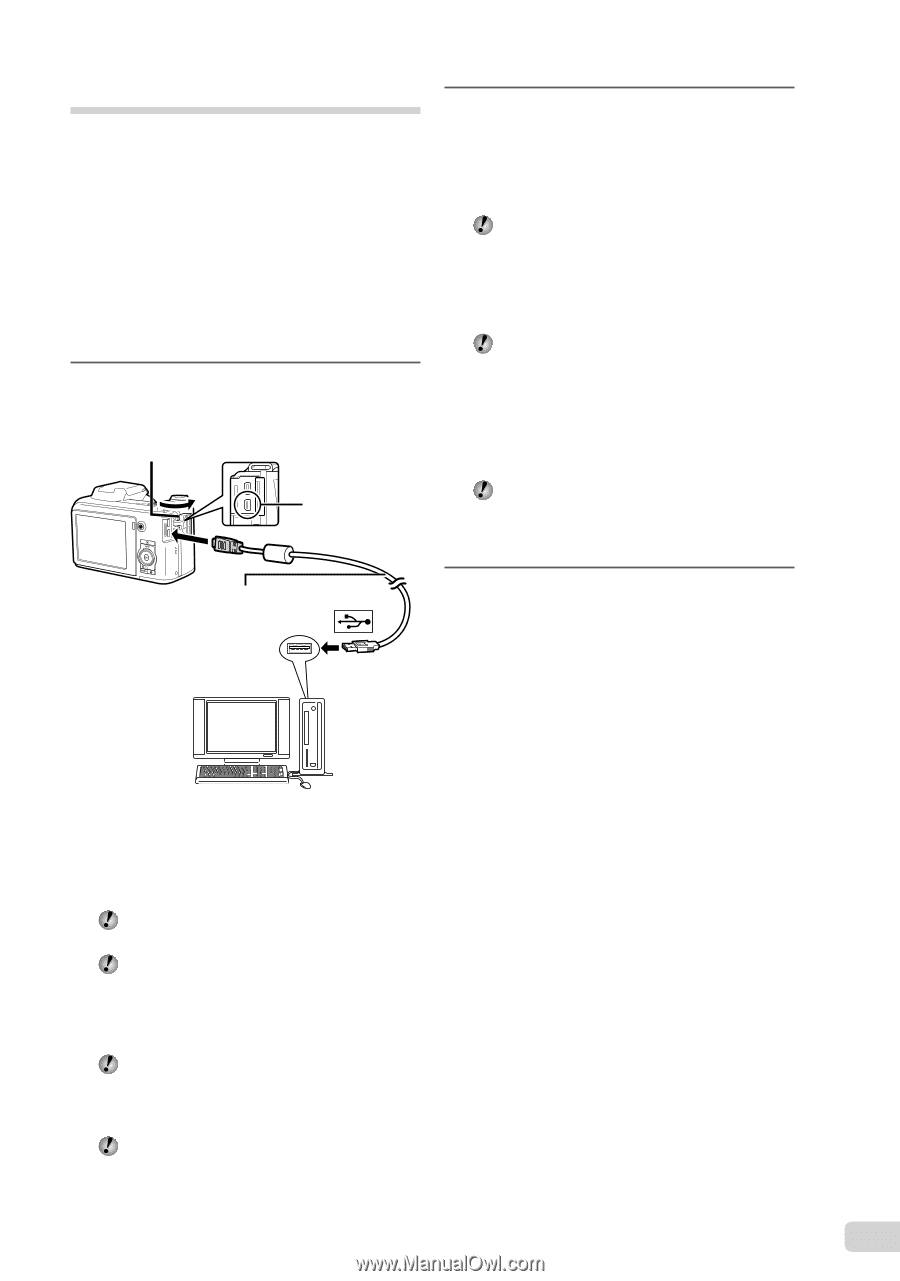
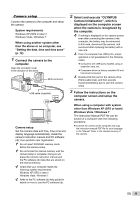
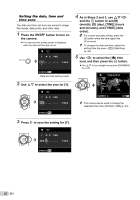
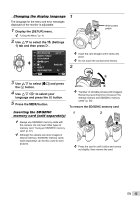
Camera setup Connect the camera to the computer and setup the camera. System requirements Windows XP (SP2 or later) / Windows Vista / Windows 7 When using another system other than the above or no computer, see "Setting the date, time and time zone" (p. 12) 1 Connect the camera to the computer. Open the connector cover in the direction of the arrow. Multi-connector USB cable (supplied) 2 Select and execute "OLYMPUS Camera Initialization", which is displayed on the computer screen when the camera is recognized by the computer. If nothing is displayed on the camera screen even after connecting the camera to the computer, the battery may be exhausted. In this case, disconnect the camera, and reconnect after replacing the battery with a new one. Even if a computer has USB ports, proper operation is not guaranteed in the following cases. ● Computers with USB ports installed using an expansion card, etc. ● Computers without a factory-installed OS and home-built computers Double-click the icon for the camera drive (Removable Disk), and then execute CameraInitialSetup.exe to start the camera setup. 3 Follow the instructions on the computer screen and setup the camera. Camera setup Set the camera date and time, time zone and display language automatically; install the camera instruction manual and PC software (ib); then perform user registration. Do not insert SD/SDHC memory cards before the camera setup. Do not format the internal memory until the camera setup is complete. Doing so will erase the camera instruction manual and the PC software (ib) data that are stored on the internal memory. Check that your computer meets the following system requirements: Windows XP (SP2 or later) / Windows Vista / Windows 7 Refer to the PC software (ib) help guide for details on how to use the PC software (ib). When using a computer with system other than Windows XP (SP2 or later)/ Windows Vista / Windows 7 The Instruction Manual PDF file can be saved on a computer with the following procedure. ● Connect the camera to the computer and copy the instruction manual PDF file for your language in the "Manual" folder in the internal memory of the camera. EN 11
-
 1
1 -
2
-
3
-
4
-
5
-
 6
6 -
 7
7 -
 8
8 -
 9
9 -
 10
10 -
 11
11 -
 12
12 -
 13
13 -
 14
14 -
 15
15 -
 16
16 -
17
-
18
-
19
-
20
-
21
-
22
-
23
-
24
-
25
-
26
-
27
-
28
-
29
-
30
-
31
-
32
-
33
-
34
-
35
-
36
-
37
-
38
-
39
-
40
-
41
-
42
-
43
-
44
-
45
-
46
-
47
-
48
-
49
-
50
-
51
-
52
-
53
-
54
-
55
-
56
-
57
-
58
-
59
-
60
-
61
-
62
-
63
-
64
-
65
-
66
-
67
-
68
-
69
-
70
 |
 |