Olympus SP-600UZ SP-600UZ Instruction Manual (English) - Page 44
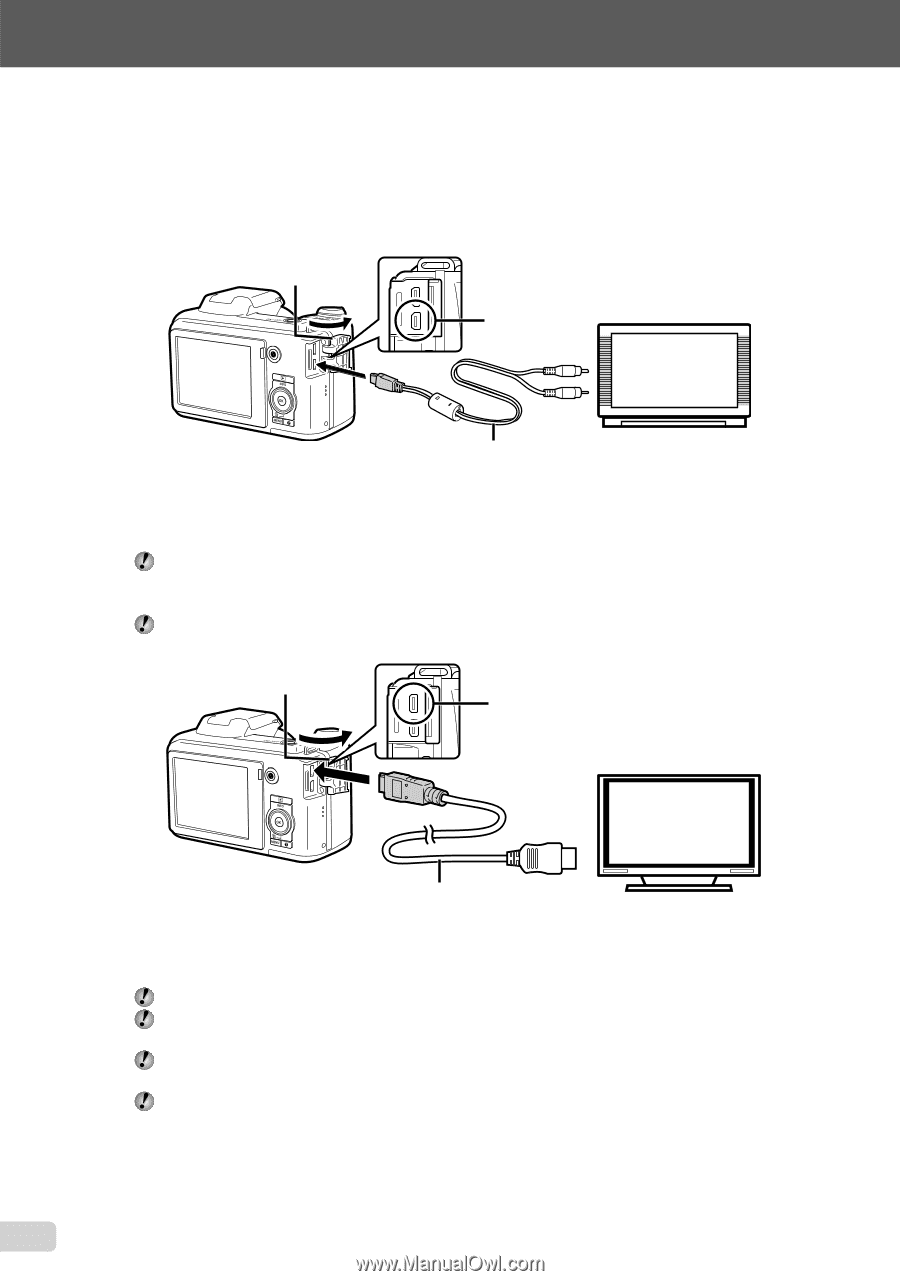
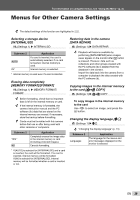
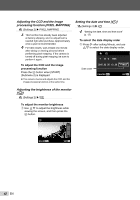
To play back camera images on a TV, Turn on the camera, and use - usb cable
 |
UPC - 050332173569
View all Olympus SP-600UZ manuals
Add to My Manuals
Save this manual to your list of manuals |
Page 44 highlights
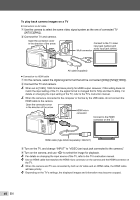
To play back camera images on a TV ● Connection via AV cable 1 Use the camera to select the same video signal system as the one of connected TV ([NTSC]/[PAL]). 2 Connect the TV and camera. Open the connector cover in the direction of the arrow. Connect to the TV video input jack (yellow) and audio input jack (white). Multi-connector AV cable (supplied) ● Connection via HDMI cable 1 On the camera, select the digital signal format that will be connected ([480p]/[720p]/[1080i]). 2 Connect the TV and camera. When set to [1080i], 1080i format takes priority for HDMI output. However, if this setting does not match the input setting of the TV, the signal format is changed first to 720p and then to 480p. For details on changing the input setting of the TV, refer to the TV's instruction manual. When the camera is connected to the computer or the like by the USB cable, do not connect the HDMI cable to the camera. Open the connector cover in the direction of the arrow. HDMI micro connector Connect to the HDMI connector on the TV. HDMI cable (type D/sold separately: CB-HD1) 3 Turn on the TV, and change "INPUT" to "VIDEO (an input jack connected to the camera)." 4 Turn on the camera, and use HI to select the image for playback. For details on changing the input source of the TV, refer to the TV's instruction manual. Use an HDMI cable that matches the HDMI micro connector on the camera and the HDMI connector on the TV. When the camera and TV are connected by both an AV cable and an HDMI cable, the HDMI cable will take priority. Depending on the TV's settings, the displayed images and information may become cropped. 44 EN
-
 1
1 -
2
-
3
-
4
-
5
-
6
-
7
-
8
-
9
-
10
-
11
-
12
-
13
-
14
-
15
-
16
-
17
-
18
-
19
-
20
-
21
-
22
-
23
-
24
-
25
-
26
-
27
-
28
-
29
-
30
-
31
-
32
-
33
-
34
-
35
-
36
-
37
-
38
-
 39
39 -
 40
40 -
 41
41 -
 42
42 -
 43
43 -
 44
44 -
 45
45 -
 46
46 -
 47
47 -
 48
48 -
 49
49 -
50
-
51
-
52
-
53
-
54
-
55
-
56
-
57
-
58
-
59
-
60
-
61
-
62
-
63
-
64
-
65
-
66
-
67
-
68
-
69
-
70
 |
 |