Olympus Stylus 7000 Silver STYLUS-7000 Instruction Manual (English) - Page 37
Menus for Other Camera Settings
 |
UPC - 050332167490
View all Olympus Stylus 7000 Silver manuals
Add to My Manuals
Save this manual to your list of manuals |
Page 37 highlights
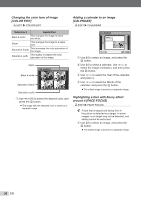
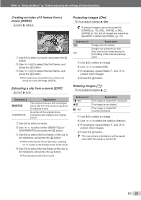
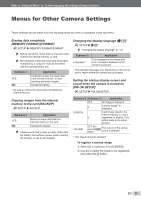
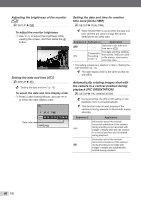
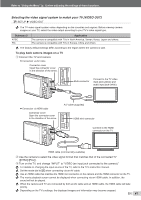
Refer to "Using the Menu" (p. 3) when adjusting the settings of these functions. Menus for Other Camera Settings These settings can be made from the shooting mode top menu or playback mode top menu. Erasing data completely [MEMORY FORMAT]/[FORMAT] E SETUP X MEMORY FORMAT/FORMAT Before formatting, check that no important data is left in the internal memory or card. Non-Olympus cards and cards that have been formatted by a computer must be formatted with this camera before use. Submenu 2 YES NO Application Completely erases the image data in the internal memory*1 or card (including protected images). Cancels formatting. *1 Be sure to remove the card before formatting the internal memory. Changing the display language [W] E SETUP X W "Changing the display language" (p. 13) Submenu 2 Languages*1 Application The language for the menus and error messages displayed on the monitor is selected. *1 The available languages vary depending on the country and/or region where the camera was purchased. Setting the startup display screen and sound when the camera is turned on [PW ON SETUP] E SETUP X PW ON SETUP Copying images from the internal memory to the card [BACKUP] E SETUP X BACKUP Submenu 2 YES NO Application Backs up image data from the internal memory to the card. Cancels the backup. It takes some time to back up data. Check that the battery has sufficient power before starting the backup, or use an AC adapter. Submenu 2 Submenu 3 Application OFF No image is displayed. 1 A preset image*1 is displayed. SCREEN 2 A still image stored in the internal memory or card is registered for display. (This option leads to the setup screen.) VOLUME OFF (No sound)/LOW/ HIGH The volume of the startup sound is selected. *1 This image cannot be changed. To register a startup image 1 Select [2] in submenu 3 for [SCREEN]. 2 Use NO to select the image to be registered, and press the E button. EN 37
-
 1
1 -
2
-
3
-
4
-
5
-
6
-
7
-
8
-
9
-
10
-
11
-
12
-
13
-
14
-
15
-
16
-
17
-
18
-
19
-
20
-
21
-
22
-
23
-
24
-
25
-
26
-
27
-
28
-
29
-
30
-
31
-
 32
32 -
 33
33 -
 34
34 -
 35
35 -
 36
36 -
 37
37 -
 38
38 -
 39
39 -
 40
40 -
 41
41 -
 42
42 -
43
-
44
-
45
-
46
-
47
-
48
-
49
-
50
-
51
-
52
-
53
-
54
-
55
-
56
-
57
-
58
-
59
-
60
-
61
-
62
-
63
-
64
-
65
-
66
-
67
-
68
-
69
-
70
 |
 |