Olympus Stylus 7000 Silver STYLUS-7000 Instruction Manual (English) - Page 43
Printing
 |
UPC - 050332167490
View all Olympus Stylus 7000 Silver manuals
Add to My Manuals
Save this manual to your list of manuals |
Page 43 highlights
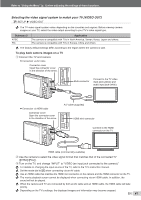
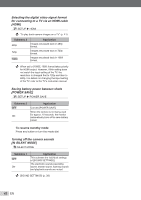
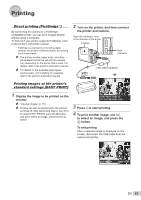
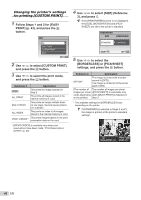
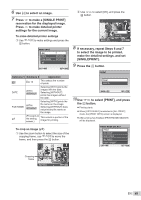
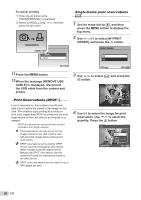
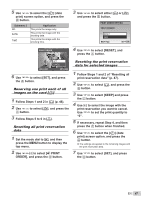
Printing Direct printing (PictBridge*1) By connecting the camera to a PictBridgecompatible printer, you can print images directly without using a computer. To find out if your printer supports PictBridge, refer to the printer's instruction manual. *1 PictBridge is a standard for connecting digital cameras and printers of different makers and printing out pictures directly. The printing modes, paper sizes, and other parameters that can be set with the camera vary depending on the printer that is used. For details, refer to the printer's instruction manual. For details on the available paper types, loading paper, and installing ink cassettes, refer to the printer's instruction manual. 2 Turn on the printer, and then connect the printer and camera. Open the connector cover in the direction of the arrow. O button Multiconnector USB cable (supplied) Printing images at the printer's standard settings [EASY PRINT] 1 Display the image to be printed on the monitor. "Viewing images" (p. 15) Printing can also be started when the camera is turned off. After performing Step 2, use LM to select [EASY PRINT], press the E button. Use NO to select an image, and press the E button. EASY PRINT START PC / CUSTOM PRINT OK 3 Press O to start printing. 4 To print another image, use NO to select an image, and press the E button. To exit printing After a selected image is displayed on the screen, disconnect the USB cable from the camera and printer. EXIT PRINT OK EN 43
-
 1
1 -
2
-
3
-
4
-
5
-
6
-
7
-
8
-
9
-
10
-
11
-
12
-
13
-
14
-
15
-
16
-
17
-
18
-
19
-
20
-
21
-
22
-
23
-
24
-
25
-
26
-
27
-
28
-
29
-
30
-
31
-
32
-
33
-
34
-
35
-
36
-
37
-
 38
38 -
 39
39 -
 40
40 -
 41
41 -
 42
42 -
 43
43 -
 44
44 -
 45
45 -
 46
46 -
 47
47 -
 48
48 -
49
-
50
-
51
-
52
-
53
-
54
-
55
-
56
-
57
-
58
-
59
-
60
-
61
-
62
-
63
-
64
-
65
-
66
-
67
-
68
-
69
-
70
 |
 |
